
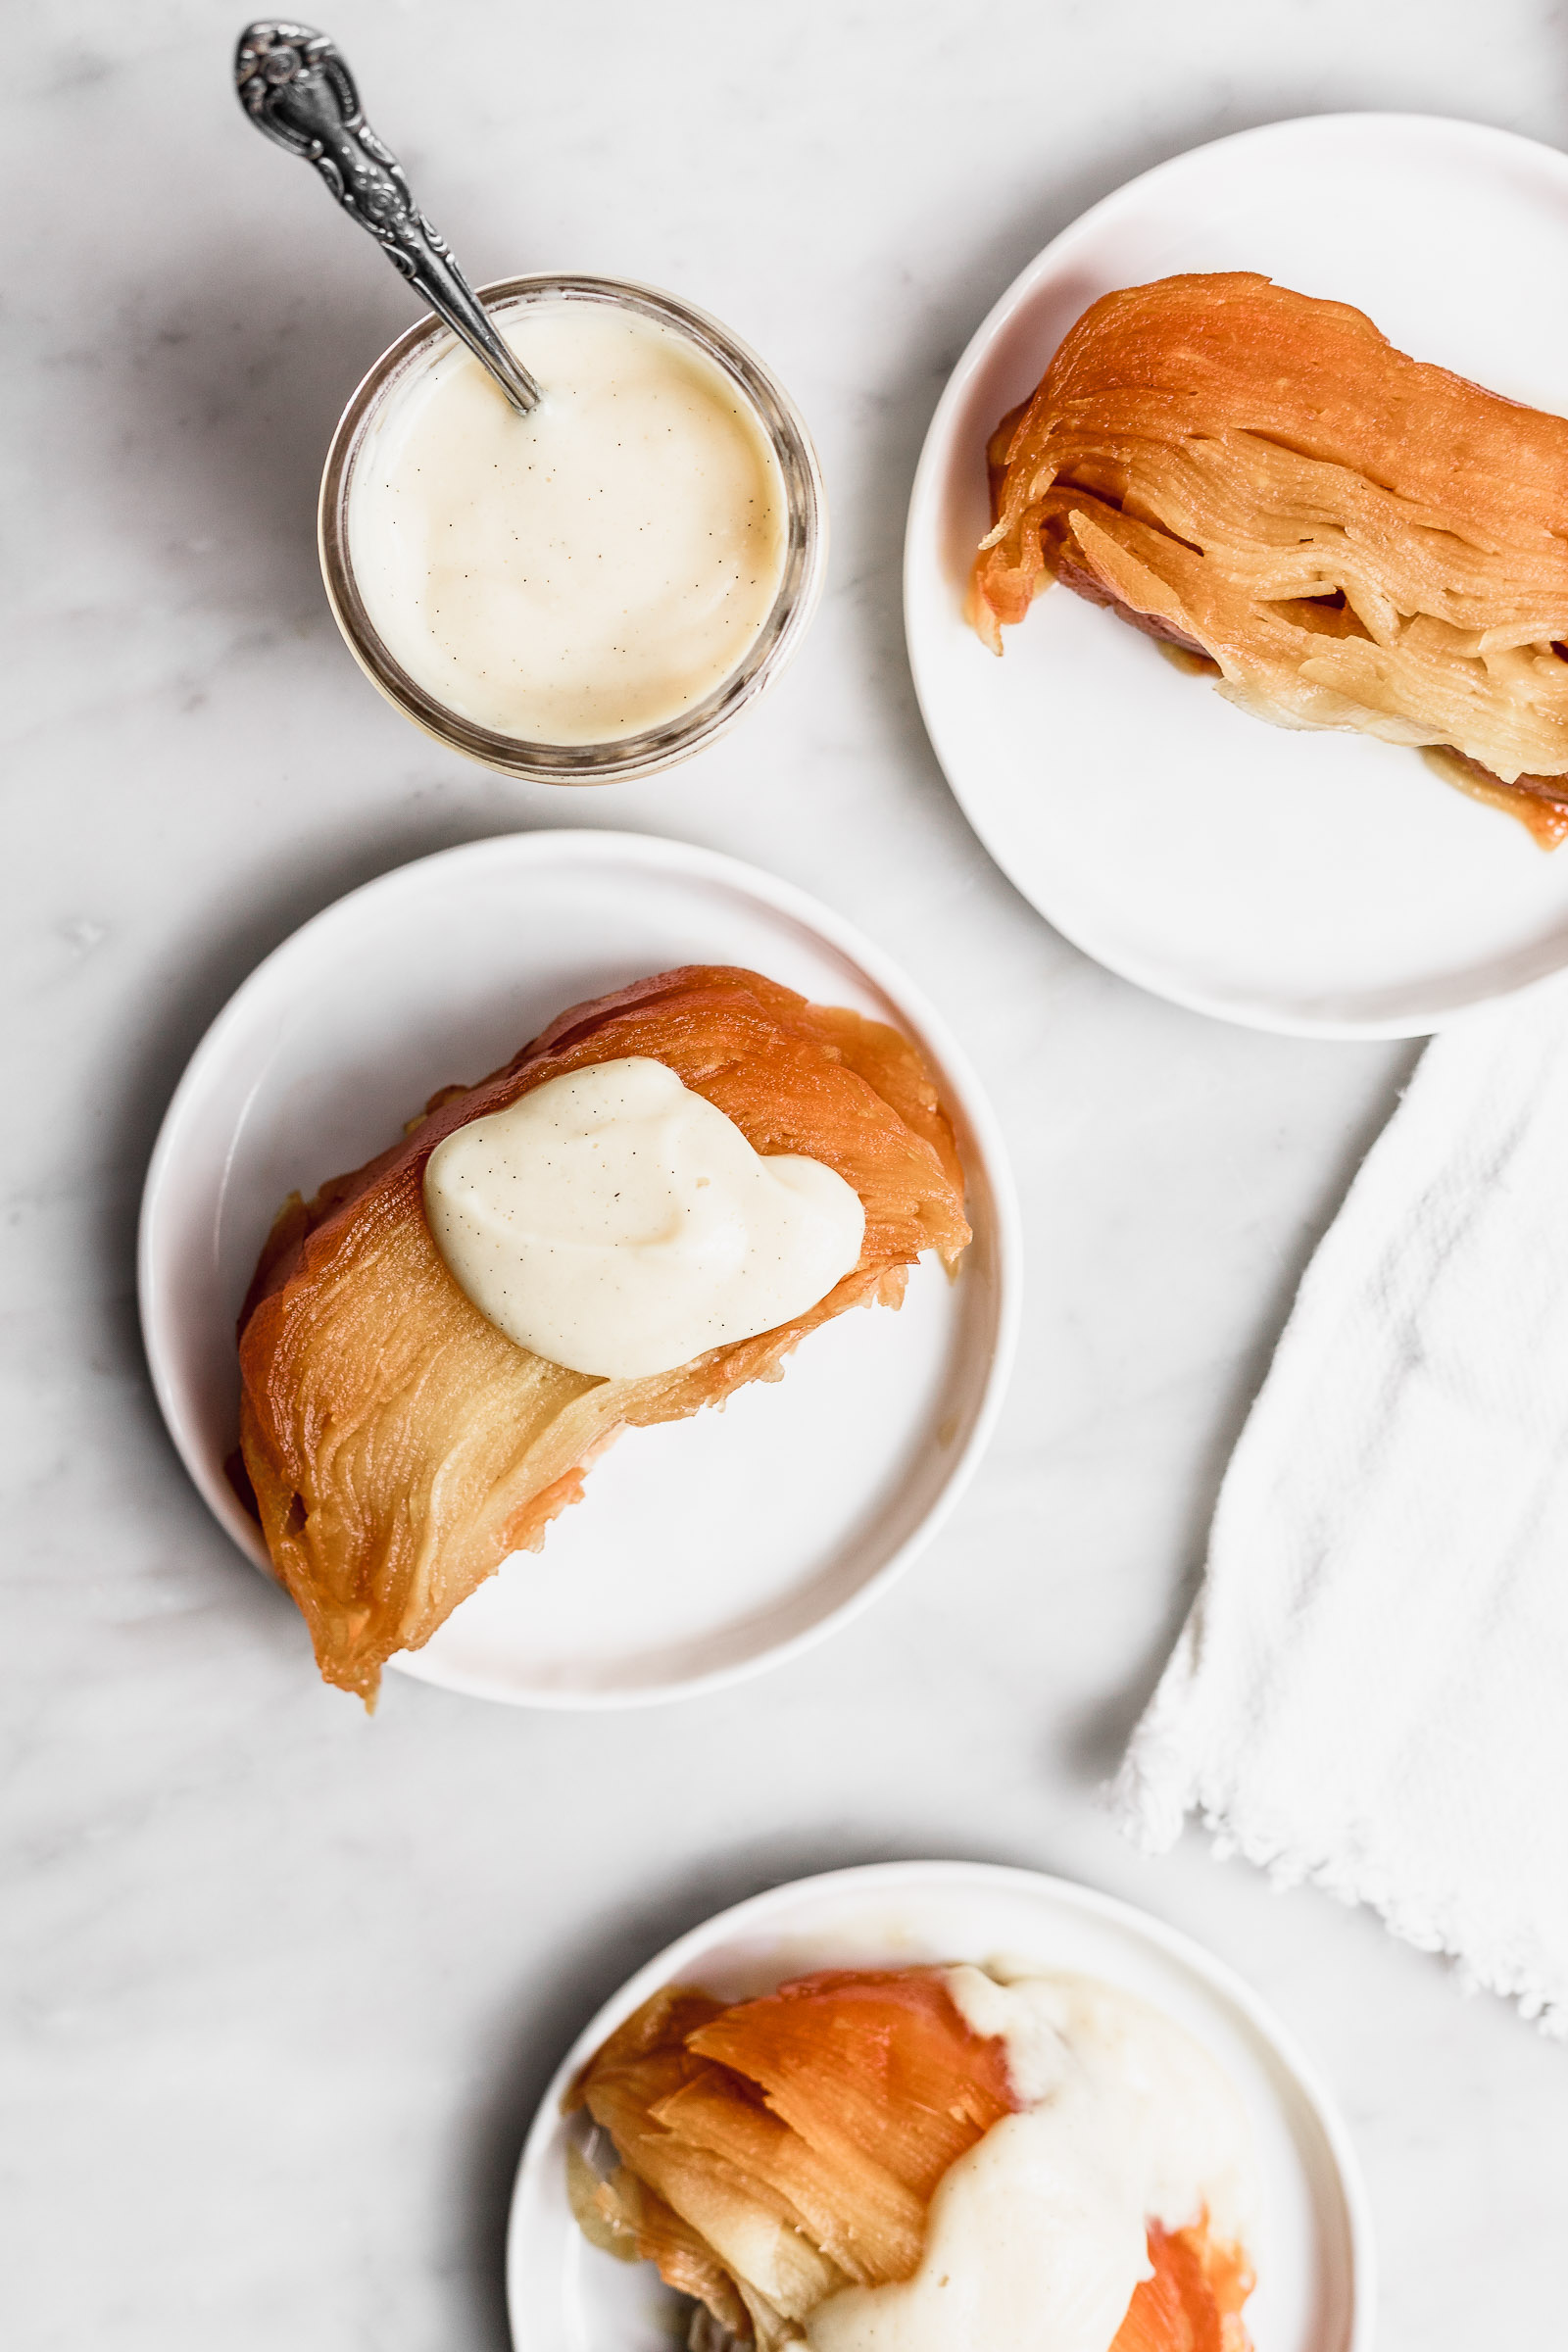
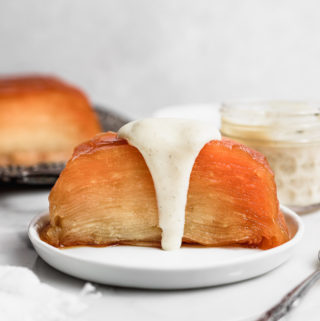
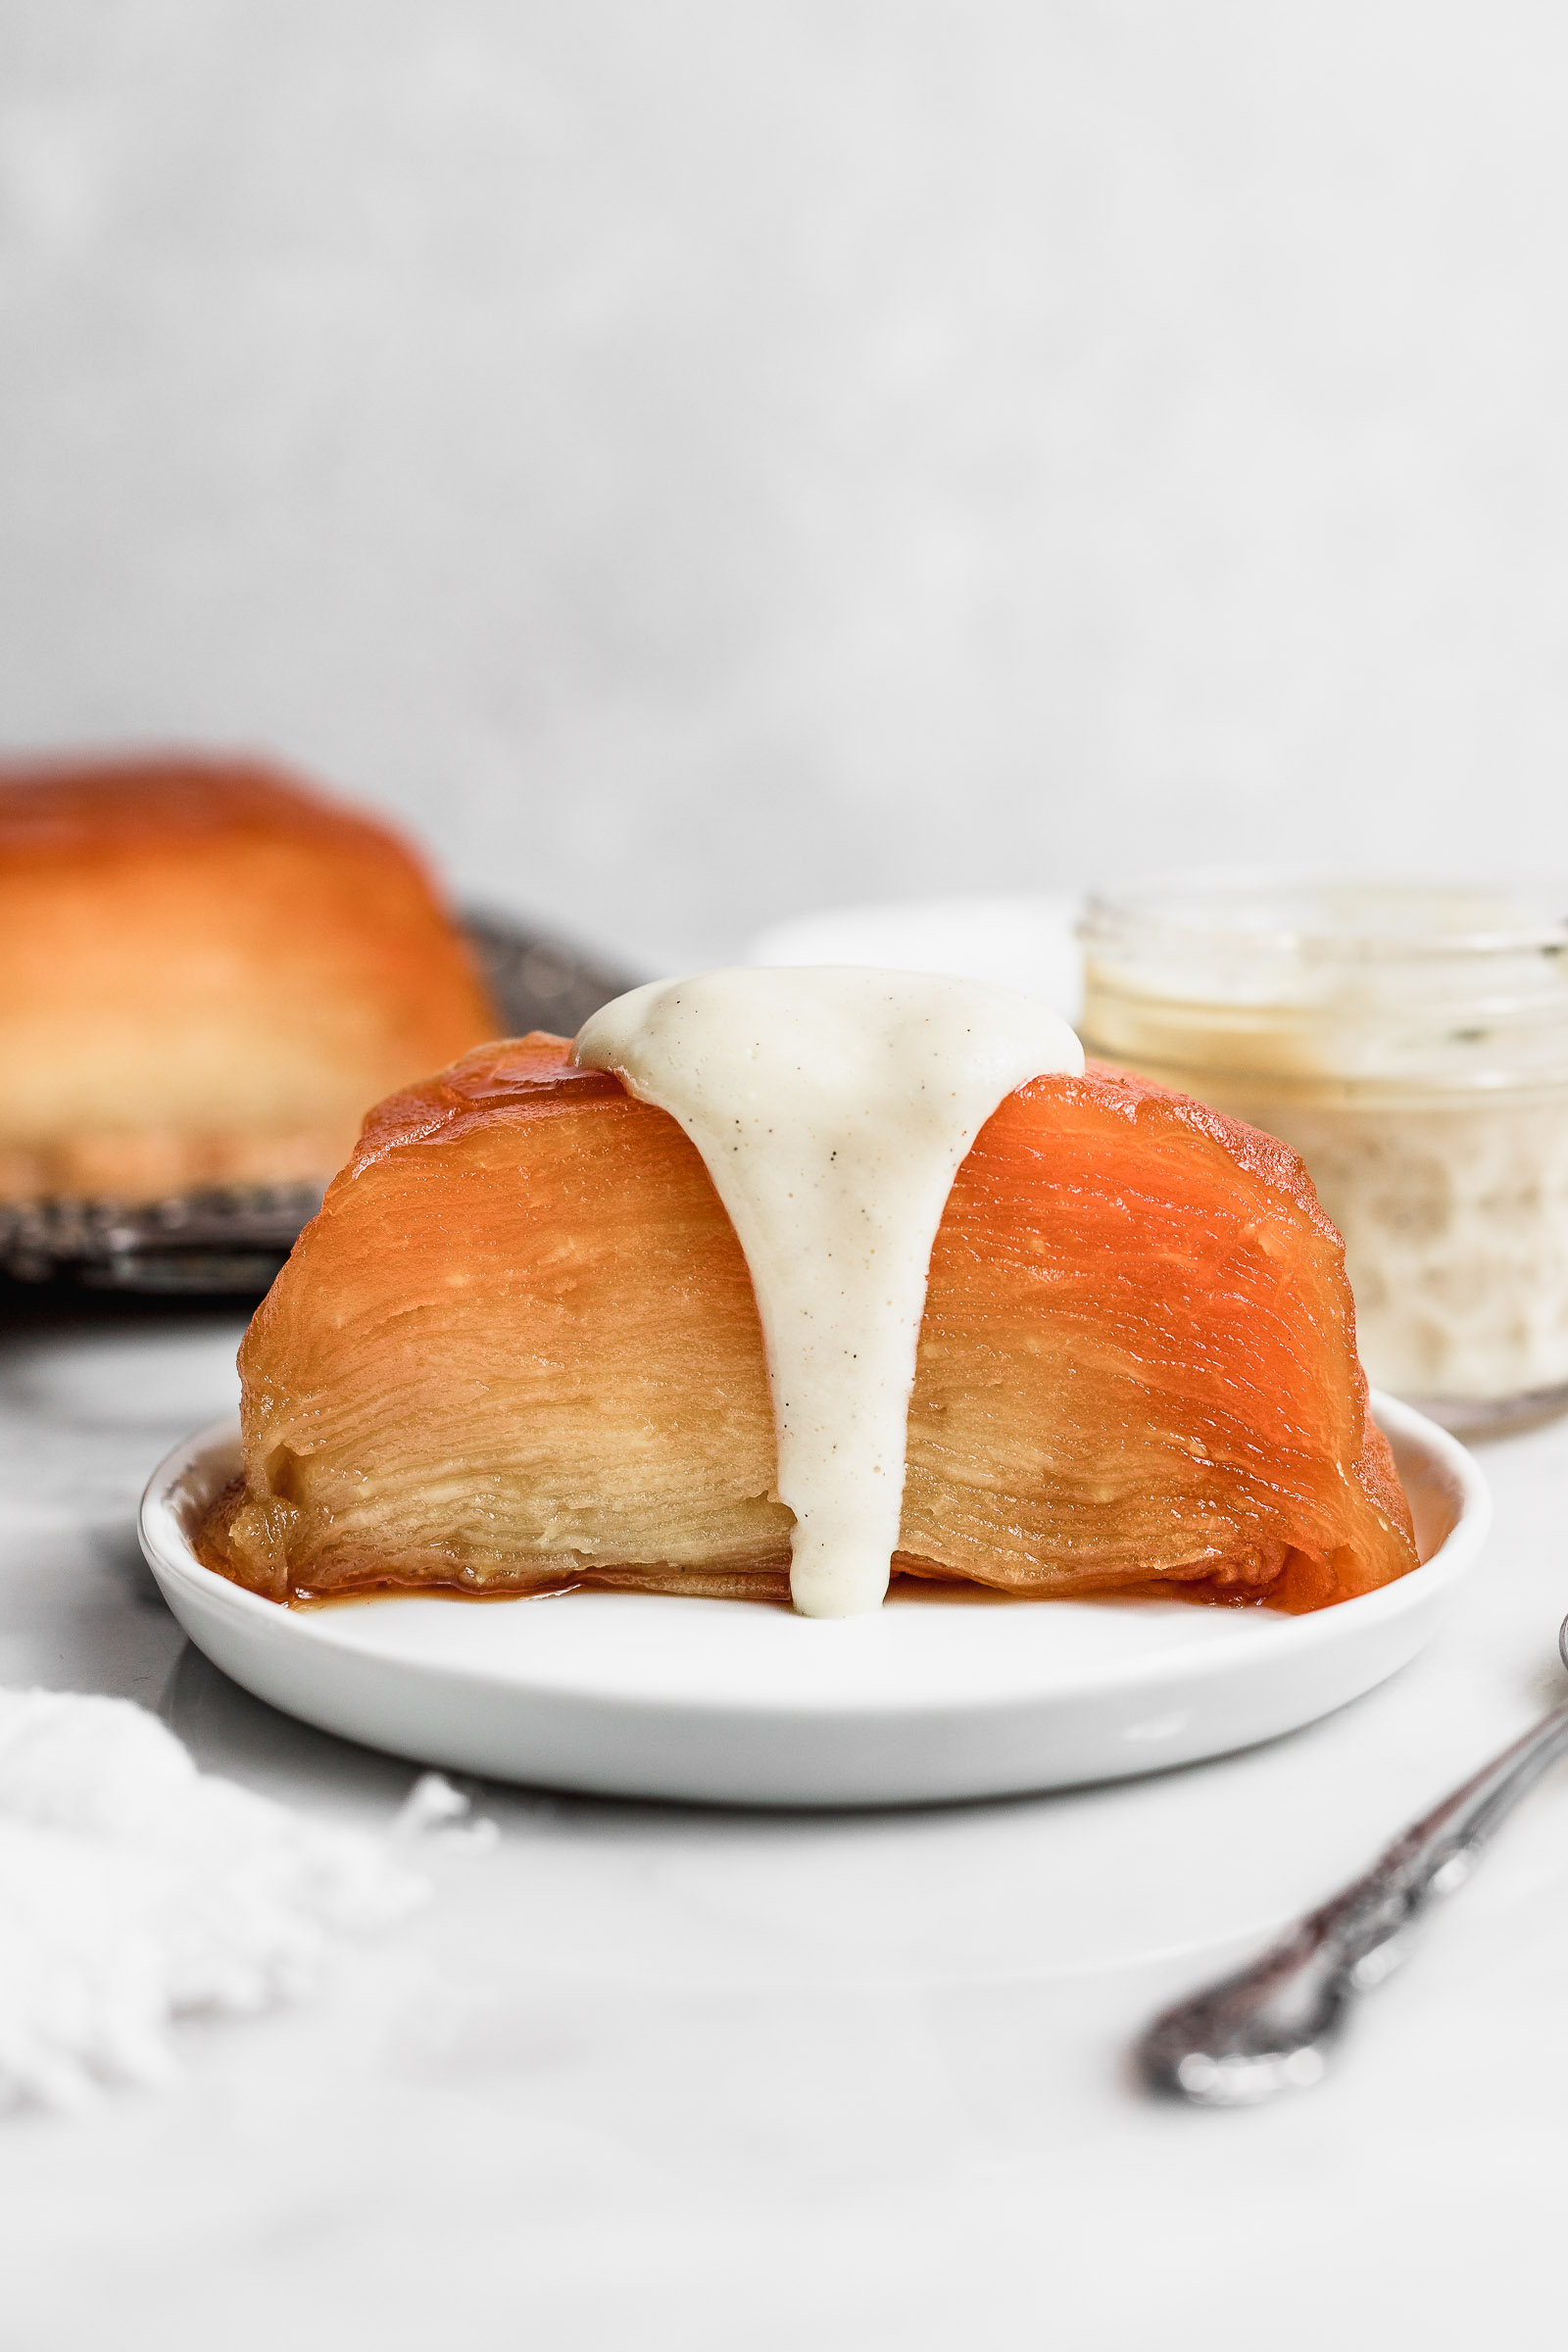
I’ve wanted to make this dessert for SO long and for one reason or another, I didn’t. I’ve always been intrigued by it and wanted to give it my own spin! This apple mille-feuille is 100% the type of dessert that I love. It’s made with thin layers of apples and sugar that are baked and served with vanilla custard.

This apple mille-feuille is naturally gluten-free because there’s no dough involved here. As a matter of fact, you can also turn it into a vegan dessert. To do this, you only need to replace the milk in the custard with vegetable milk and add more cornstarch to sub for the egg yolks.
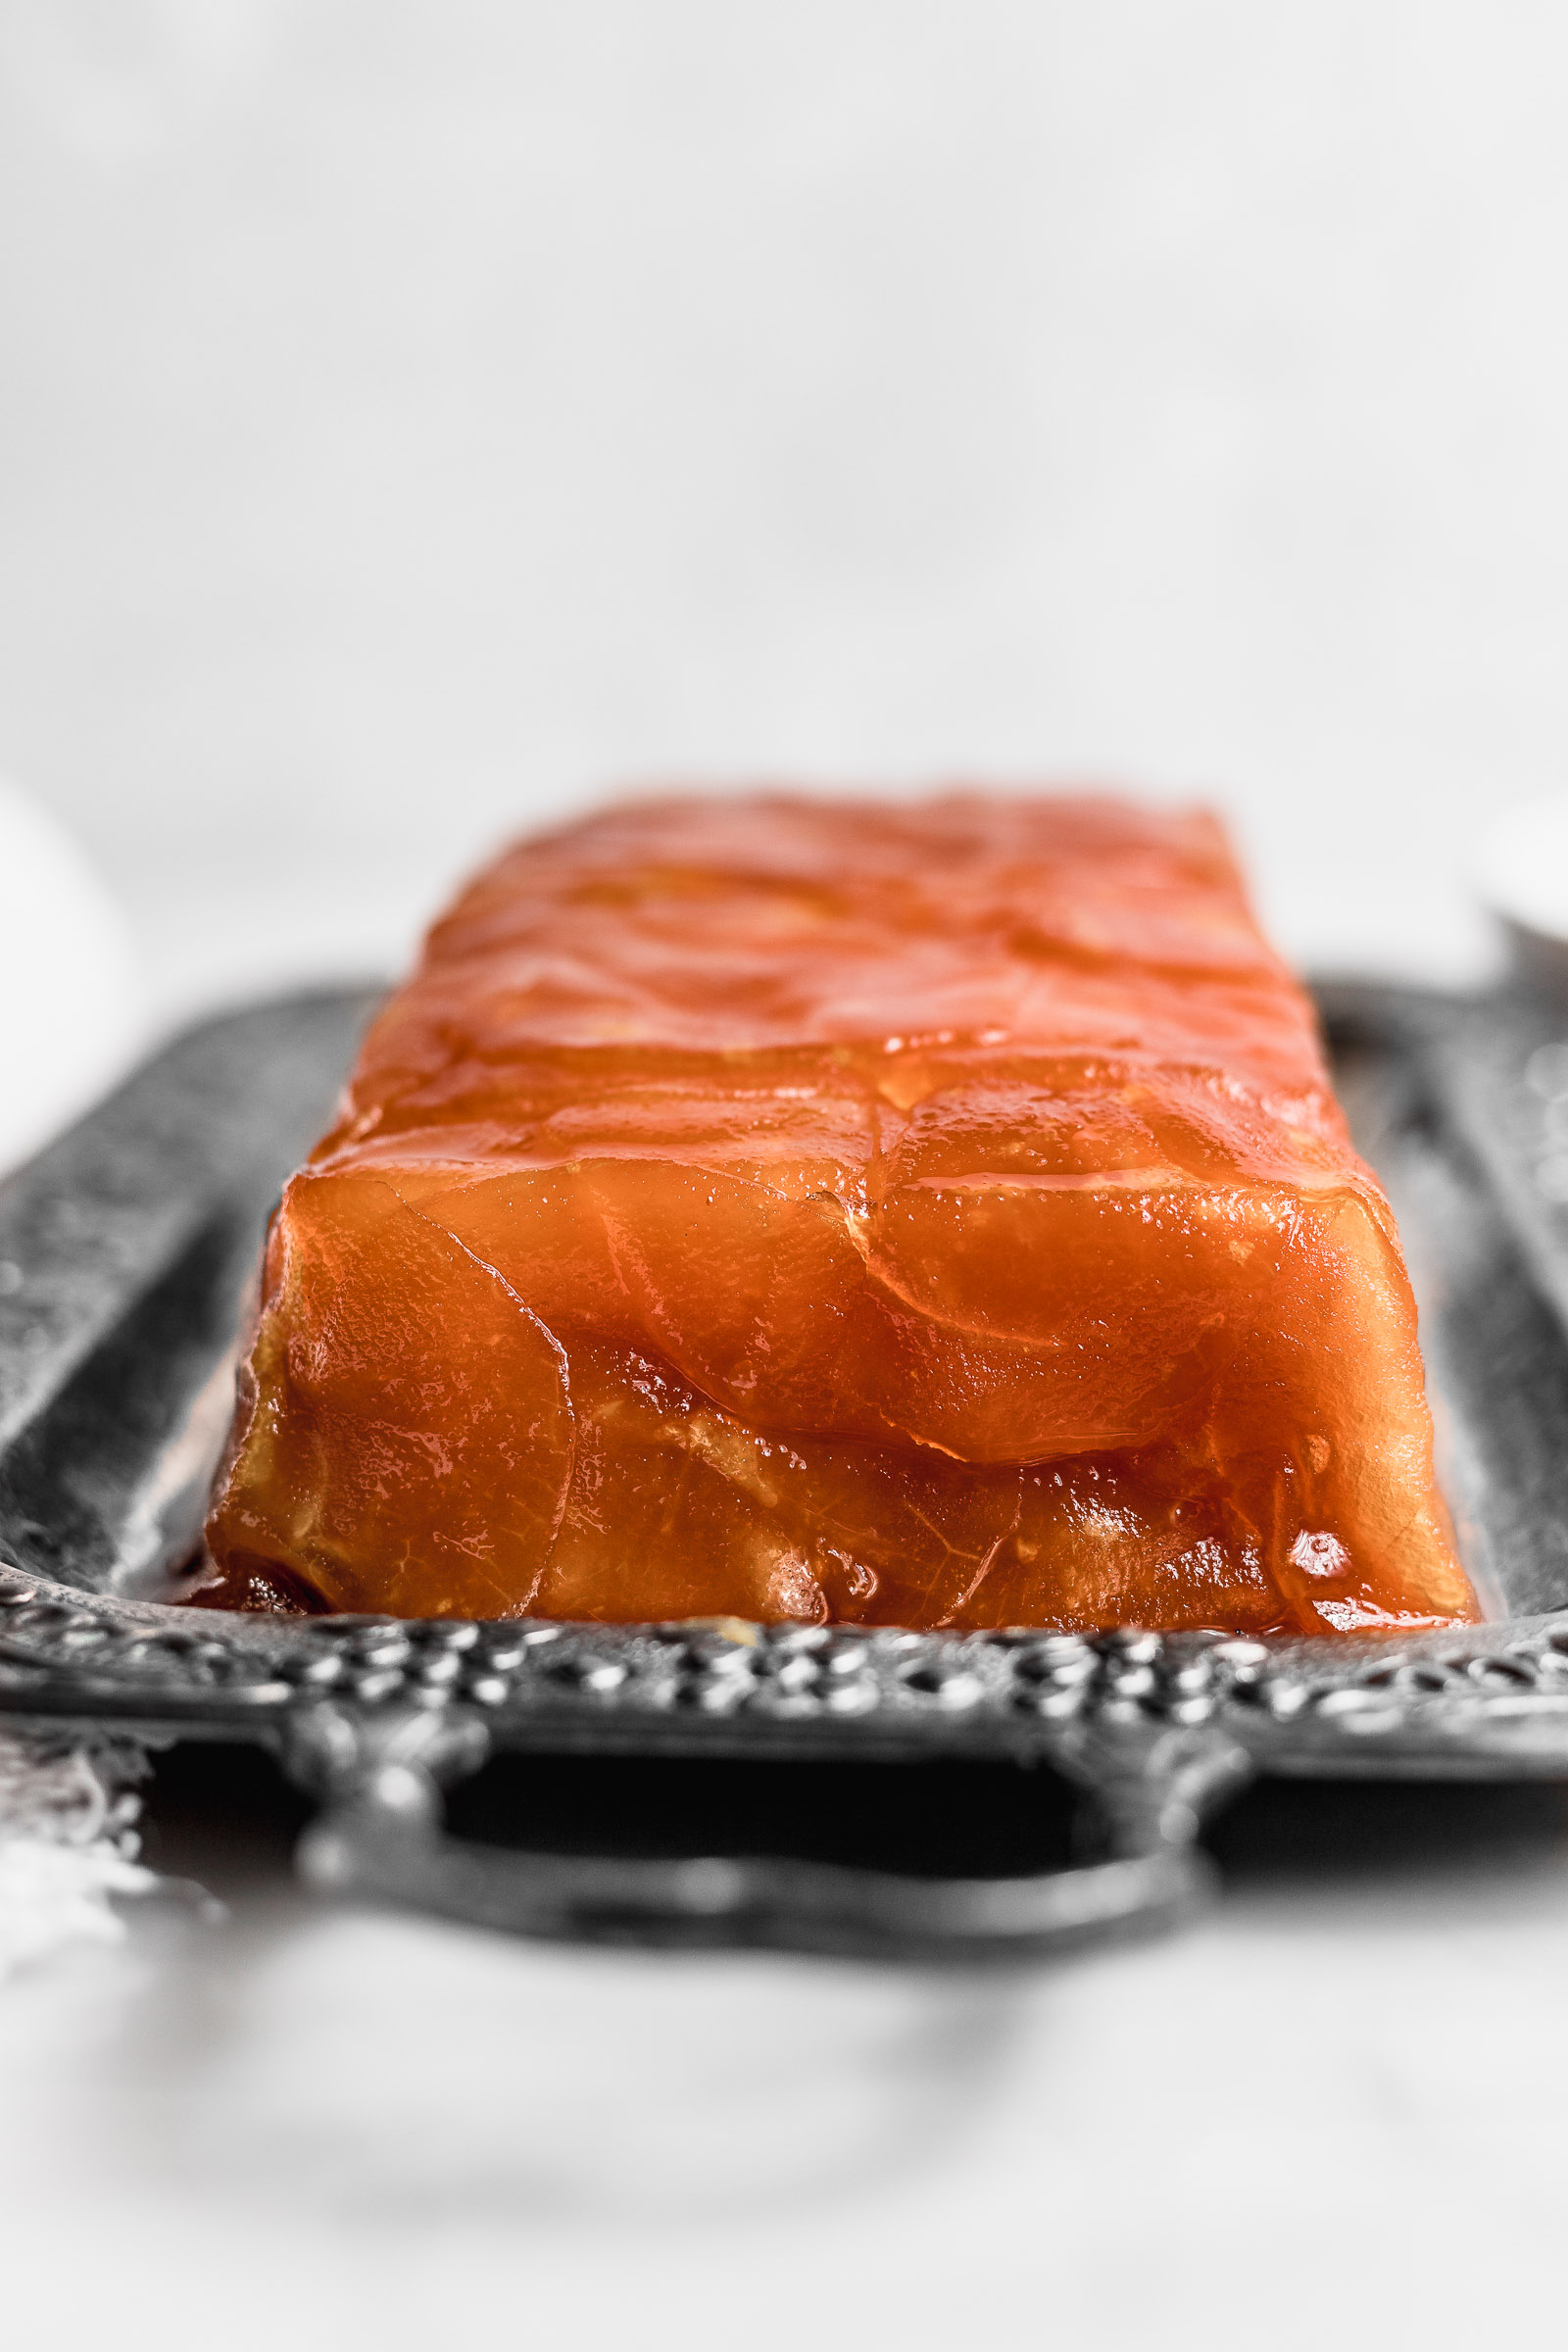
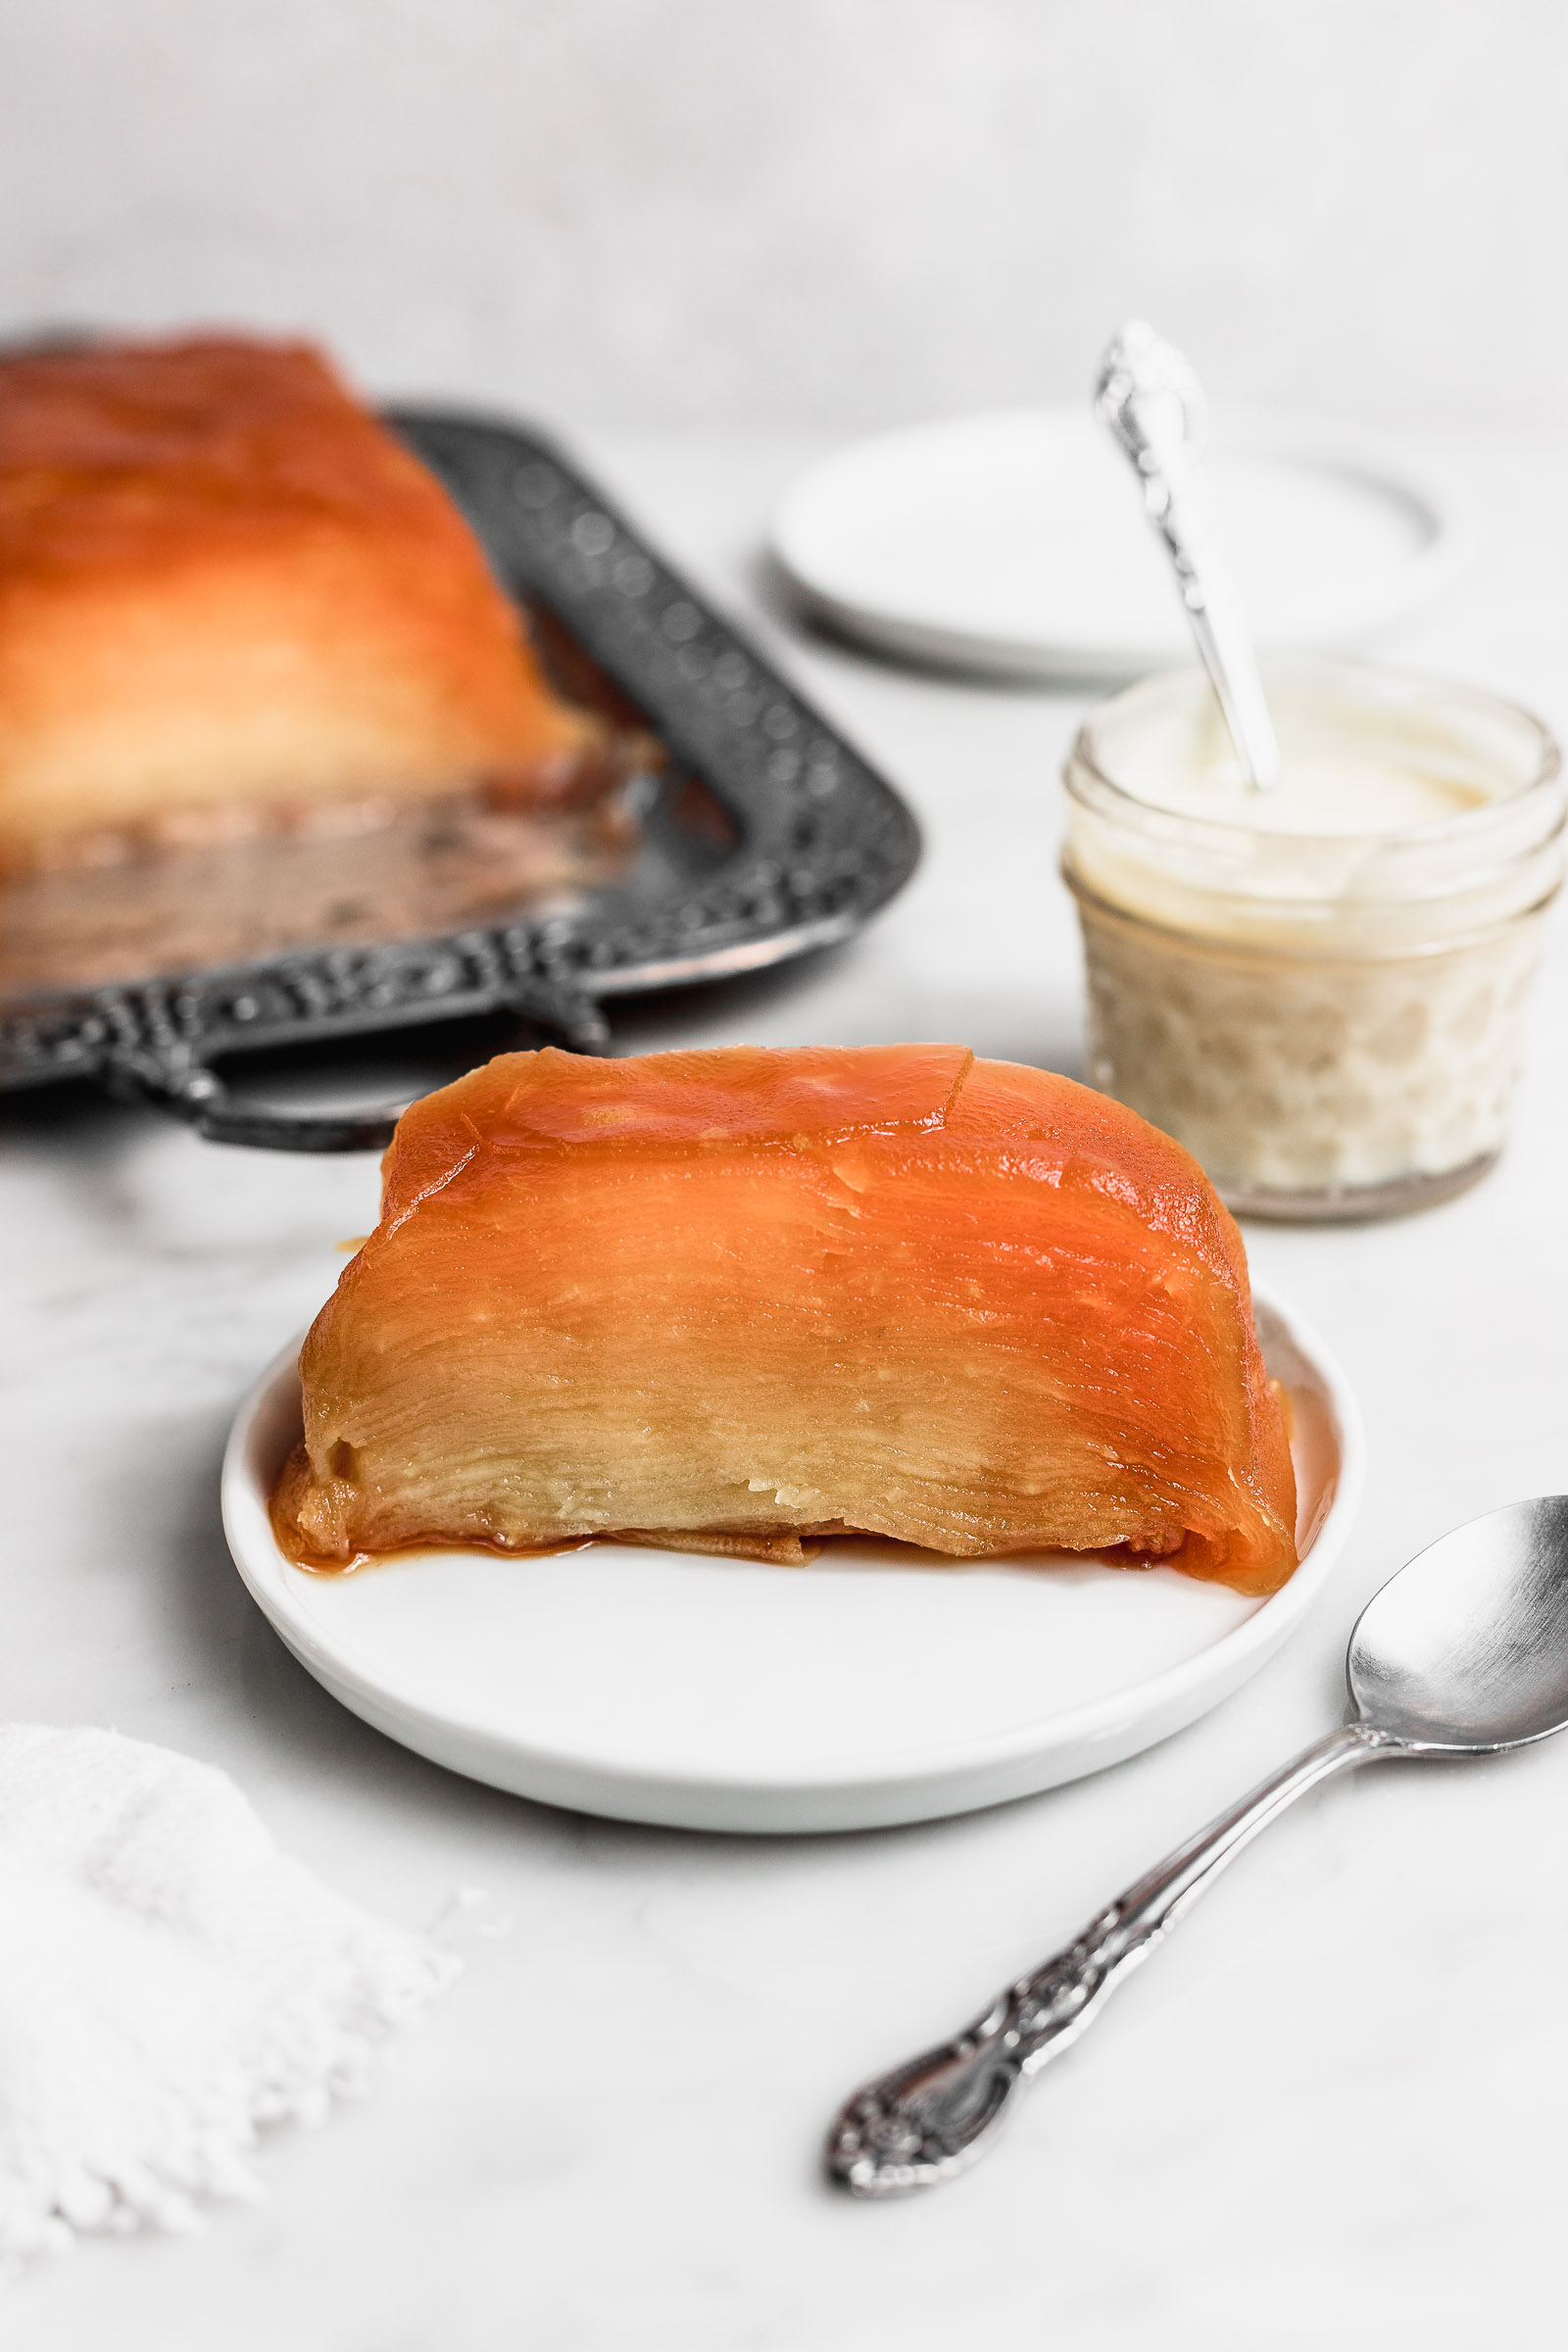
The thickness of the apple is essential in this apple mille-feuille. It should be around 1mm thick (0.03in). For this, using a mandolin is best because it’s hard to make such thin and even cuts with a knife. Just be careful with your hands because mandolins tend to be extremely sharp. If you like apple desserts like me, I recommend that you check out my cinnamon apple galette.
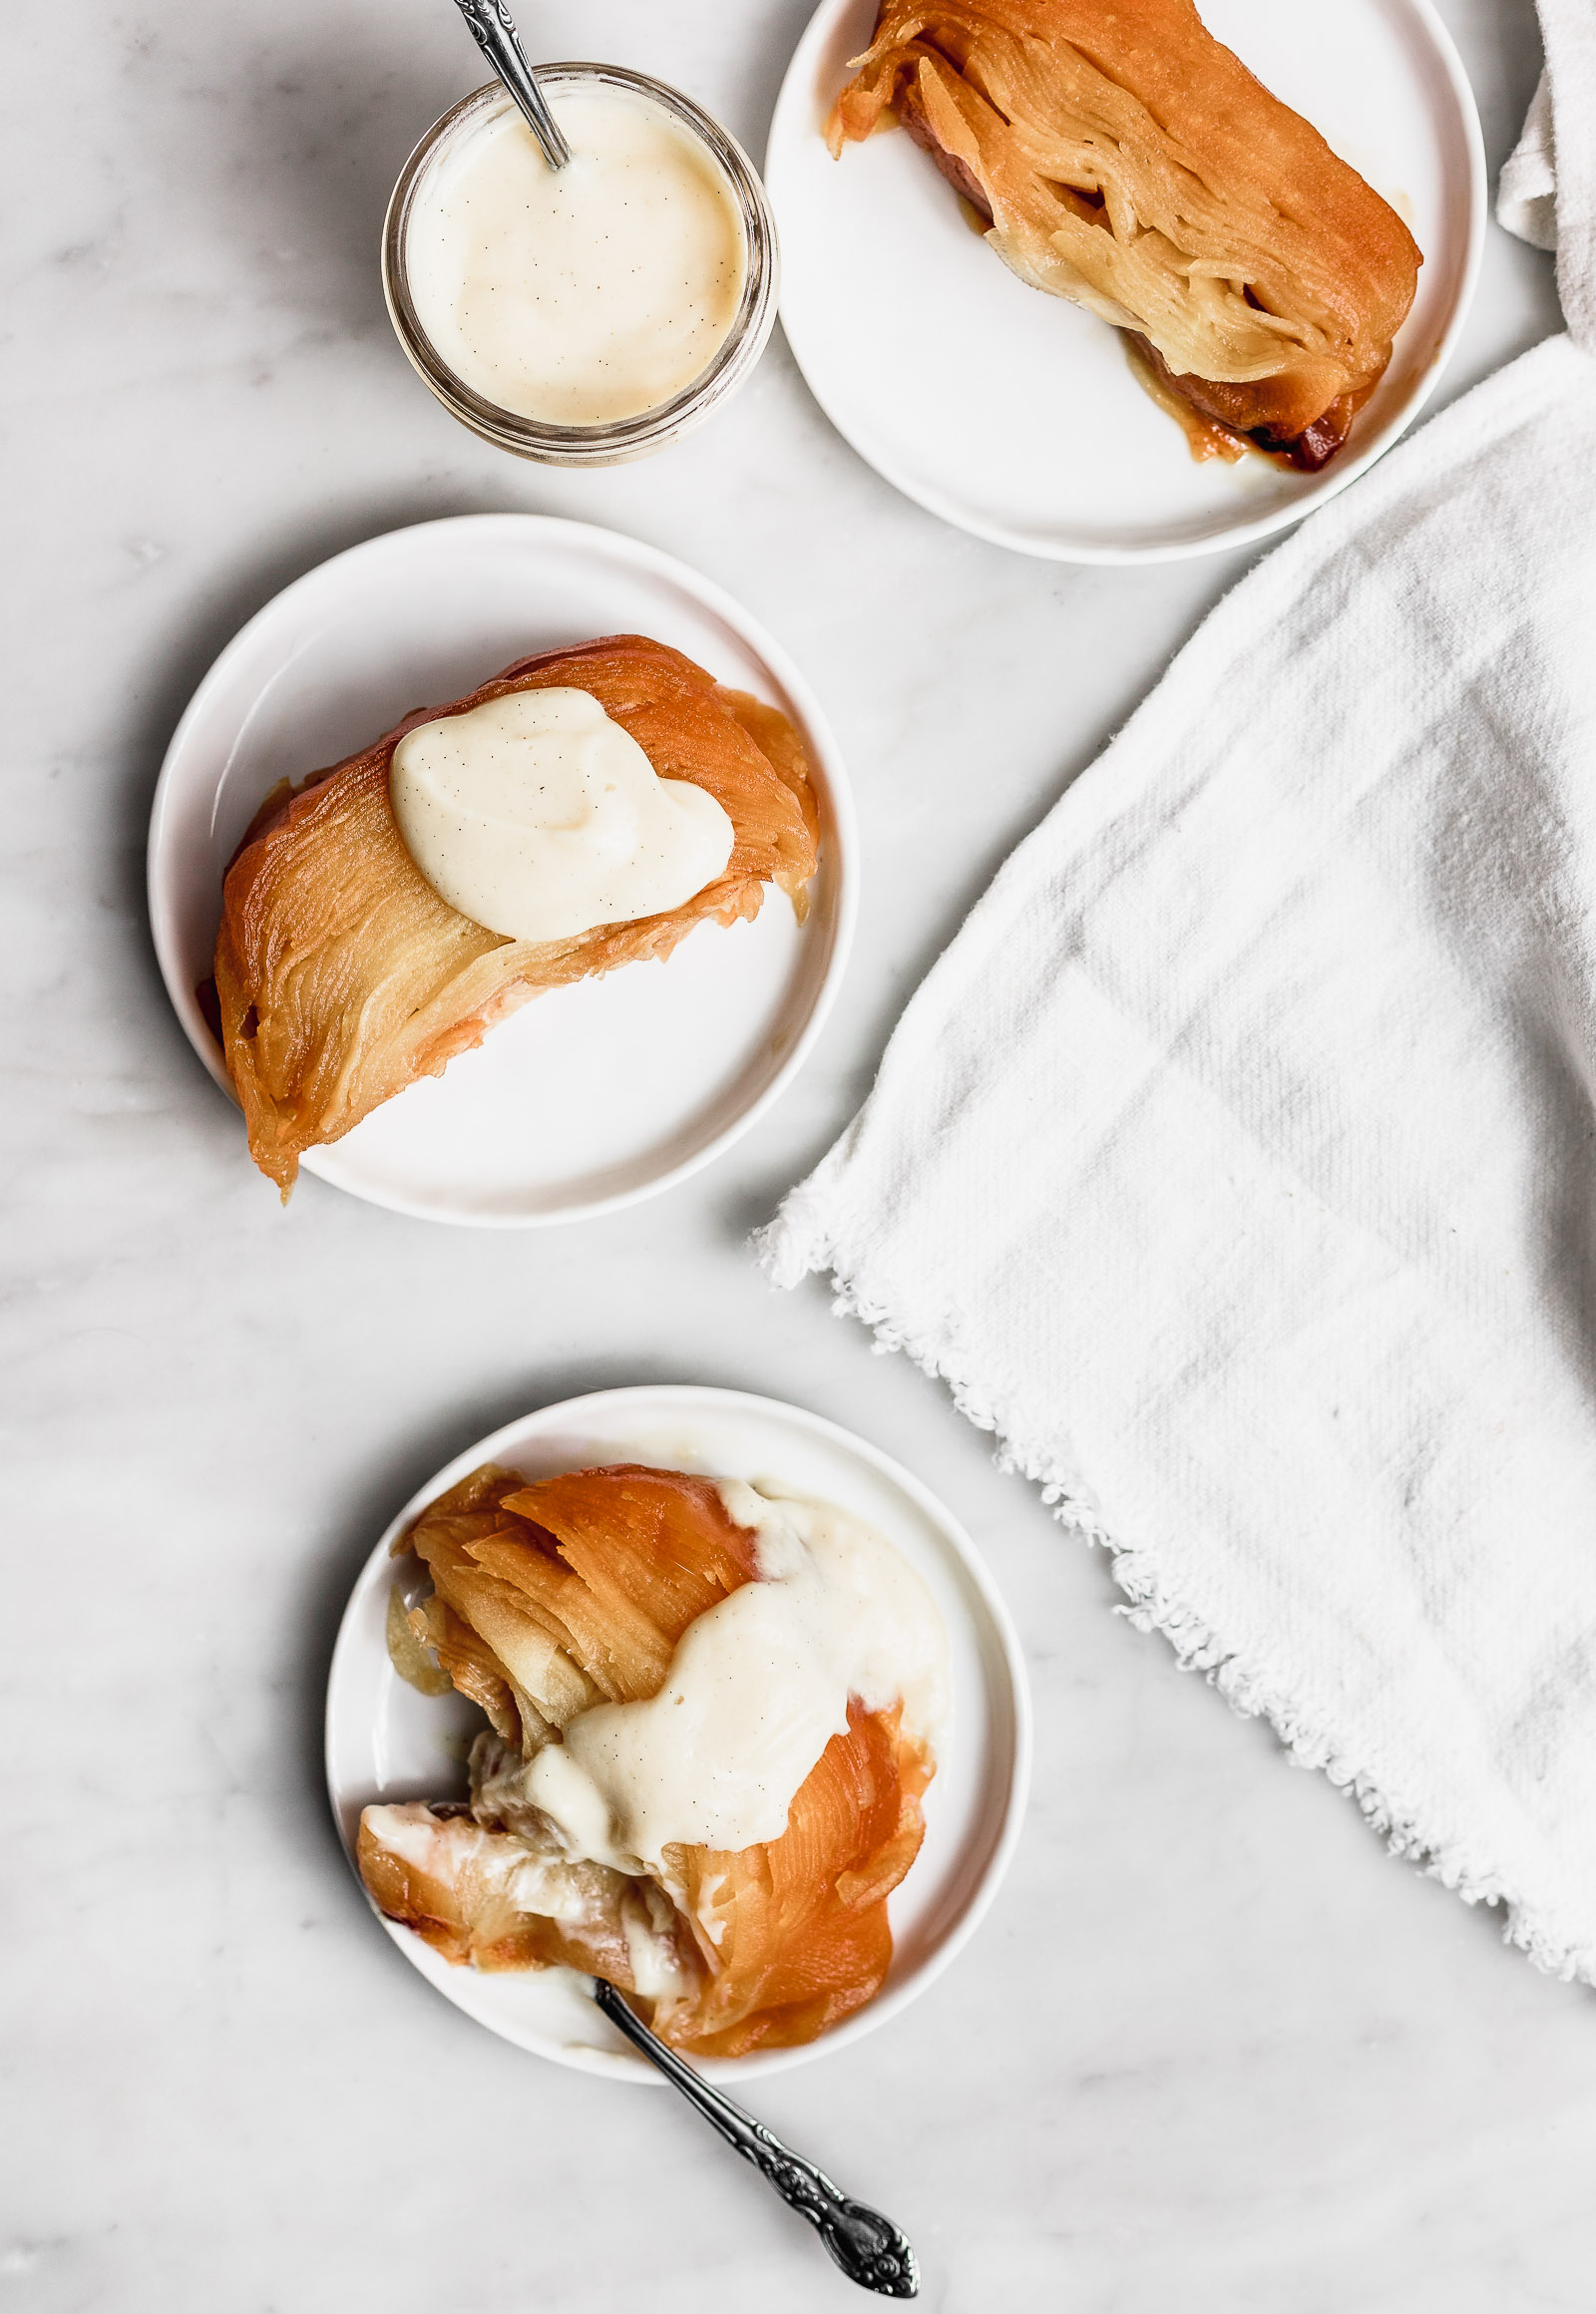
Another step you need to be careful with is the cooking of the vanilla custard. A custard is a milk-based sauce that has more consistency than an Anglaise sauce but less than a crème patissière. The result is exceptionally creamy and delicious. However, since it has egg yolks in it, there’s a chance that you could split it. That’s why you need to be extra careful. Don’t let it break into a bowl and remove it from the heat and pot as soon as it thickens. In this way, you will stop the cooking process. If you keep it in the pot you cooked it in, the residual heat will continue to cook it and it could split.
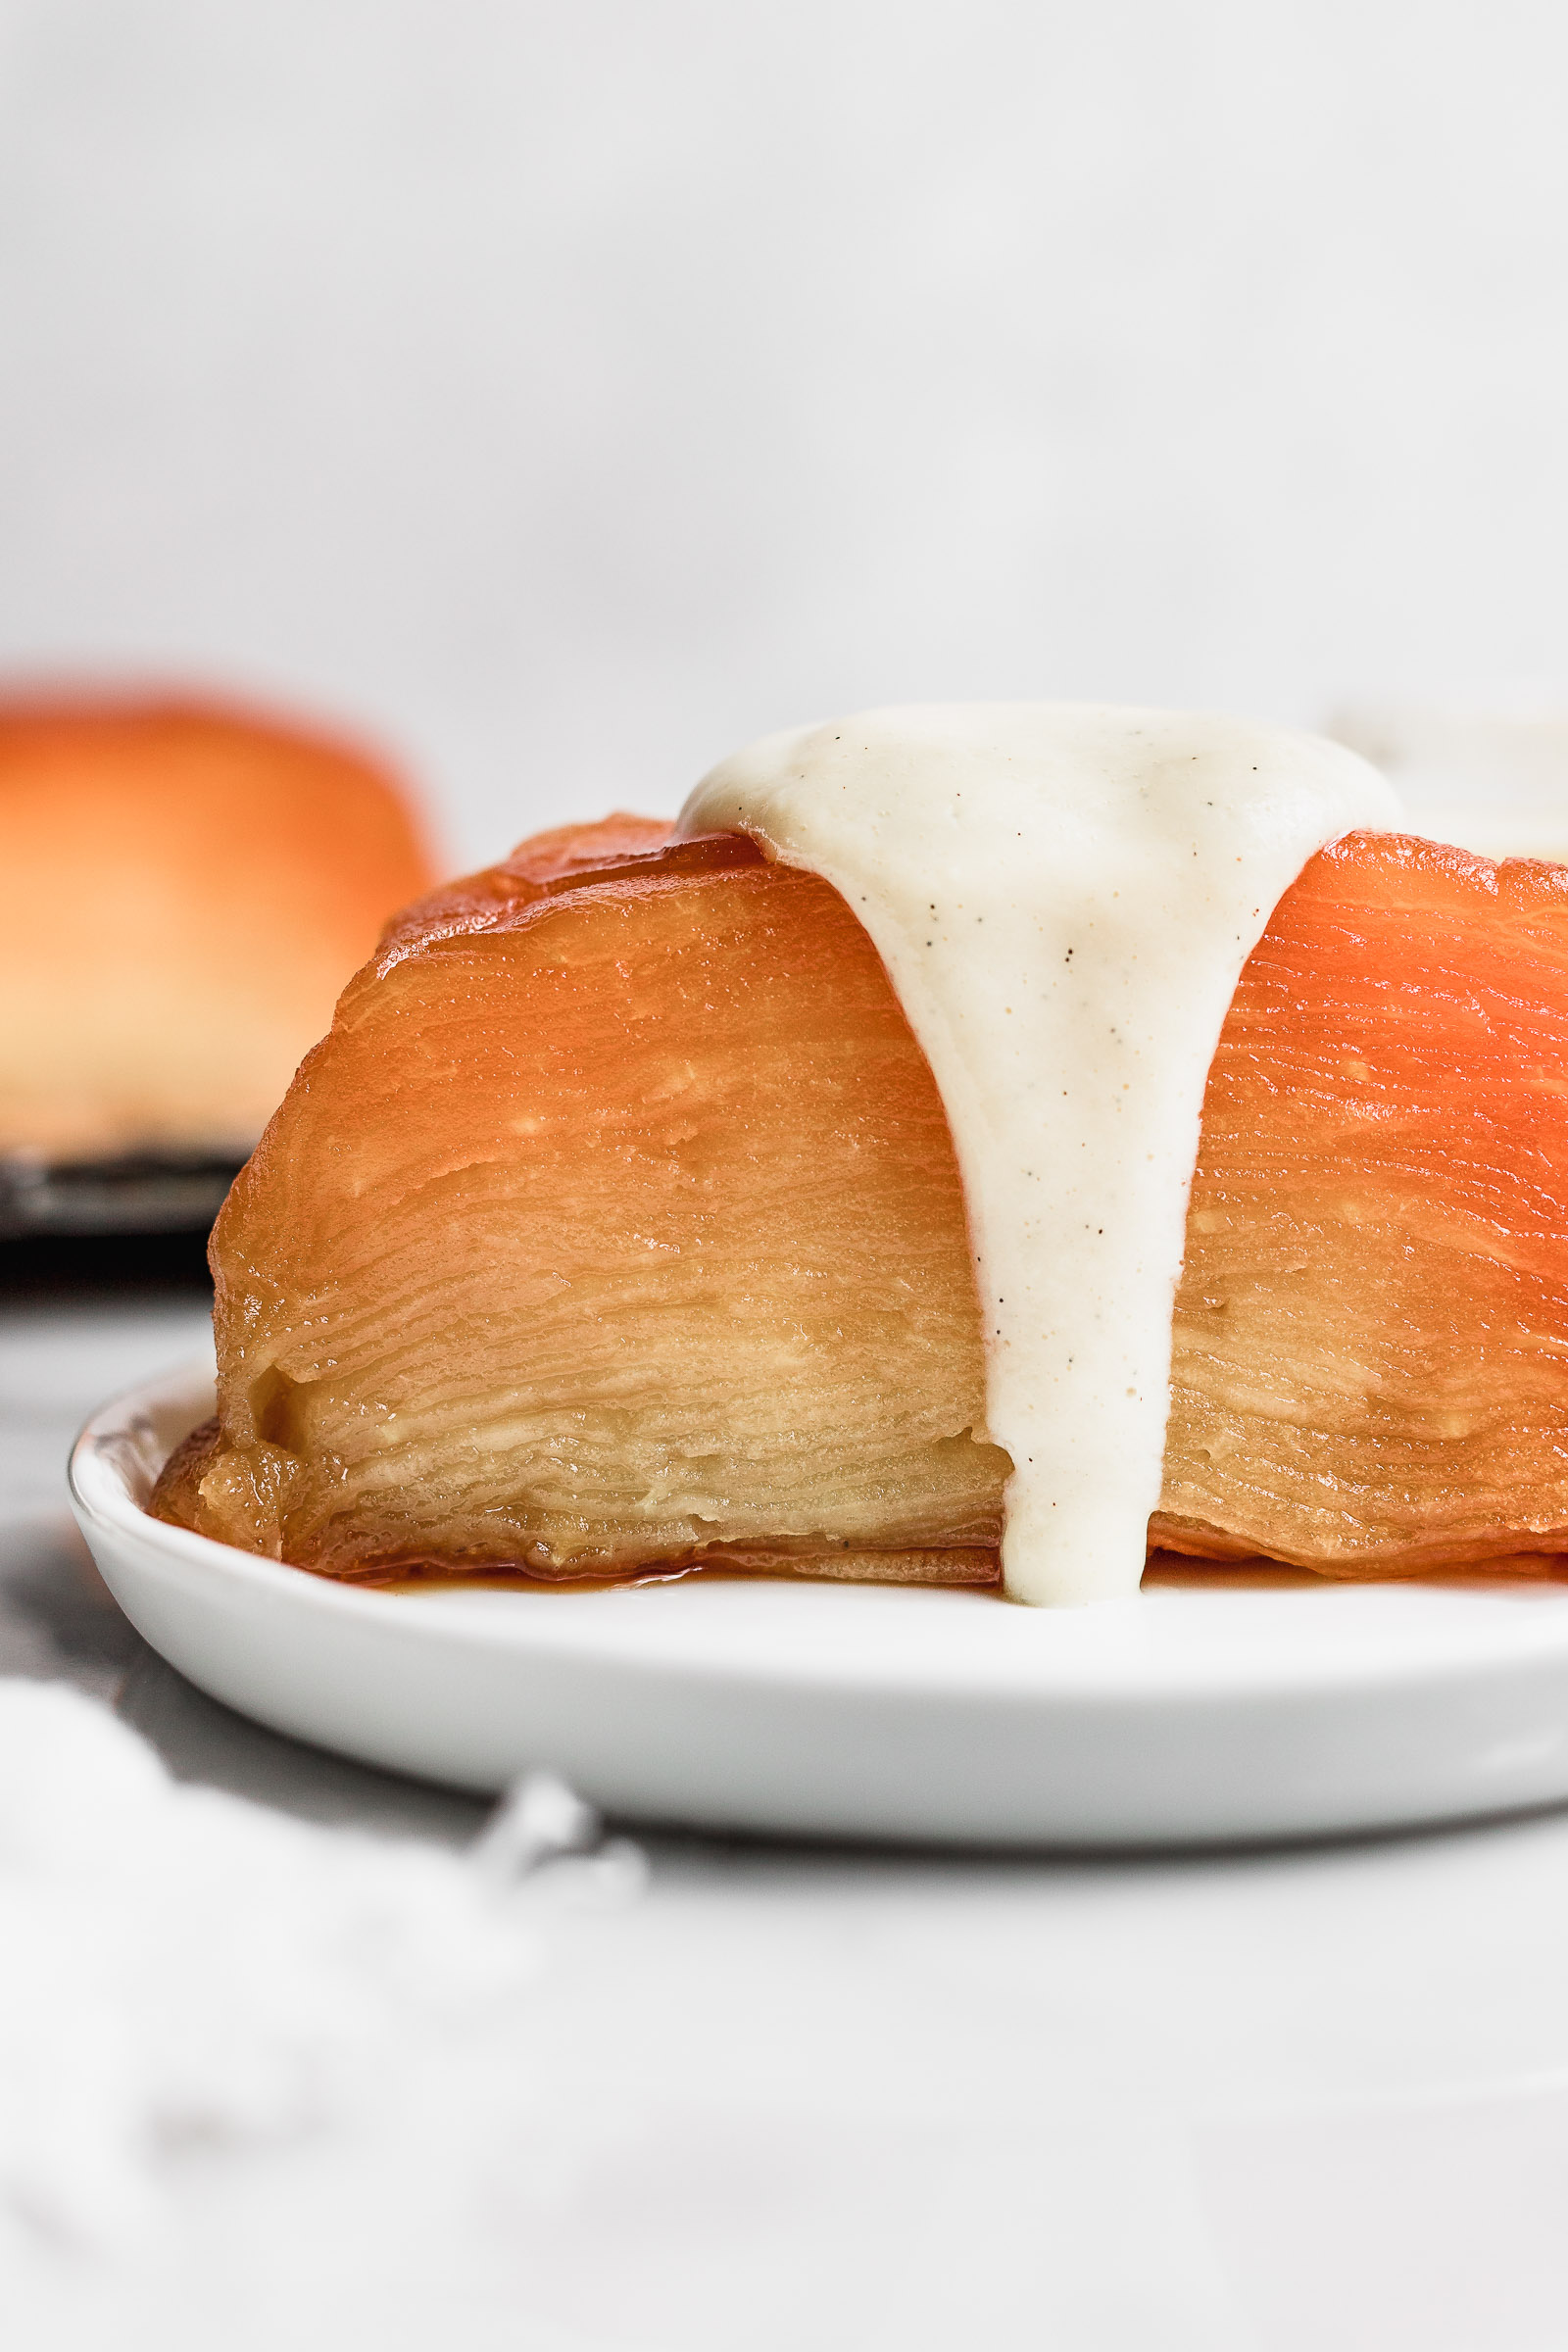
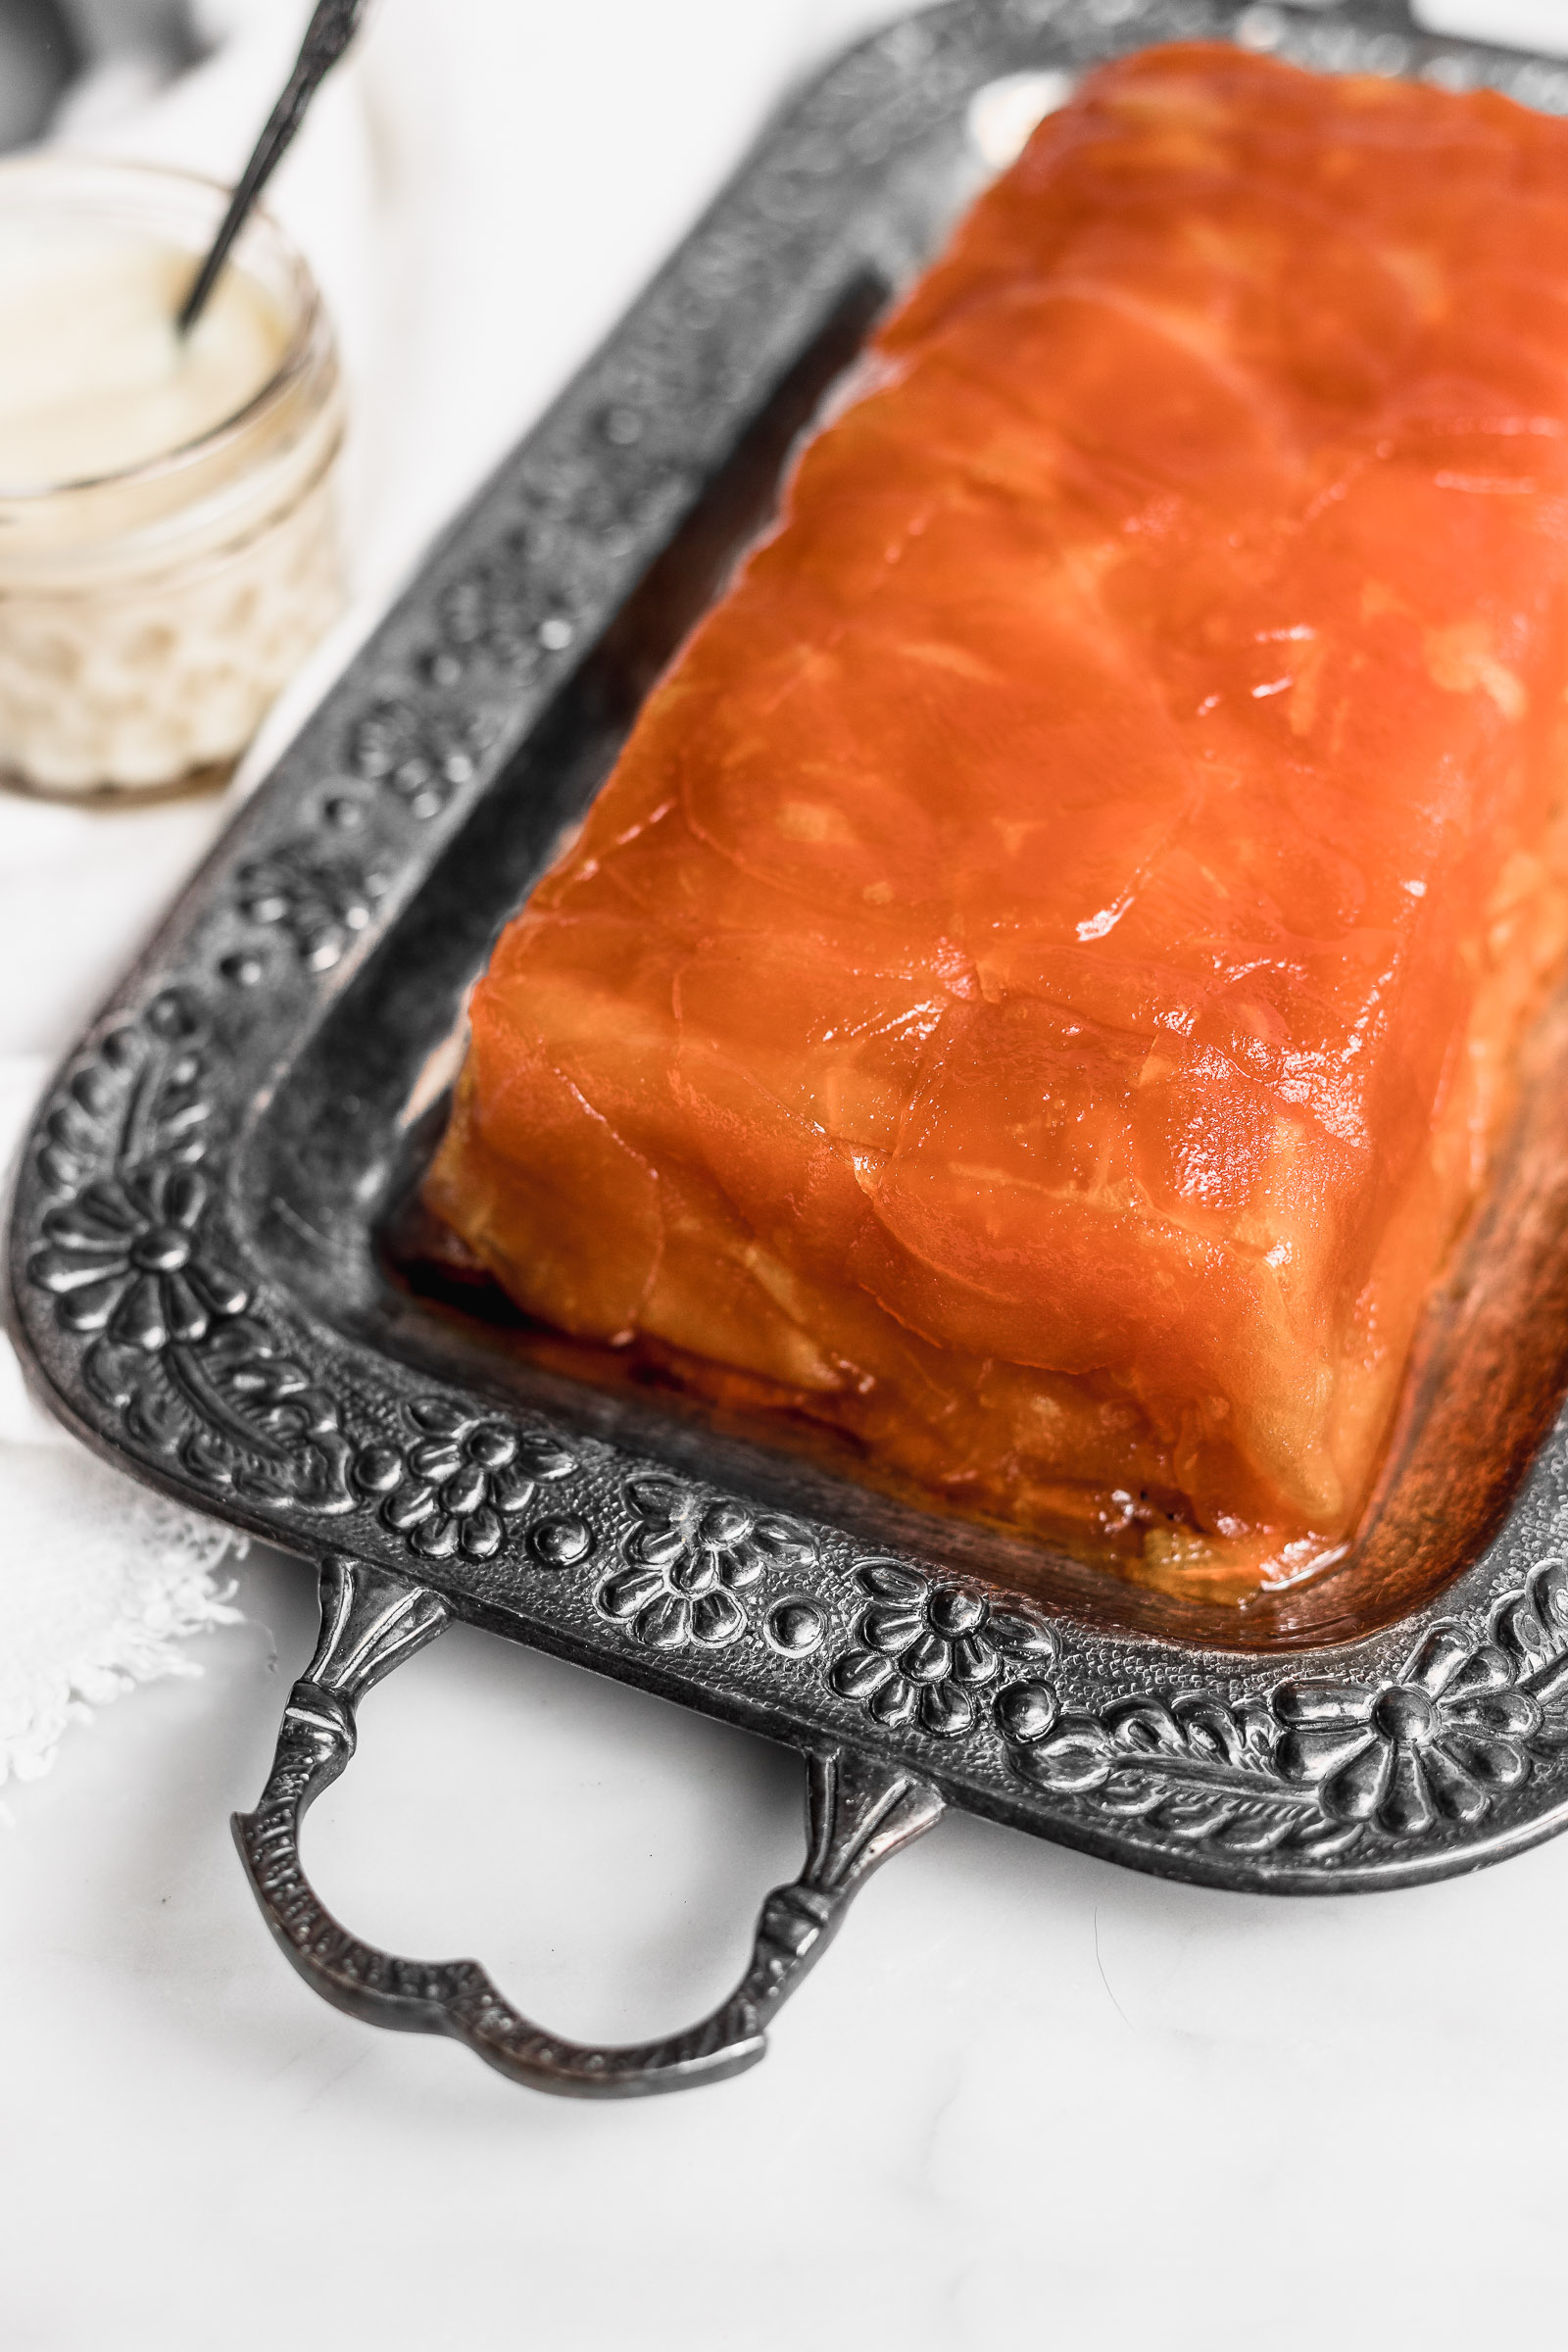
The photos you see here are from my second attempt at this dessert. The first time I made it I added too little cornstarch and when I flipped it, the shape wasn’t as nice and the juice was really liquidy. With this amount of cornstarch, though, the juice is much more saucy, like syrup, and the shape stays nice when flipped. If a few slices of apple stay stuck in the pan, don’t worry. Just remove them from the pan and place them on your mille-feuille.
Apple Mille Feuille with Vanilla Custard (gluten-free)
Print Pin RateIngredients
For the caramel
- 150 g granulated sugar
For the apple millefeuille
- 2 kg apples Fuji, Royal Gala or Pink Lady
- 150 g granulated sugar
- 1 tsp salt
- 1 tbsp cornstarch
For the vanilla custard
- 4 egg yolks
- 2 tbsp cornstarch
- 600 ml milk whole / skimmed / lactose free or vegetable
- 50 g granulated sugar
- 1/4 tsp salt
- 2 tsp vanilla bean paste or 1 vanilla pod: open it lengthwise, remove the seeds and add them along with the pod to the pot to flavour the milk. Alternatively, use 1 tsp of vanilla extract or essence.
Instructions
For the caramel
- Place your 22x11cm / 8.6×4.3in in a preheated oven at 100°C / 210°. This will give you more time as you cover the inside with the caramel.
- Spread a thin layer of sugar on the base of a pan over medium heat. As it starts to melt, add more sugar to those melted spots. Repeat this until you have used all the sugar in the recipe.
- Grab the pan's handle and tilt the pan to one side and the other to help the caramel melt and get mixed. Do not use a utensil to mix or the caramel will crystalize. If it becomes too dark or smoke starts to come out of it, it means the heat is too hot. *TIP* Many people tell me that their caramel is always really dark. If it's your first time making the caramel, it's best to use a light-coloured pan so you can clearly see the evolution in the colour of the caramel.
- Once melted, pour the caramel into the mould and rotate it to cover both the base and sides. Be careful, your mould is hot!
For the apple millefeuille
- Peel and slice the apples using a mandolin. The slices should be 1mm / 0.03in thick. Start on one side until just before you reach the seeds. Then rotate the apple to slice the other side and so on. Only slice half the apples at first and then slice more as you need them to fill the mould. You don't want to be left with extra sliced apples.
- Mix the sugar, salt and cornstarch.
- Start by placing the apples on the base and make them come up the sides as well. You can see the video lines above for further reference.
- In between each layer of apples, sprinkle the mix of sugar, cornstarch and salt. Repeat this until your mould is full.
- Every 4 layers press down on the apples with your hands so they are nice and tight.
- Cook in a preheated oven at 180°C / 350°F for 1 hour. Make sure to place the mould on a baking sheet because it tends to drip a bit and if it falls on the base of your oven, it will burn and smoke.
- Remove it from the oven and unmould when it's warm. First, separate the apples from the sides with a knife os thin spatula. Place the dish you'll be serving it in on top and flip it.
For the vanilla custard
- Whisk together the egg yolks and cornstarch.
- Place the milk, vanilla bean paste, sugar and salt in a pot and heat it until it steams. Stir the whole time.
- Add a bit of milk to the egg yolk mix and whisk quickly. Then add the rest of the milk and whisk it in as well.
- Return the milk to the pot and cook over medium-low heat until it thickens. Do not let it break into a boil or it could split.
- As soon as the custard has thickened, remove it from the heat and transfer to a clean bowl to stop the cooking process.

50 comments
Wow, this looks great! I have a few questions… should this be left at room temp until served or kept in the fridge? Should it be left in the mold until it’s ready to be served? How long in advance can this be made? Thank you!
Hi Jennifer! You can keep it at room temperature or keep it in the fridge for up to 5 days. Ideally though don¡t serve it beyond day 2 because it tends to dry out a bit. If you’re serving it cold you can warm up the custard for a nice temperature contrast <3
When we flipped, there was several ounces of DELICIOUS apple/caramel juice pooling around it. The millefeuille kept its shape and has a nice color, but should there be that much liquid?
Hi Warren! You definitely want some of that, but maybe you didn’t fill the pan with apples all the way to the top?
How much cornstarch would you use as an egg yoke replacement?
Hi Alex! You can always dissolve 4 tbsp of cornstarch in 4tbsp or water and add a little at a time until you like the consistency
Hello, looks so good!
I only have glass loaf pans. Will that work?
Hi Katie! Yes definitely
Is there any way to reheat this once it has cooled? I’d like to make it for Thanksgiving the day prior so serving is easier on me while we have guests!
Hi Anisa! This is served warm or at room temperature! If anything I would reheat the sauce and for that you can use a microwave or in a saucepan 🙂
Soooo good, so easy to make! Perfect taste balance !Custard is out of this world!!! Thank you for a great recipe !!!
That makes me really happy to read!!!
I’m a little confused on the custard section. It says “Add a bit of milk to the egg yolk mix and whisk quickly”. Is that referring to the steamed milk/vanilla/sugar mixture created in the previous step or separate just milk?
Hi! Yes, the one you heated.
Hi! Mine came out VERY liquidy. Do you know why or how I can prevent that for next time? Should I have waited for the Carmel to harden after taking it out of the oven?
Hi Sophia! It’s key that you really fill up the loaf pan all the way to the rim. Otherwise the concentrated sugar creates a lot of liquid. Do you think that couldn’ve happened? The caramel won’t harden after removing from the oven 🙂
What would be a good replacement for the cornstarch? We’ve got some corn intolerant family members.
Hi Kurtis! Potato starch works as good 🙂
Does the baking pan need to be greased before adding the caramel? I’m concerned the caramel won’t release from the pan?
Hi Kate! The caramel dissolves with the apple juices so the release is really simple 🙂
Will granny smith apples work?
Hi! Yes but it will be more towards the acidic side of the spectrum
I made this but it’s so watery!! I’m afraid to unmold this… what do I do?
Hi Rachel! You need to make sure you really fill up the pan with apples, it’s key for the recipe to work in the proportions laid out. Wateryness usually happens when you use less apples, it’s just melted sugar! If that’s not the case, you can always return it to the oven for more liquid to evaporate.
What temperature should I cook the caramel to?
Hi Leah! Just until it’s golden. It’s a dry caramel so there’s no need to take the temperature.
I can’t get my sugar to turn into caramel
Maybe this will help: https://cravingsjournal.com/how-to-make-direct-caramel-and-salted-caramel-sauce/
Tastes good but fell apart after taking it out of the baking tin?!
Any advice on what I did wrong?
Thank you!
Hi Ed! Did you remove it from the pan while it was warm? Or maybe your tin is just not non-stick enough, maybe try using baking paper before adding the caramel for easy unmolding
I made this yesterday with high hopes, as your photos are so beautiful! But mine was completely liquid, despite cooling for 3 hours before removing from the pan. I did keep the apples from browning while I was cutting them by placing them in iced lemon water, but I drained them thoroughly in a colander and patted dry with towels before placing in the mold. It didn’t seem wet when I placed it in the oven. It tasted great, but didn’t set up at all. I filled the pan up to about 0.5cm from the top. Thoughts?
Hi Matt! The apples do soak up water when you lay them in iced lemon water. Sugar also prevents them from browning so as long as you slice and place, slice and place, that won’t be a problem. Also, make sure to fill the tin with apples all the way to the top
I want it more apple pie-ish do you think I could do layers of phyllo dough with the apple layers?
Hi Nicole! You could but they won’t turn crispy in between the apples
I did not think of that. Thank you!!
Help! My caramel is too gummy l can’t coat the pan and it’s drying hard as a rock on my spoon
Hi Dana! It helps if you preheat the pan a bit in the oven so that the caramel doesn’t firm up too quick
I’ve made this recipe and it is definitely very watery despite filling the pan to the brim. I think it might just be the type of apples I used? Out of curiosity, what kind of apples did you use? (Mine were pink ladies)
Carolyn! I also used pink lady apples, they’re my favourite! Maybe let them dry out in the oven for a bit longer next time. Apples will vary in moisture depending on the area where they grew
Came out tasting great. I love the vanilla custard on top!
One change I recommend is putting the note to only slice half the apples in the first sentence of step 1. I was following the recipe step by step and ended up slicing all of the apples and having to throw out a lot 😩 IE “Peel and slice half of the apples using a mandolin.”
Would this work with pears just the same? Thanks!
Hi antonio! yes!
This is so interesting – I’ve never heard of mille feuille before. Sounds lovely and it is such a pretty dessert.
I’m going to try this recipe today to go with a crème caramel! I was just wondering if you thought this could be made in silicone moulds as I’m going for an individual serve sort of dessert? Or would it be better to do in a metal loaf pan and cut into portions? Thank you so much!
Hi! I’ve never tried it but I think it could work well!
Hi if I make it the day before should I still remove it from the pan? will it keep its shape?
Outstanding!! This is SO MUCH MORE DELICIOUS than I thought it would be, and actually incredibly simple to make. It only took about half an hour or less to prepare, working at a leisurely pace. My family was super impressed when I served this up to them last night, definitely a 5-star restaurant-worthy dish!! Thank you!
This was a challenge but it was so worth it! I always struggle with caramel – mine cooled too quickly, even in the preheated pan, so I was worried it would be too thick on top. But the liquid from the apples melted it down and it came out absolutely perfect. Might be the best dessert I’ve ever made. Thank you so much for the recipe and the video!
This Apple Mille-Feuille looks absolutely divine! I love how you’ve made it gluten-free without sacrificing flavor. The layers are so beautiful, and the vanilla custard sounds like the perfect complement to the apples. Can’t wait to try making this at home!
This Apple Mille-Feuille looks absolutely delicious! I love that it’s gluten-free and the addition of vanilla custard sounds divine. Can’t wait to try making this at home! Thanks for sharing such a wonderful recipe!