5.6K
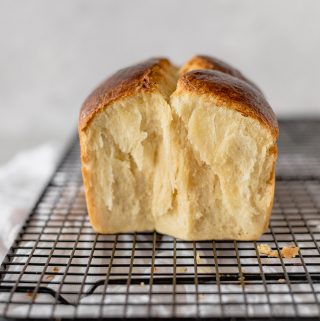
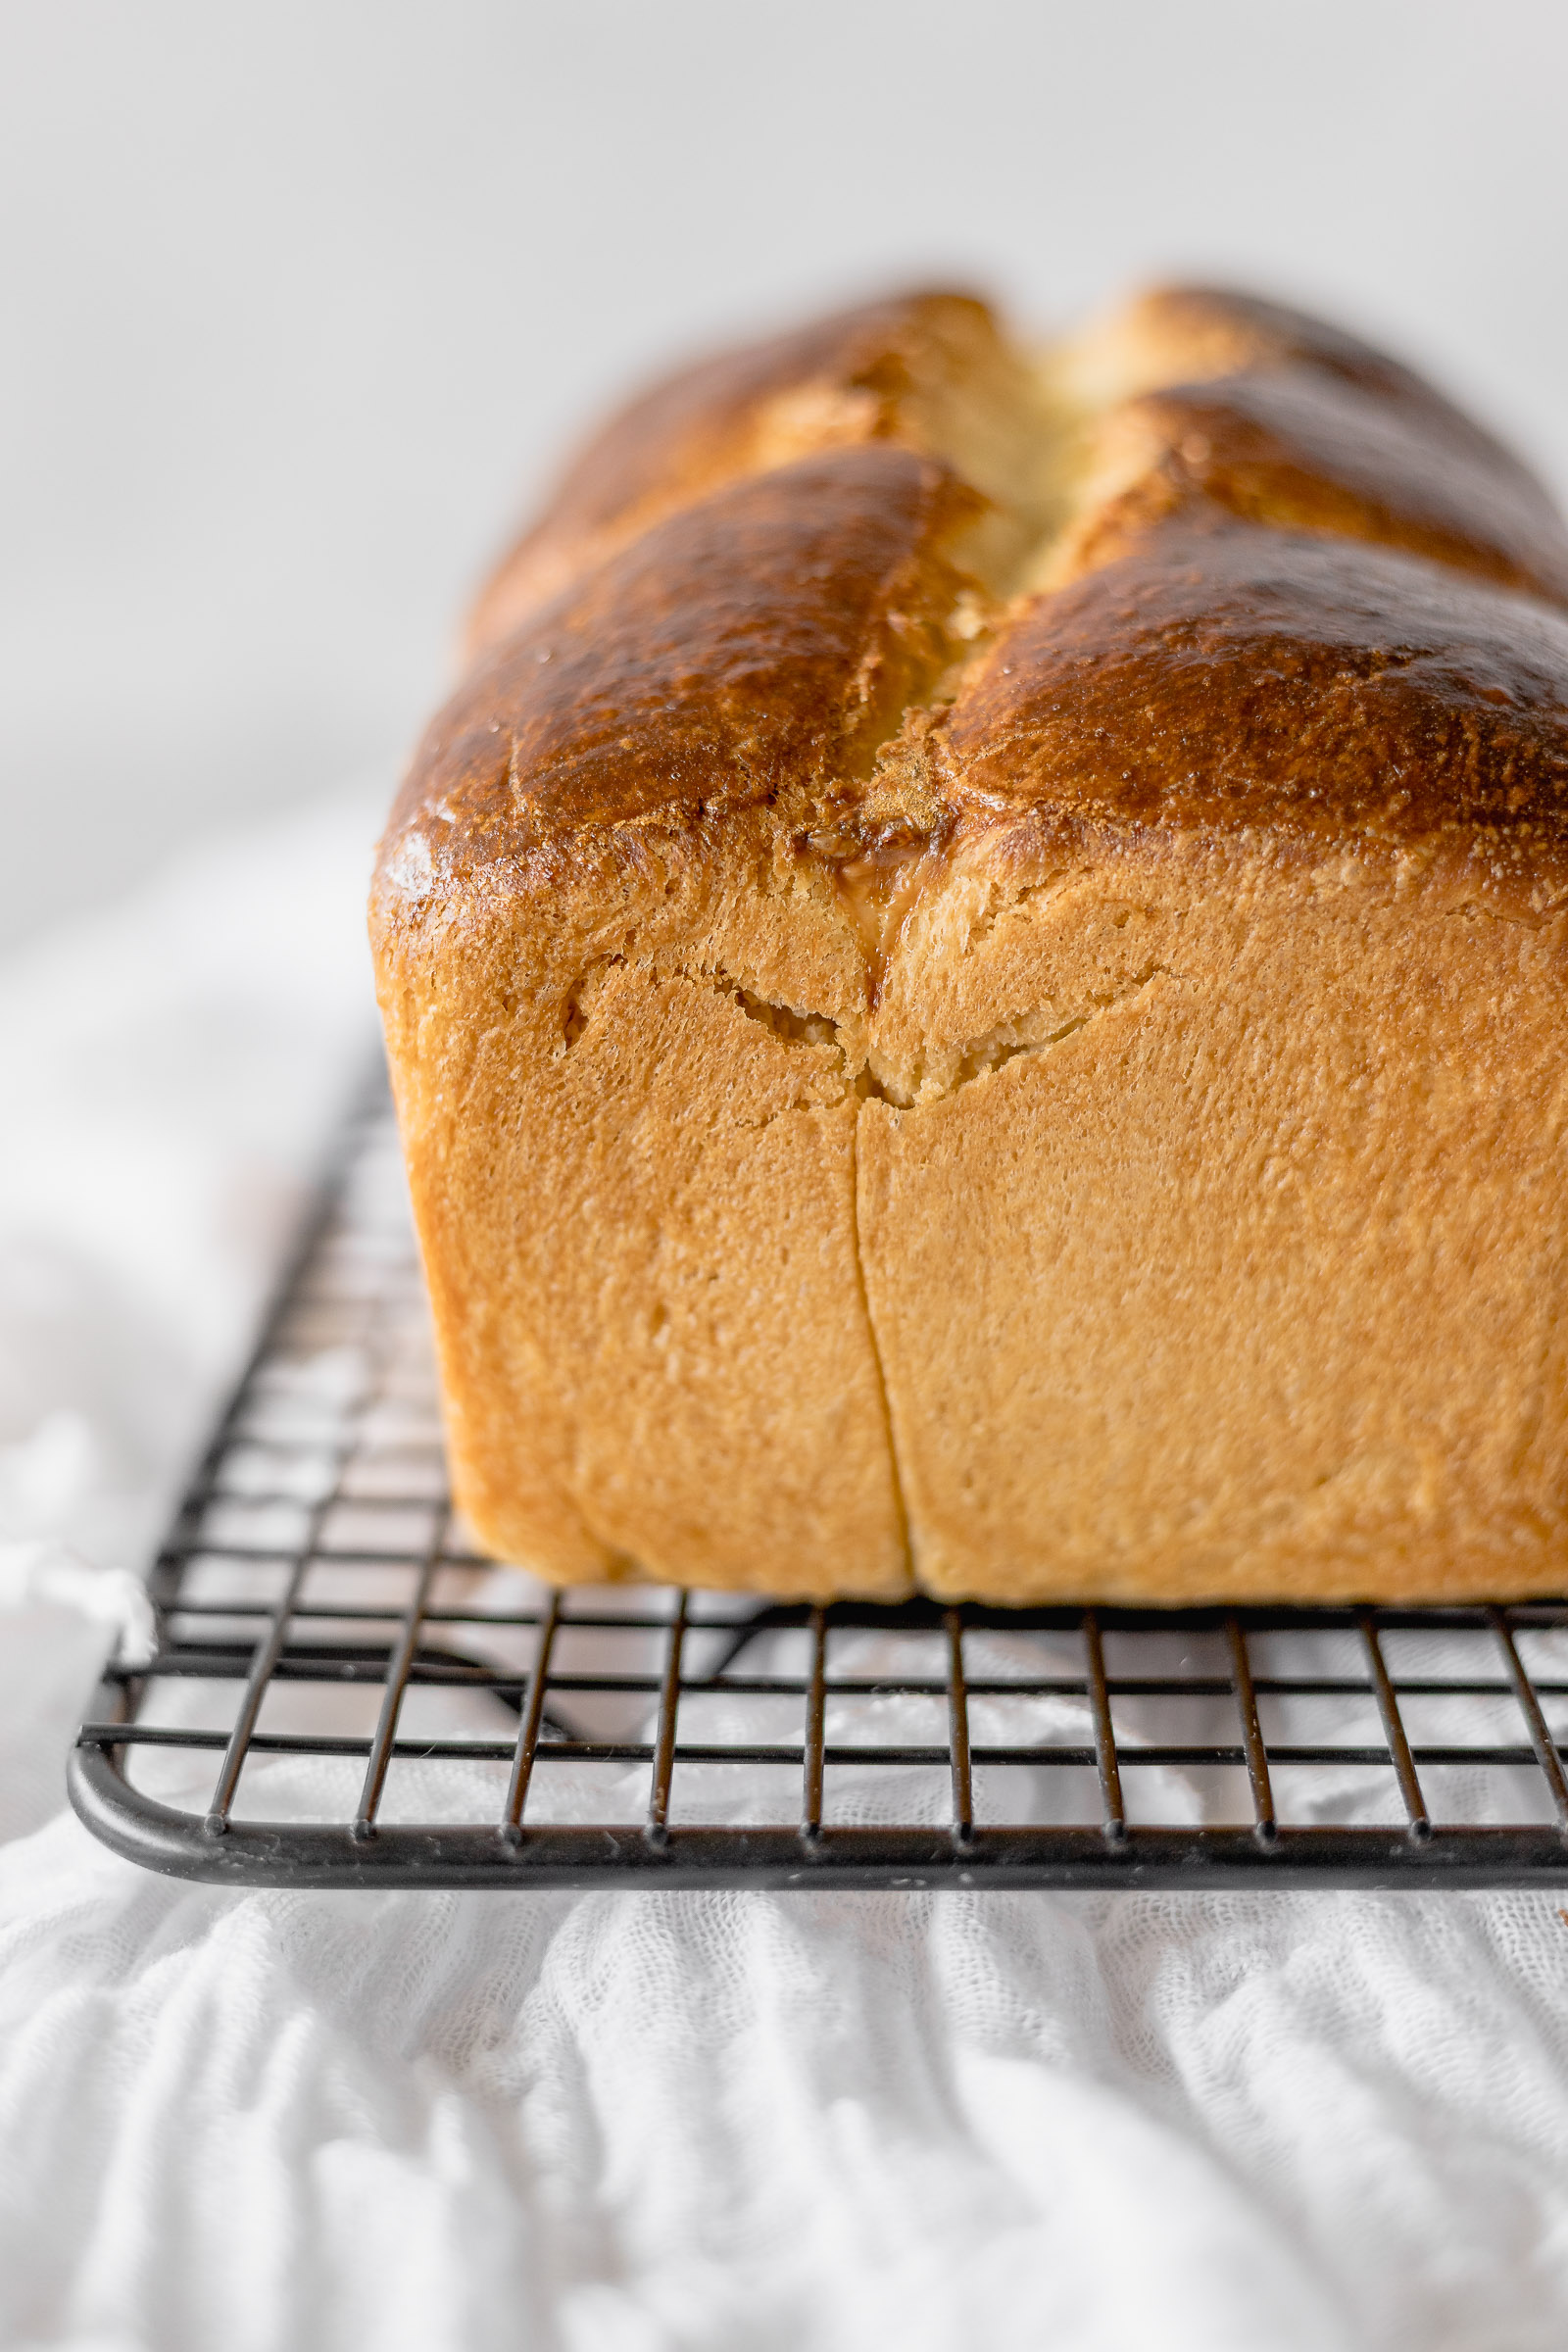
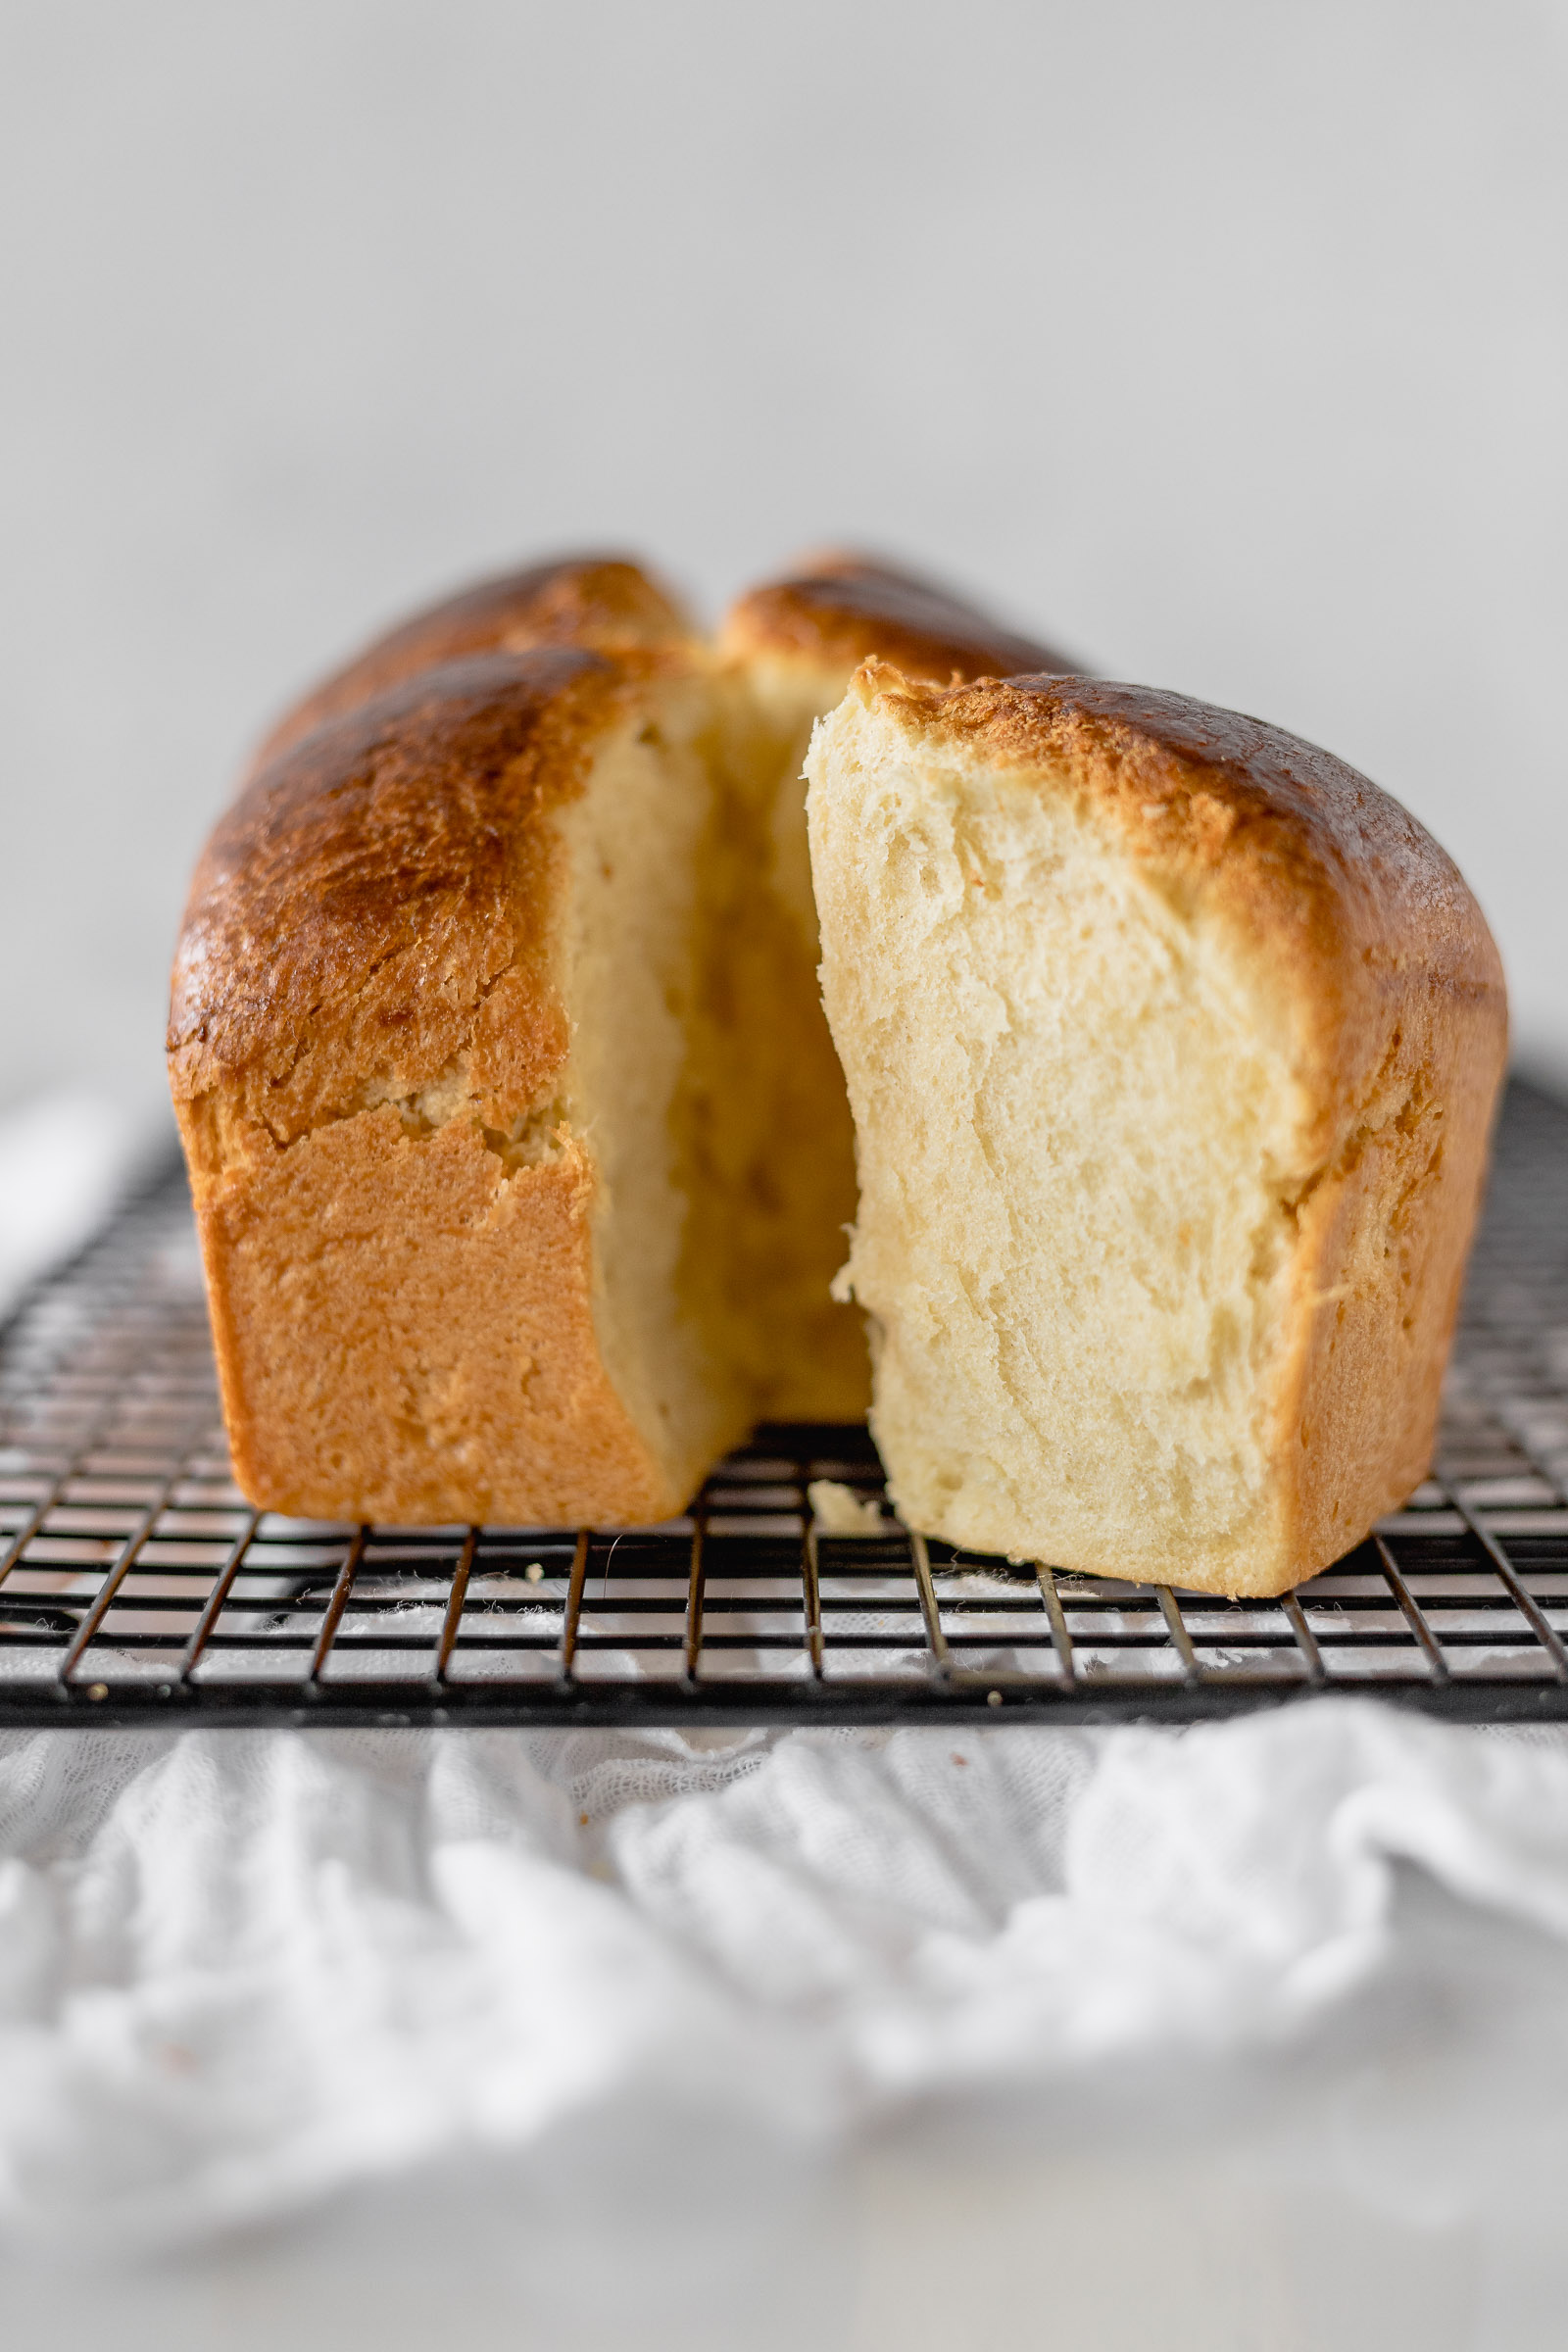
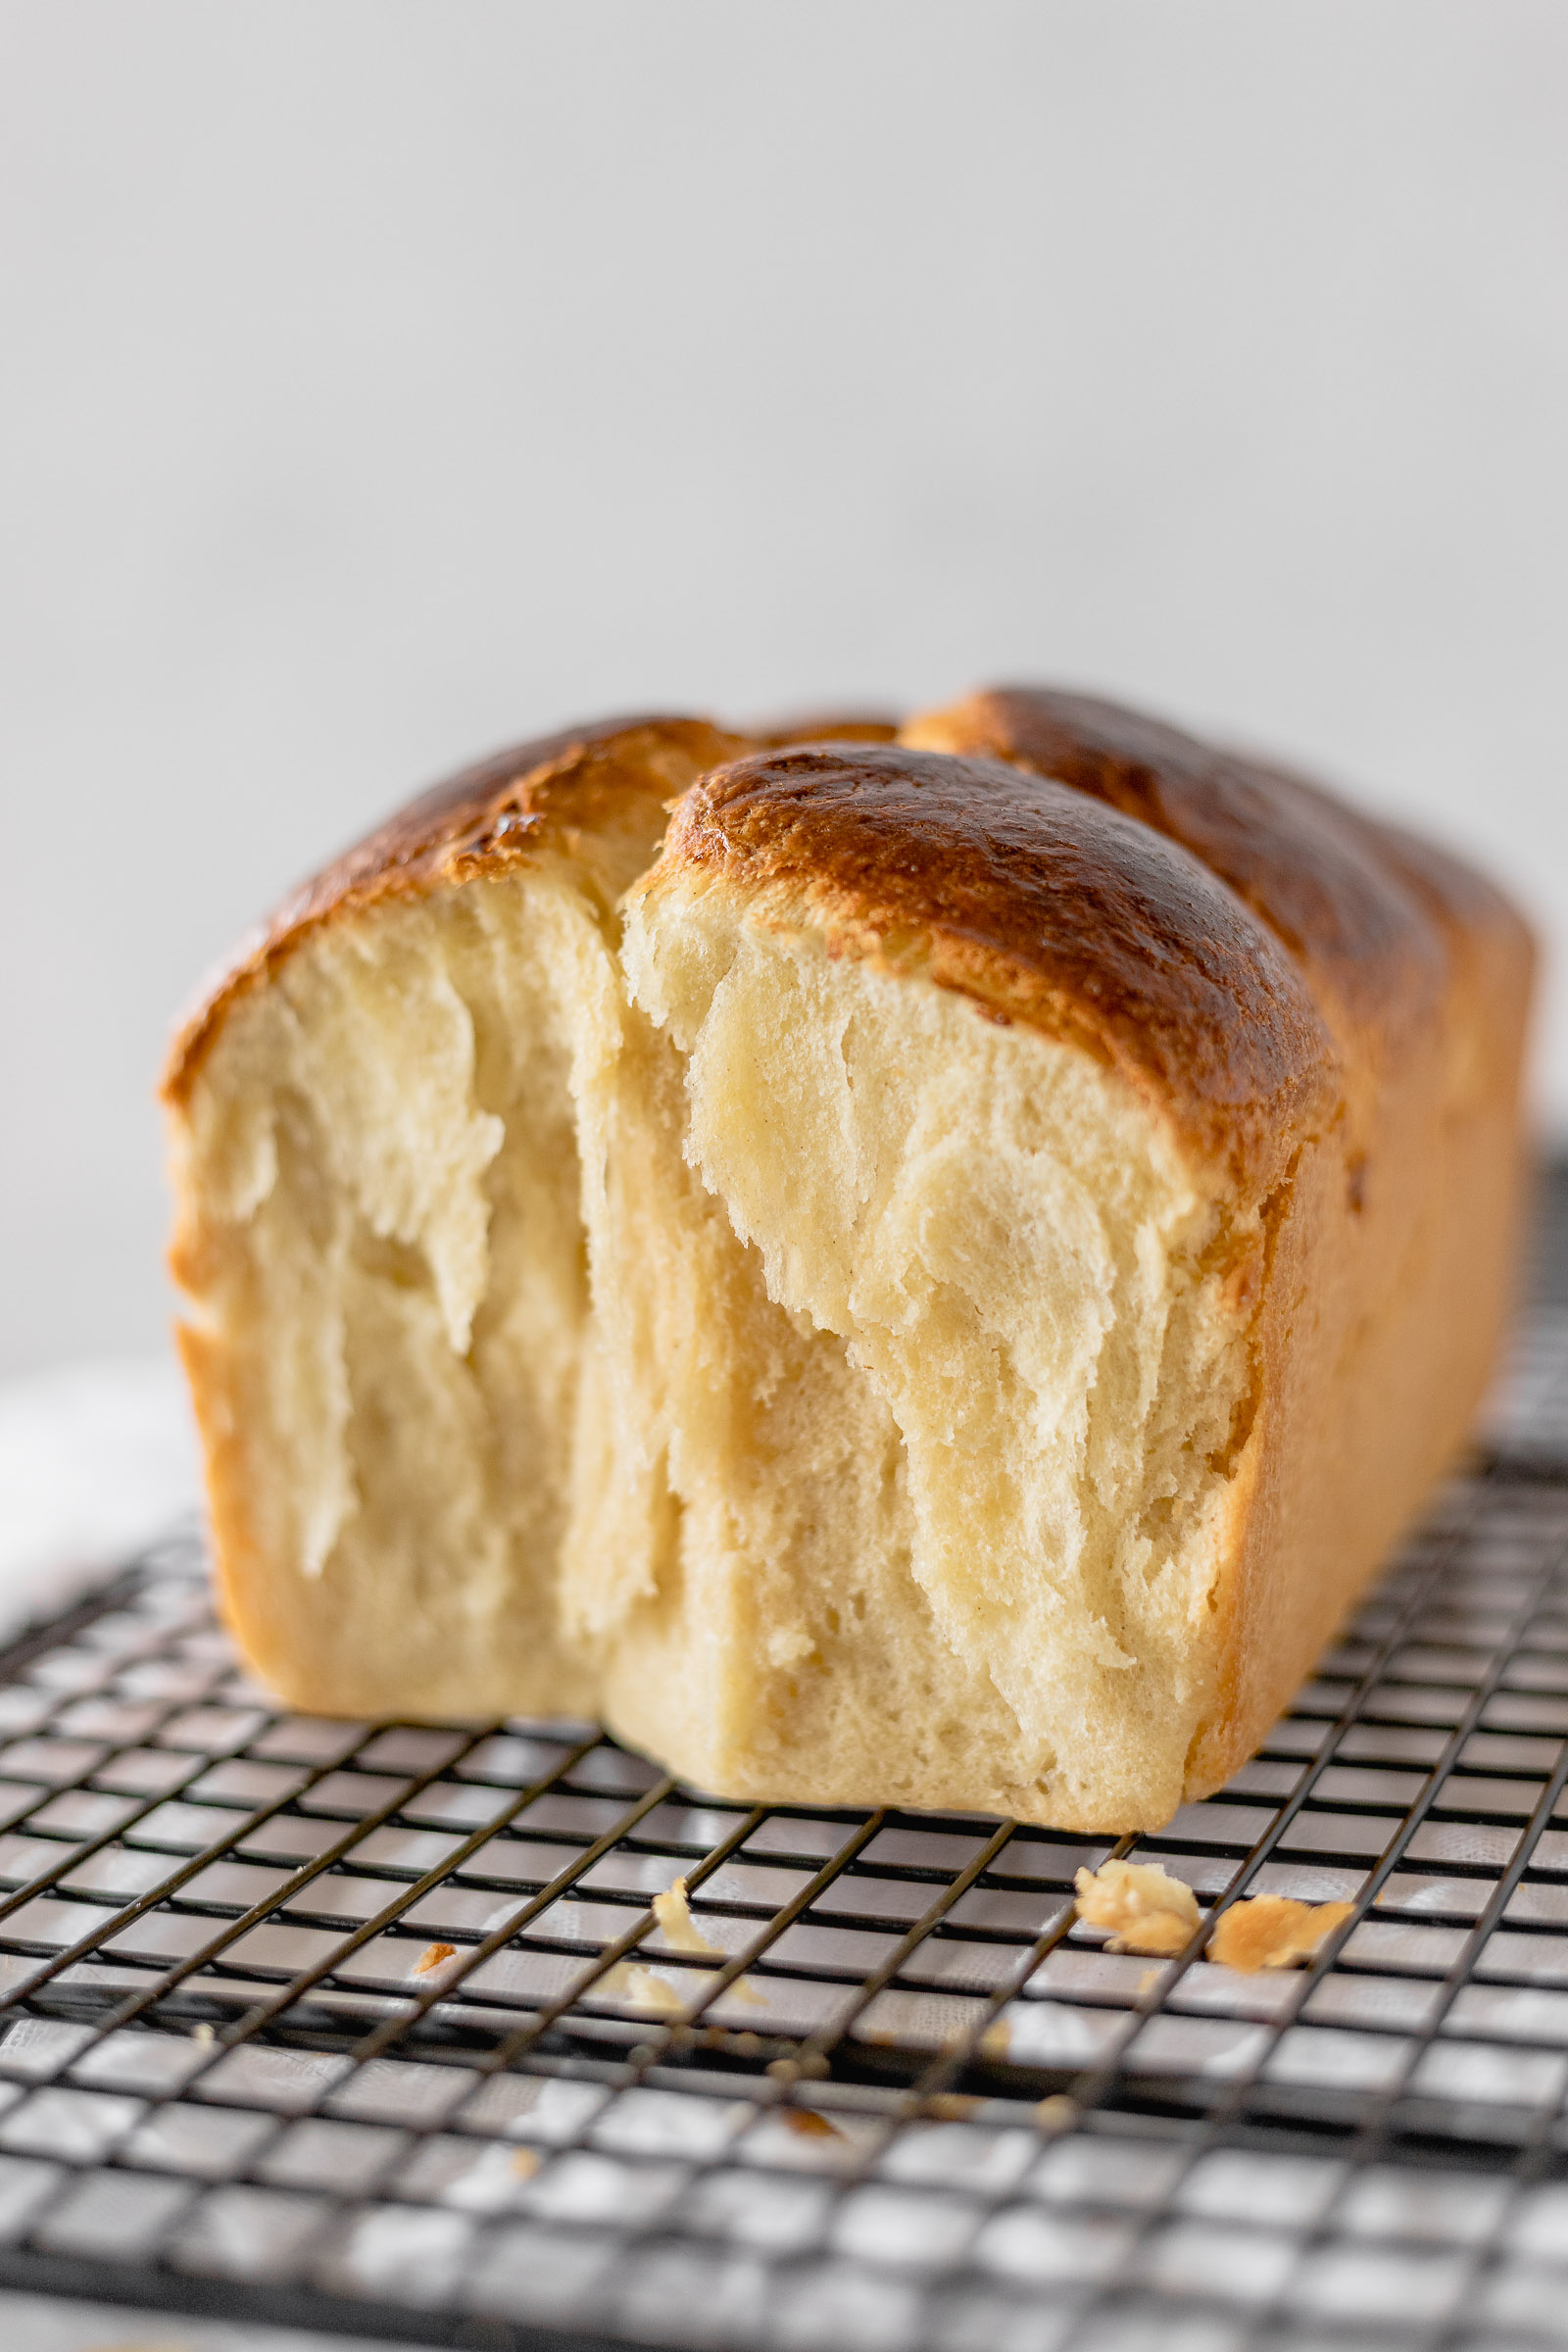
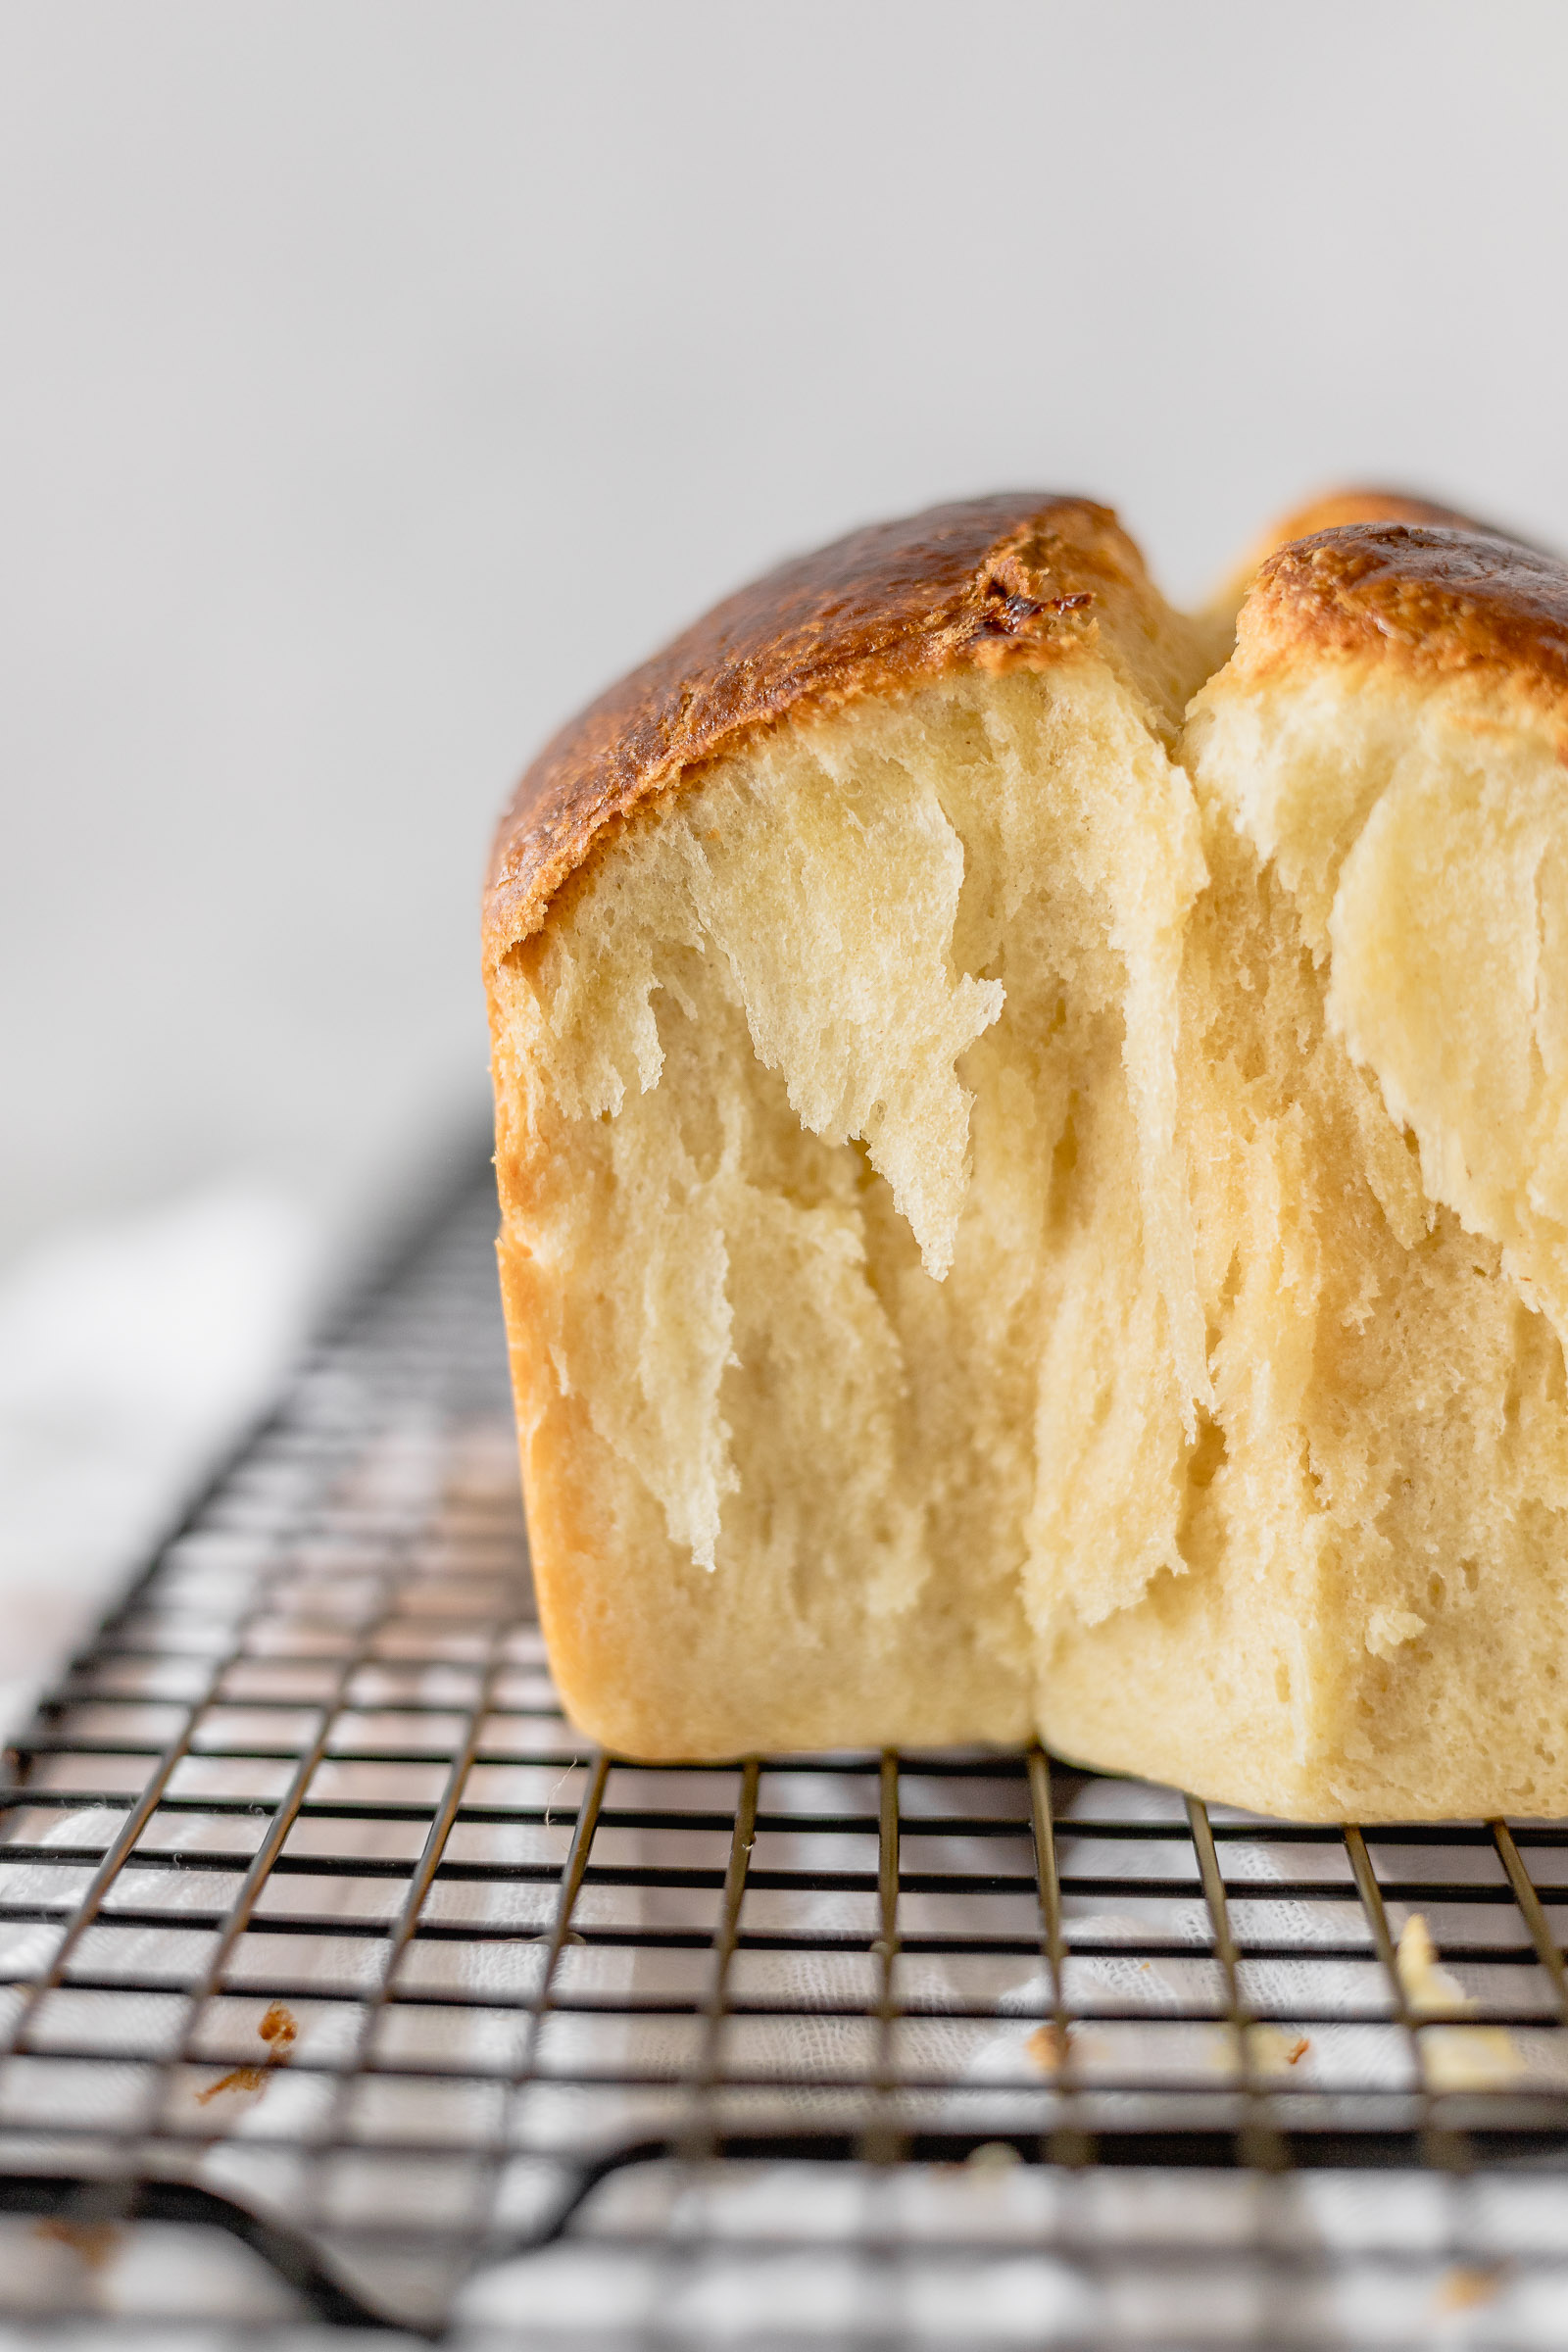
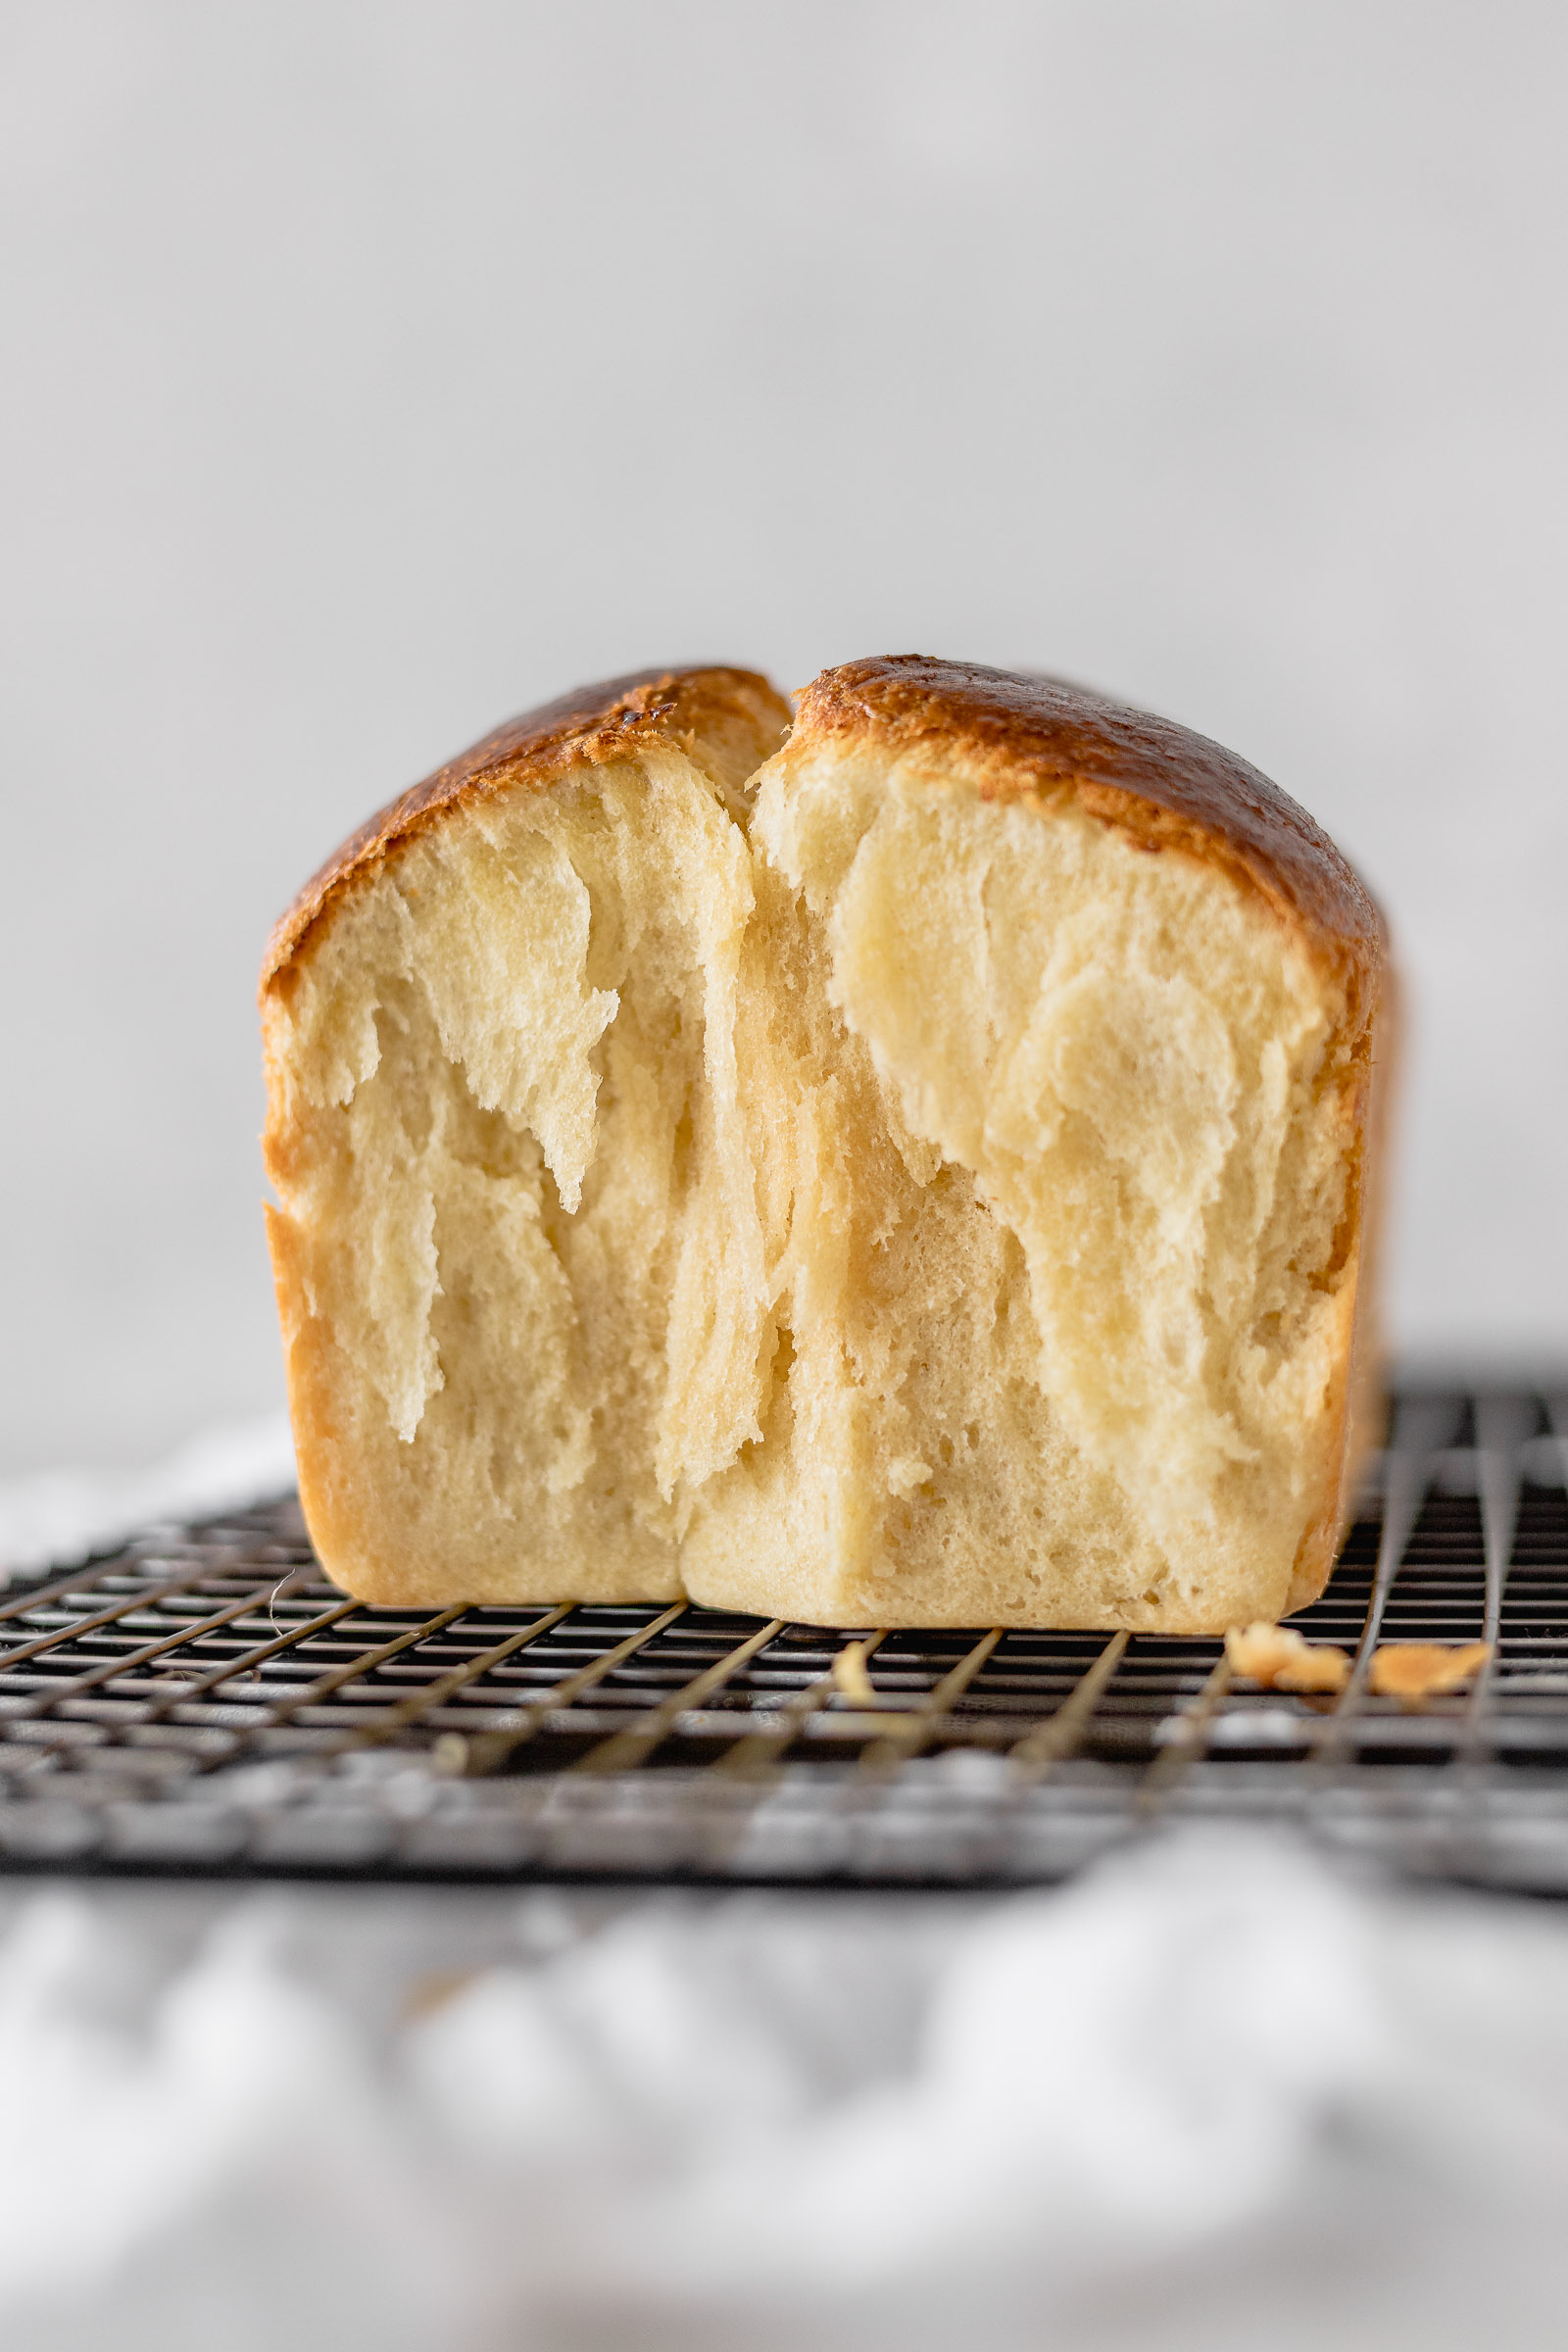
Let’s talk obsessions. This Brioche Nantaise is my obsession. You only need to see the inside of this bread and the ingredient list to understand why.

As always when we make bread it’s important to respect the weight of the ingredients because a small difference in the weight of the ingredients can make a large difference in the end result. Nowadays digital scales are really cheap and you can even find them in supermarkets.
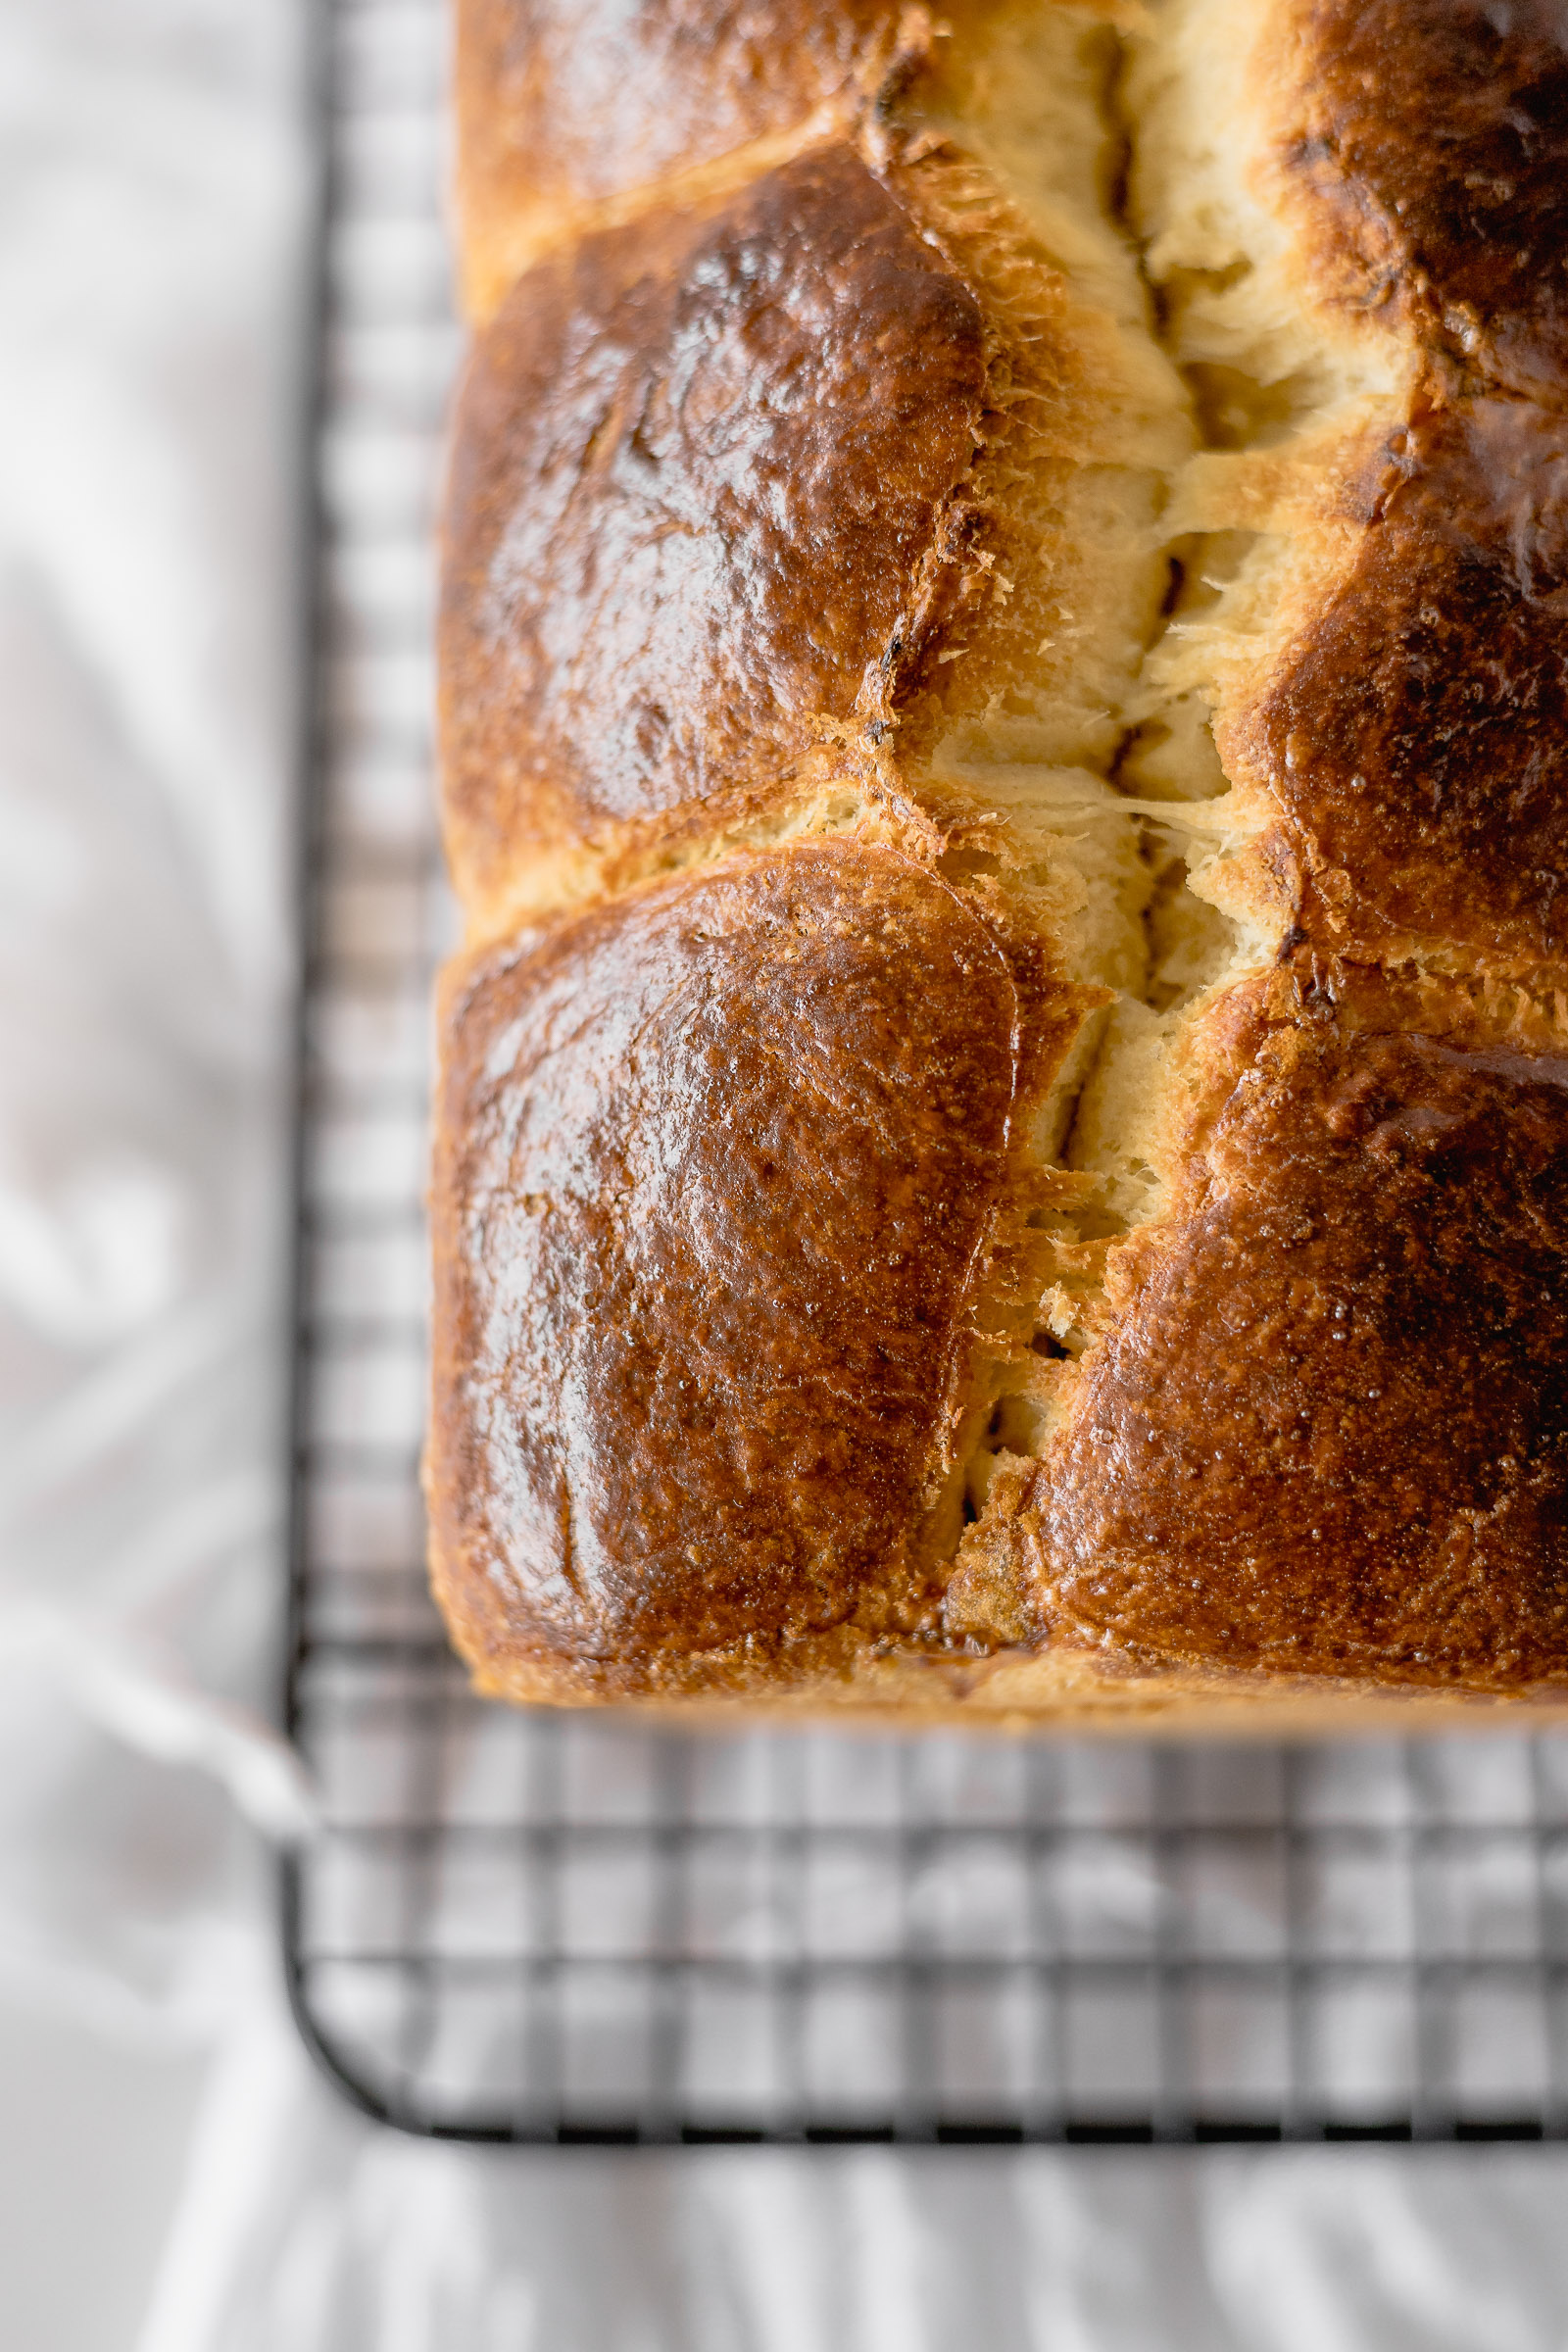
This type of brioche is called “Nantaise” because of the shape that it has made by individual buns squeezed together in a mould. Of course the dough is good for any shape of brioche, even just normal buns. This bread is perfect for sandwiches with proteins: chicken, hamburgers, breaded fish, etc.

Ingredients
- 490 g all purpose flour
- 9 g instant yeast or 18g dry active yeast or 36g fresh yeast
- 12 g salt
- 90 g sugar
- 220 g eggs
- 60 g milk
- 210 g unsalted butter at room temperature
Instructions
- In a bowl put the flour, yeast, salt and sugar and mix.
- In another bowl mix the eggs and the milk. To measure the weight of the eggs break one by one and when you get to the last one you want to break it on a separate bowl and add it little by little until you reach the weight from the recipe. Whatever's left from that last egg reserve to paint the bread later before it goes into the oven.
- Add the egg mix to the flour and mix. This you can also do on a stand mixer using the hook attachment.
- Once the dough has come together we need to knead. To knead you don't add flour to your surface but it does have to be really clean. You can do it by hand (it takes 20-30min) or with a stand mixer with the hook attachment (around 10min on medium speed). You know you can stop kneading when the dough passes a window test: take a bit of the dough and stretch it out gently from the edges. If you can see through the center without it breaking then you're good to go. For further reference watch the video above.
- Now let's incorporate the butter. This is much easier to do in a stand mixer but as you can see in the video you can also do it by hand. Add little by little as the previous dollop gets absorbes by the dough. It's useful to have something to scrape the surface as we advance.
- From the moment all the butter is in the dough you'll need to knead for about 10 more minutes or until the dough changes: it will unstick from the table or bowl and go really shiny.
- We're going to make a parcel out of out dough: stretch it out into a circle and then bring the edges in. Then turn it around to that the place where they join is now at the bottom. Use your hands to turn the dough around to seal the bottom. Watch the video for further reference. Now place in a bowl and cover with cling film and let it rest overnight or for 8 hours. this lets the dough rest from all that kneading but also solidifies the butter a bit to make it easier to work with.
- Grease the mould. I like to do it with vegetable oil but it can be butter as well.
- Weigh the dough and divide in 8 equal portions. Each we make into a parcel like we did before: smash it and the bring the edges in. Turn it over and with one hand form it into a ball, slightly pressing down onto the table to seal the bottom.
- Place the buns we're making one by one into the mould, alternating sides and sightly pressing them back so they can all fit.
- Let it proof for 2 hours in a not-so-warm place or an hour in a warm place. The second option is best. I set my oven to 40C but if you can't look for a warm place in your house so the yeast can wake up.
- Paint the bread with the leftover egg with a tablespoon of water and take to a preheated oven at 160C for 1h15min.
Notes
*for any of the other types of yeast you want to first mix them with the milk that needs to be warm and let it activate for 10min.
Tried this recipe?Mention @CravingsJournal or tag #RecipeCJ!