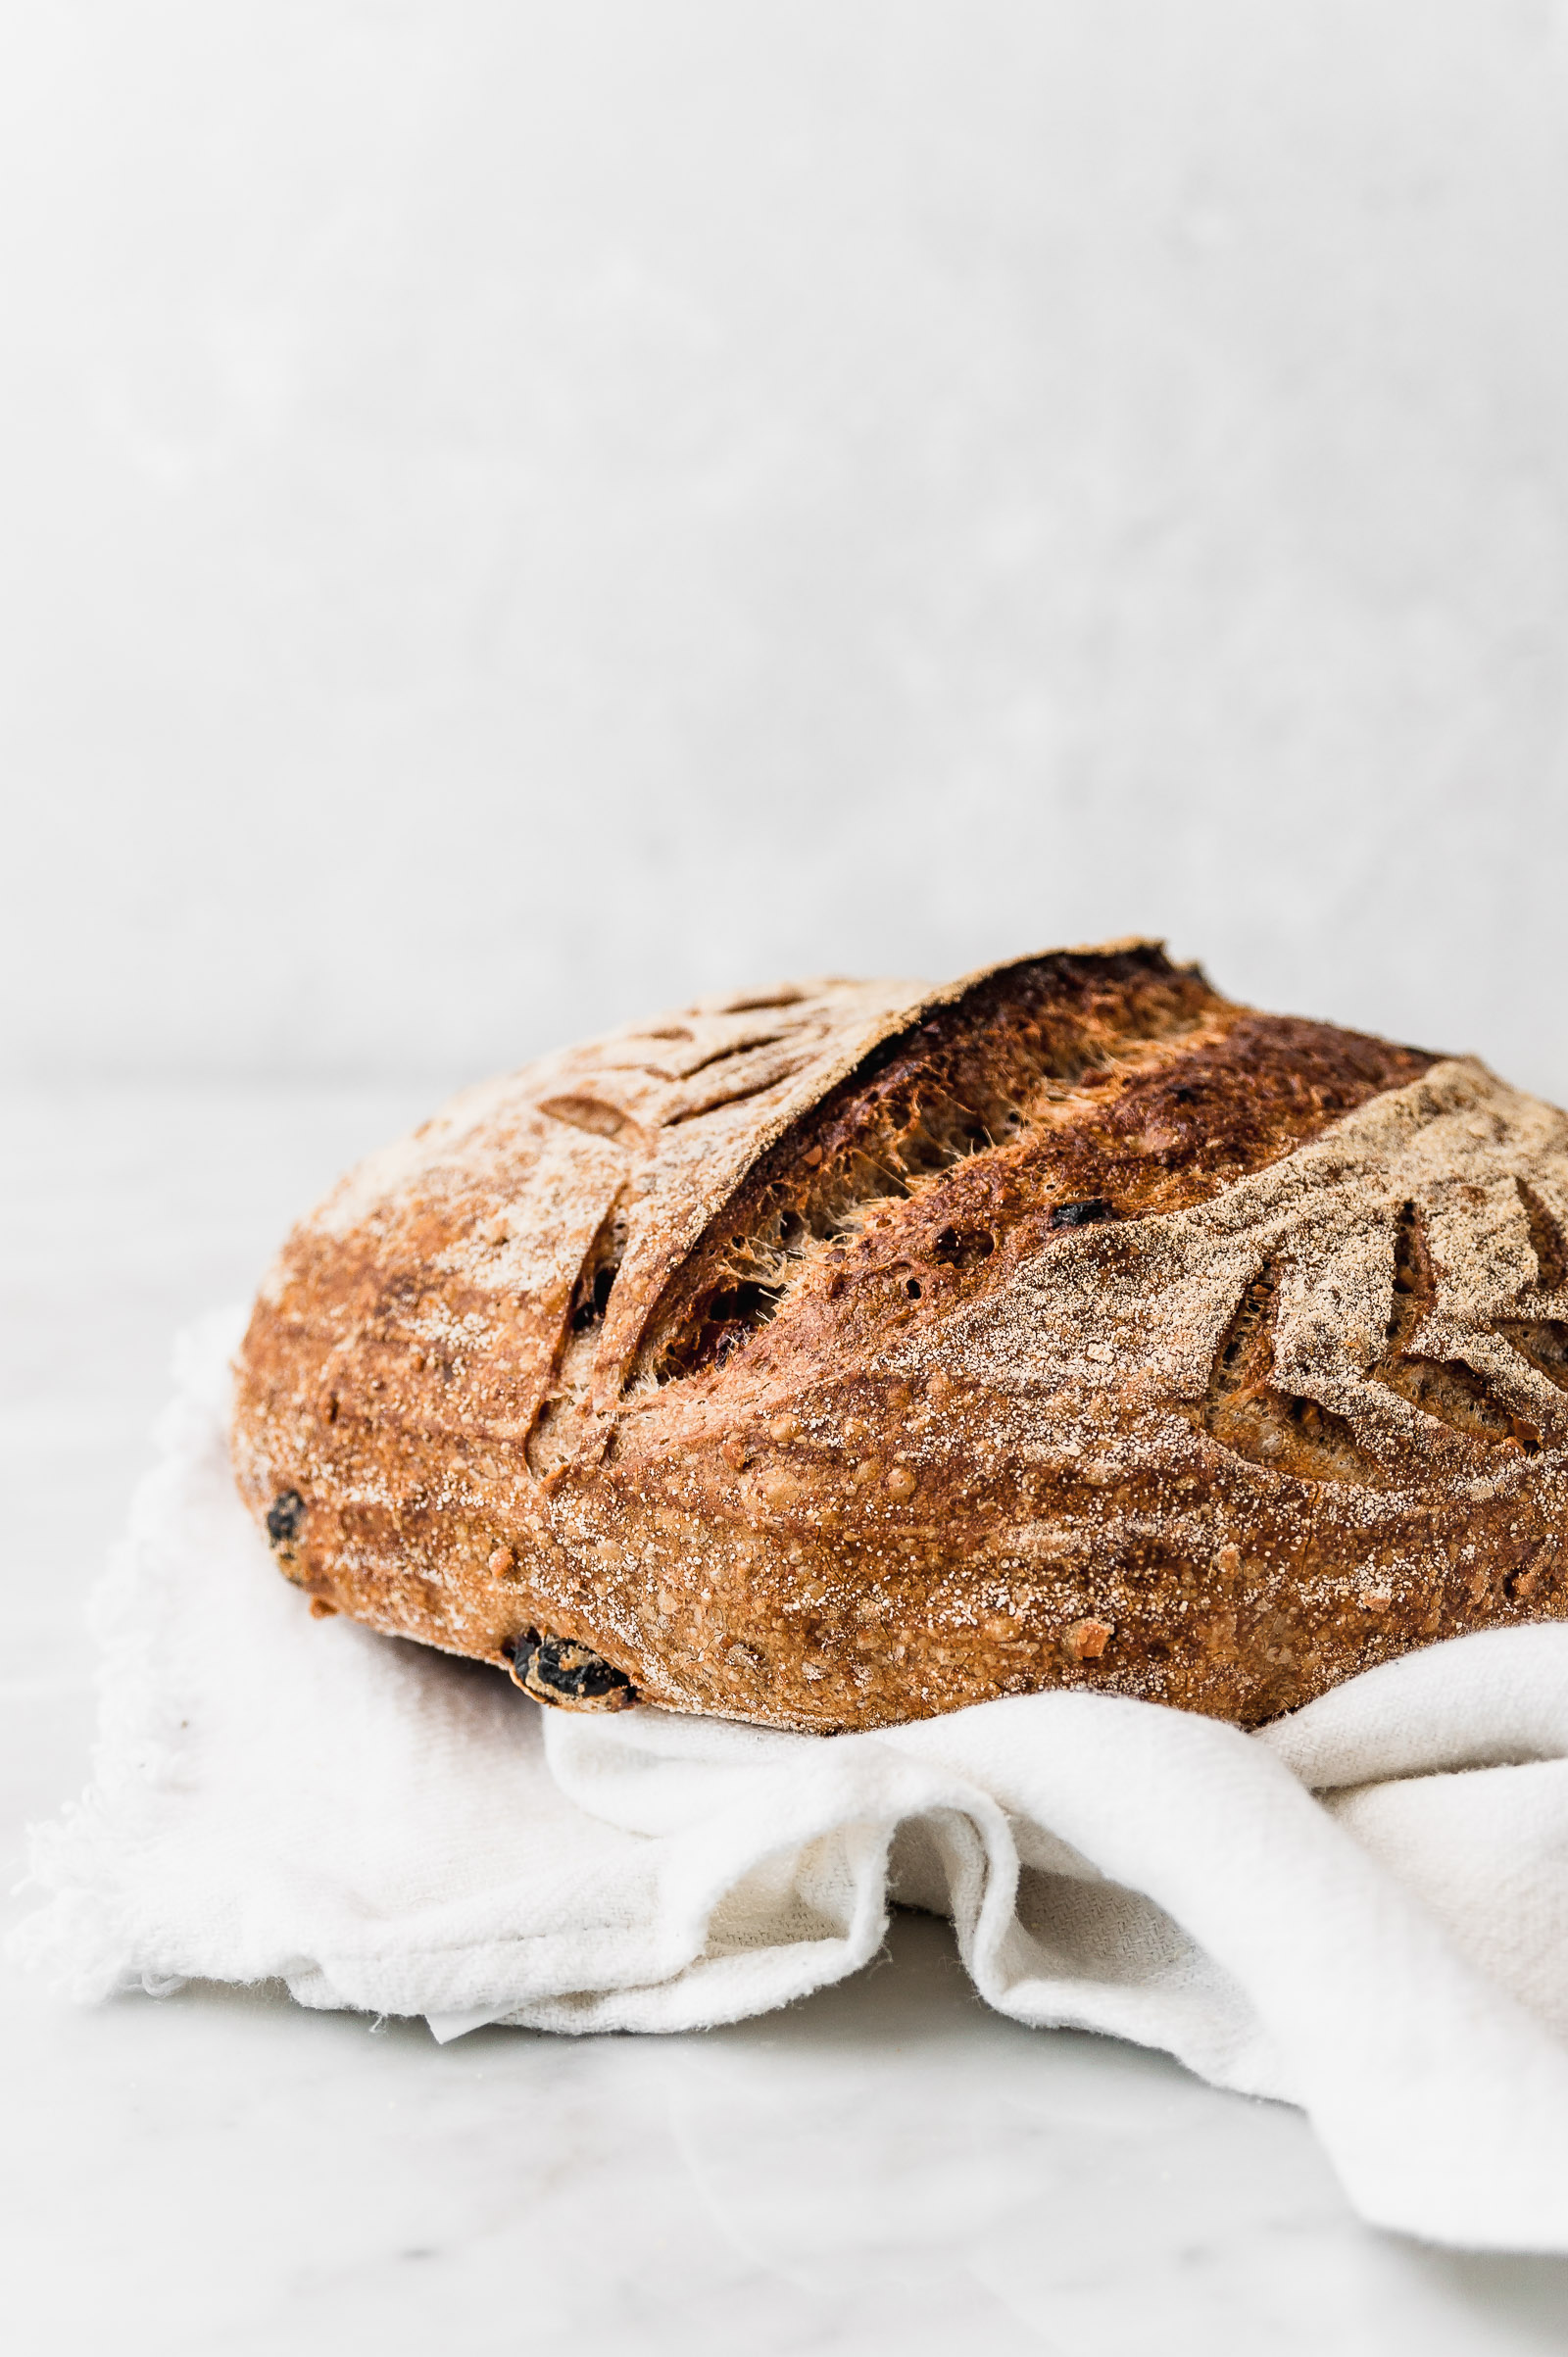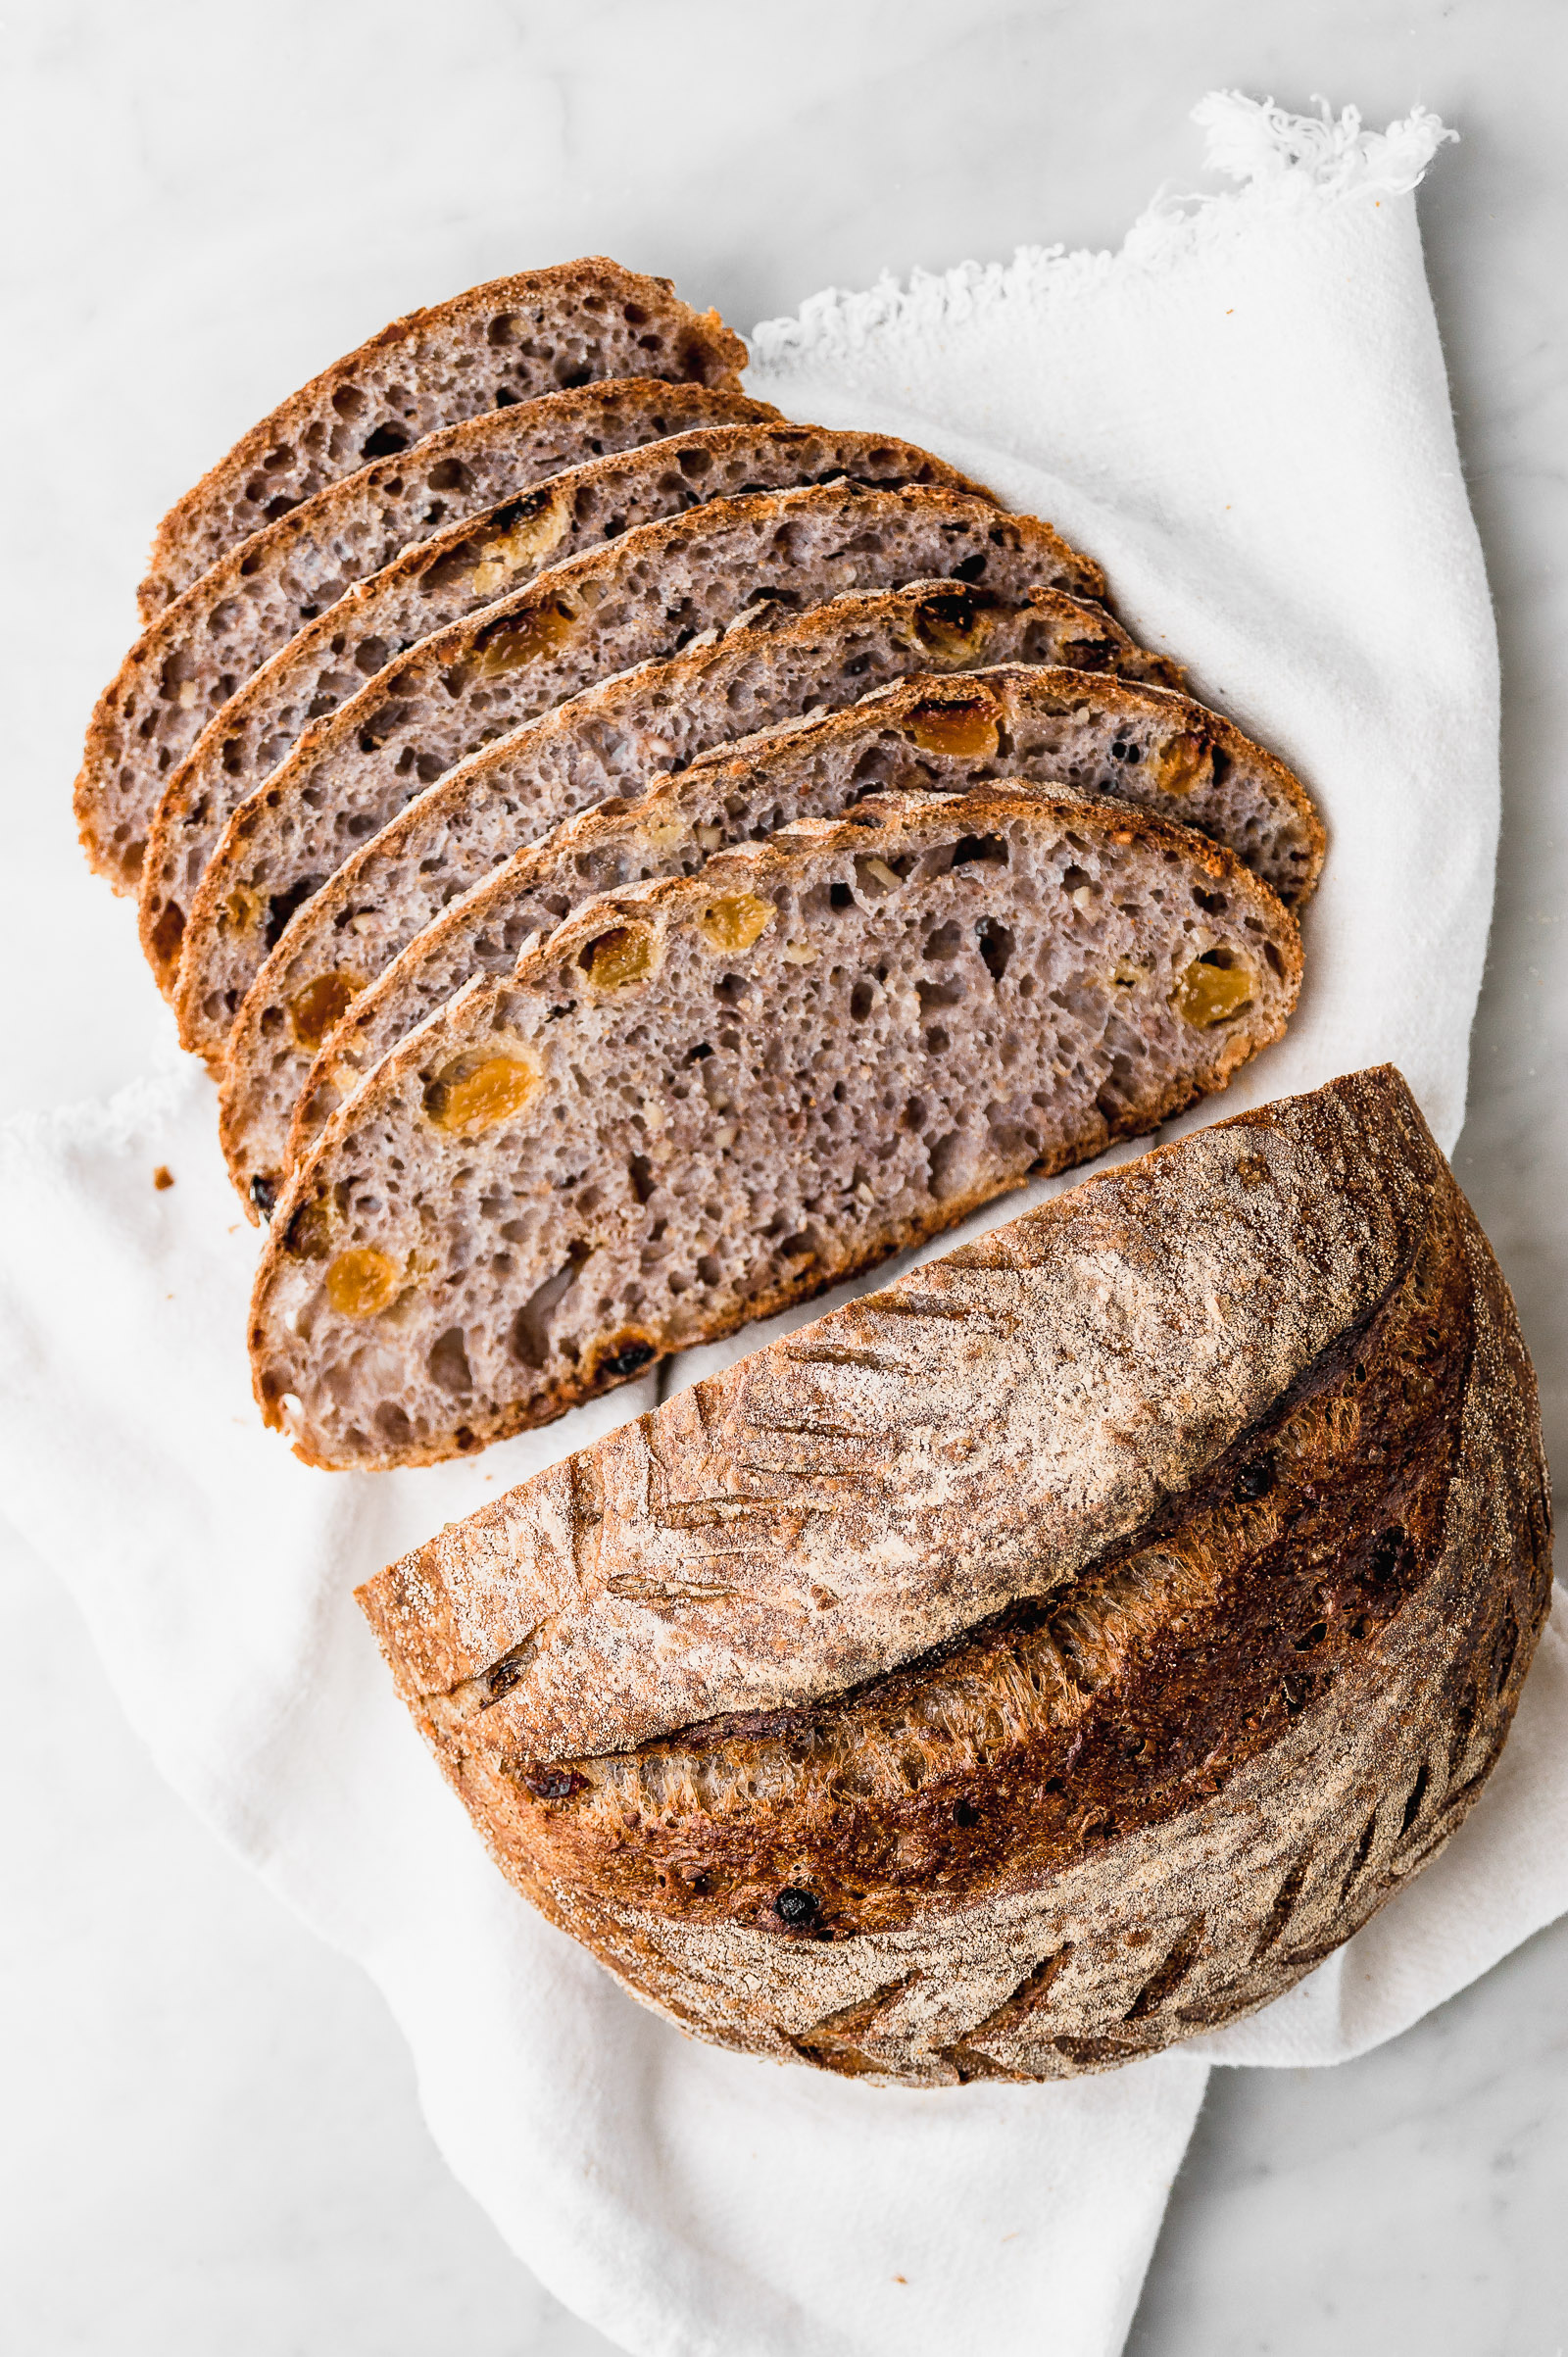
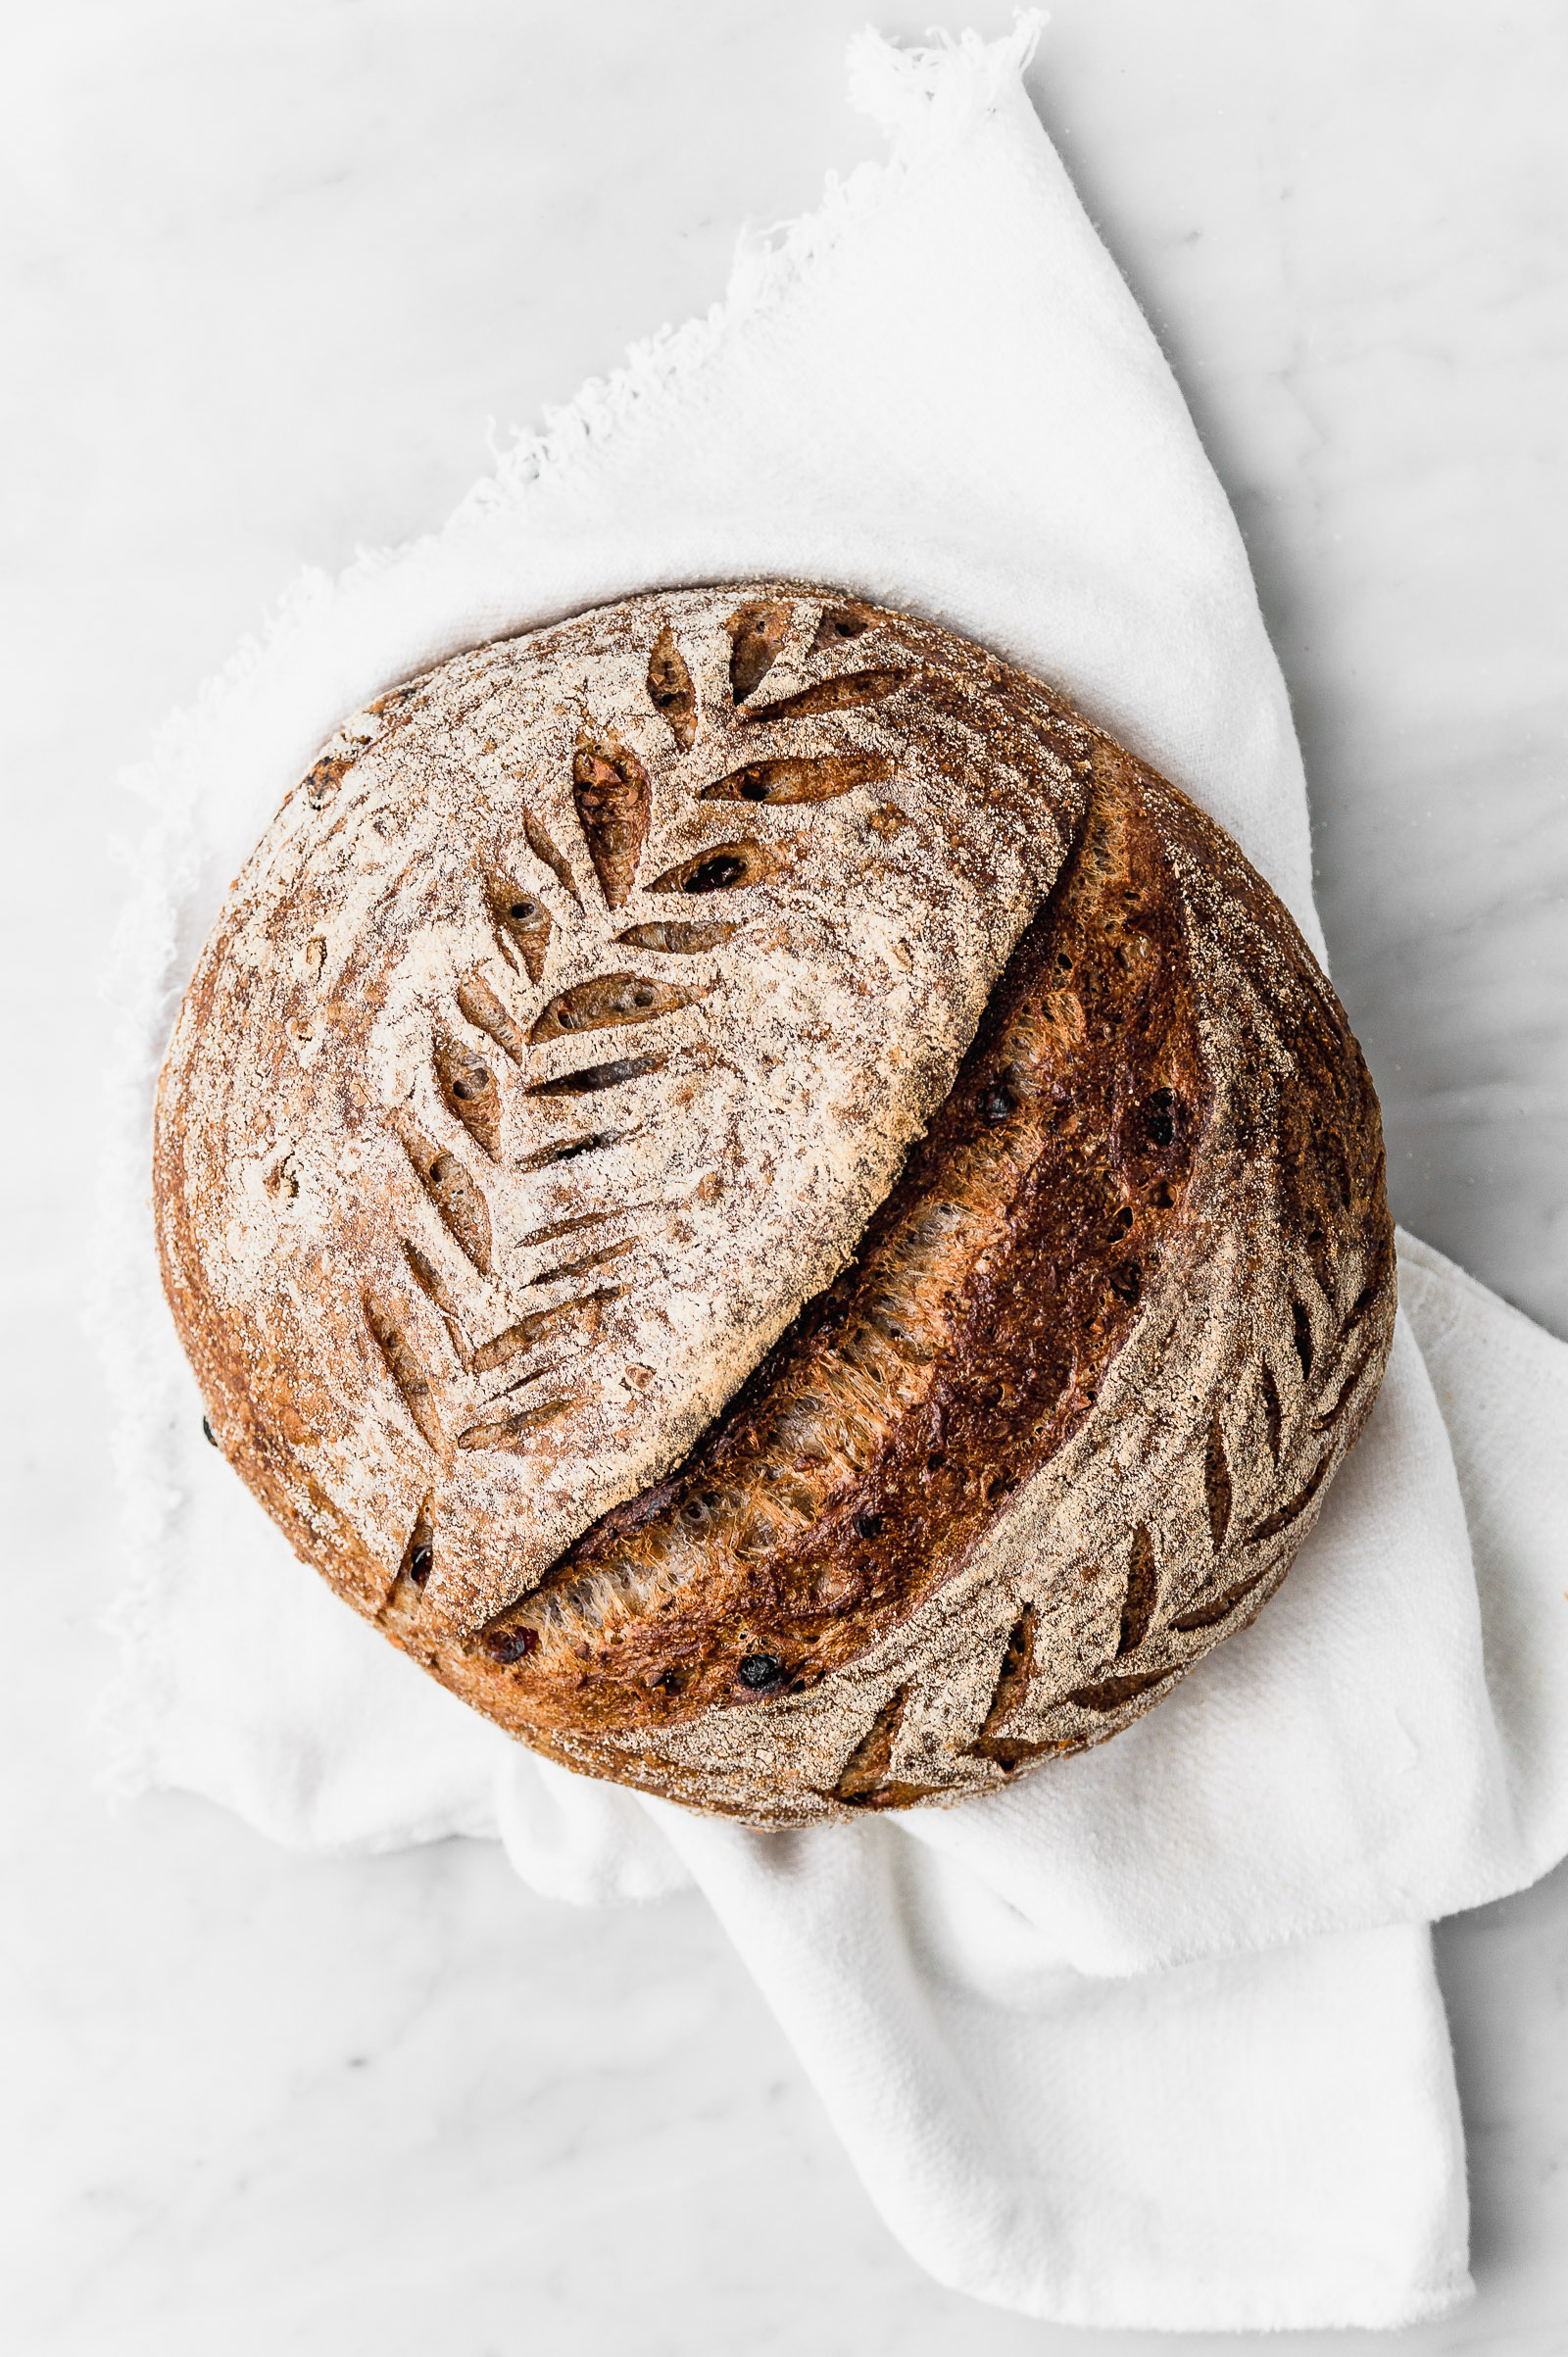
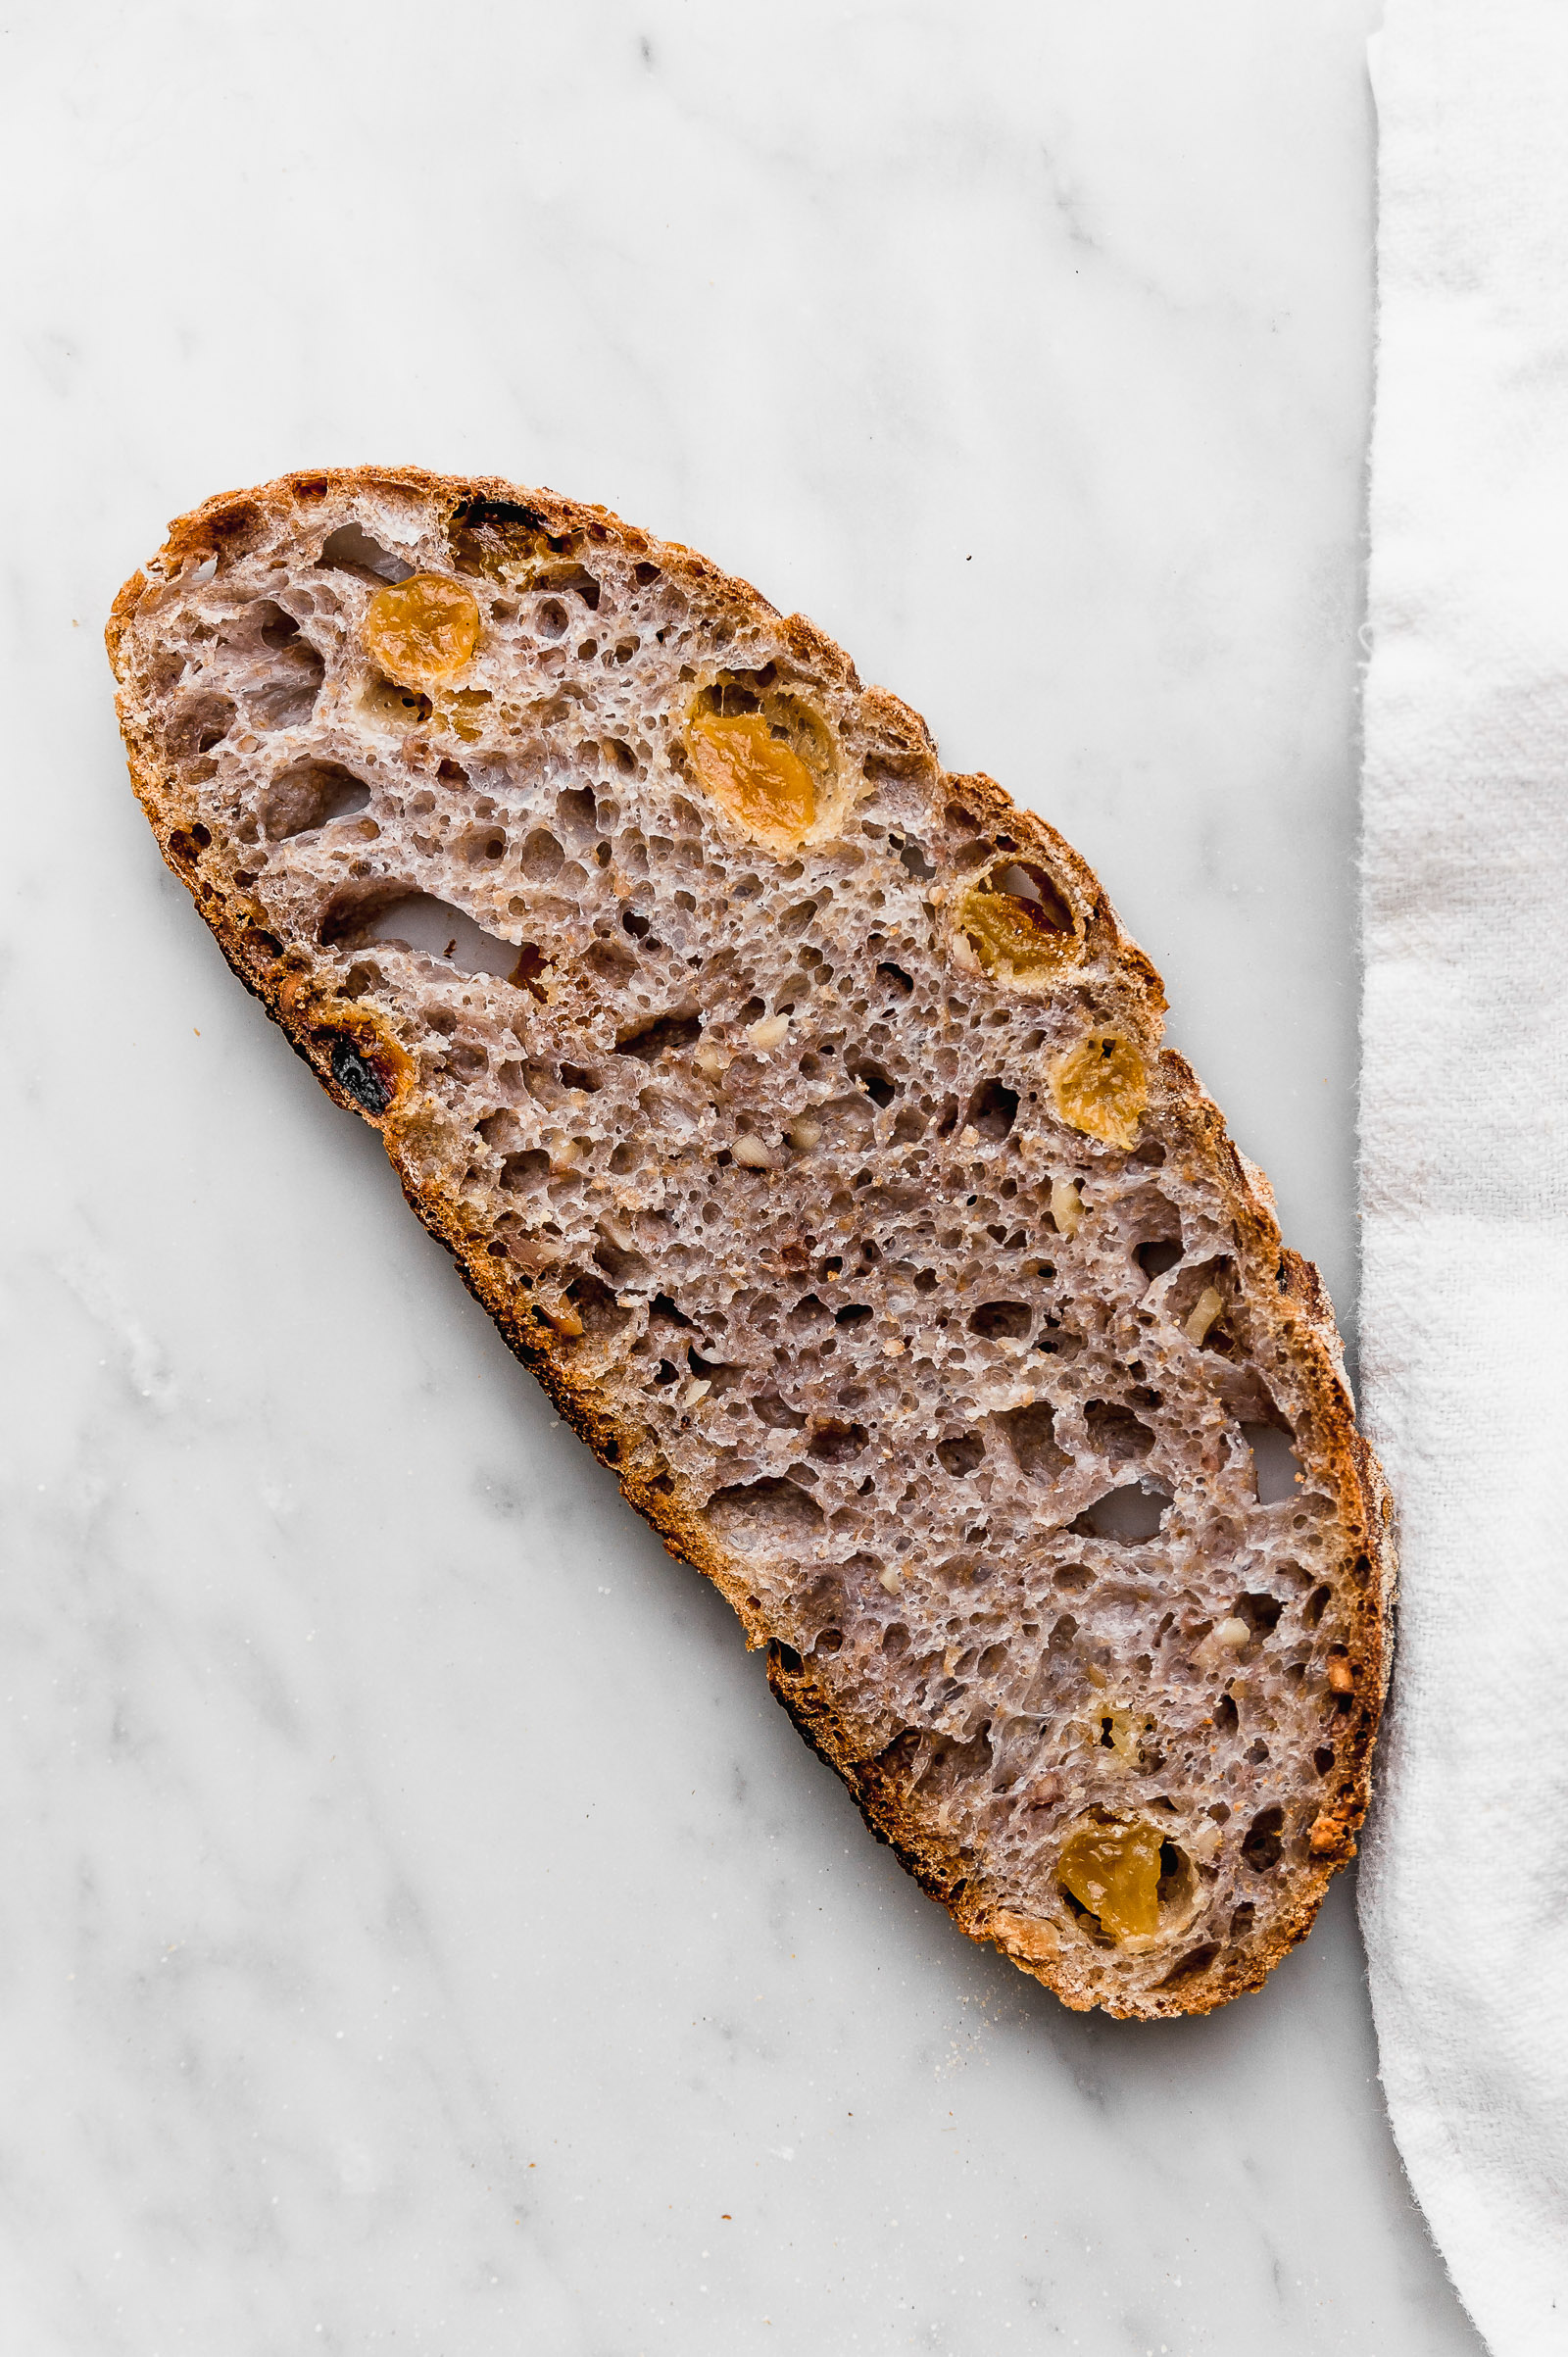
In this sourdough adventure I put myself in I’ve put myself in I’ve already made more than 20 loaves of bread. The first six were a mess and only two of them were edible, lol. I’m grasping it now though! This golden raisin and walnut sourdough bread with 20% wholegrain flour is the nicest I’ve made ever. I just had to share this recipe with you!
If you don’t have one yet you can check out my post on how to make a sourdough starter.
This recipe is based on my beginner’s sourdough bread recipe except that this one has 20% wholegrain flour. The more wholegrain flour you use the trickier it gets. That’s because wholegrain flour has less gluten and so you need to work the dough a bit more. In this case, it’s only 20% wholegrain so I only added a lamination to the process. I’ll explain what that is don’t worry ;).
LAMINATION
Lamination is done by dampening your work surface as well as your hands. Remember that everytime you’re handling the dough it helps to have wet hands so it doesn’t stick to them. To laminate the dough you stretch the dough on the surface until it’s really thin and square. As gluten has already developed at this point it should be pretty easy to stretch it carefully without it breaking. After it’s stretched you want to fold it in 3 to one side and then in the other direction. This is the only step that I do in this one that’s not in the beginner’s loaf.
NOW LET’S GO TO THE RECIPE

10:30AM – STEP 1: LEVAIN
In the morning when you go to feed your sourdough starter as usual take out the amount that we need for the levain first. The levain is the yeast mix that we’re going to use to make the bread. Use 50g of your active sourdough starter, 100g flour (it can be all purpose) and 100ml water that’s lukewarm. The fact that the water is lukewarm will help us speed up the process of the levain getting to its peak of activity. It will take 4-5 hours to get to get to that point. Just in case you’re wondering the time is just a reference, adjust according to your schedule.
11:30AM – STEP 2: AUTOLYSE
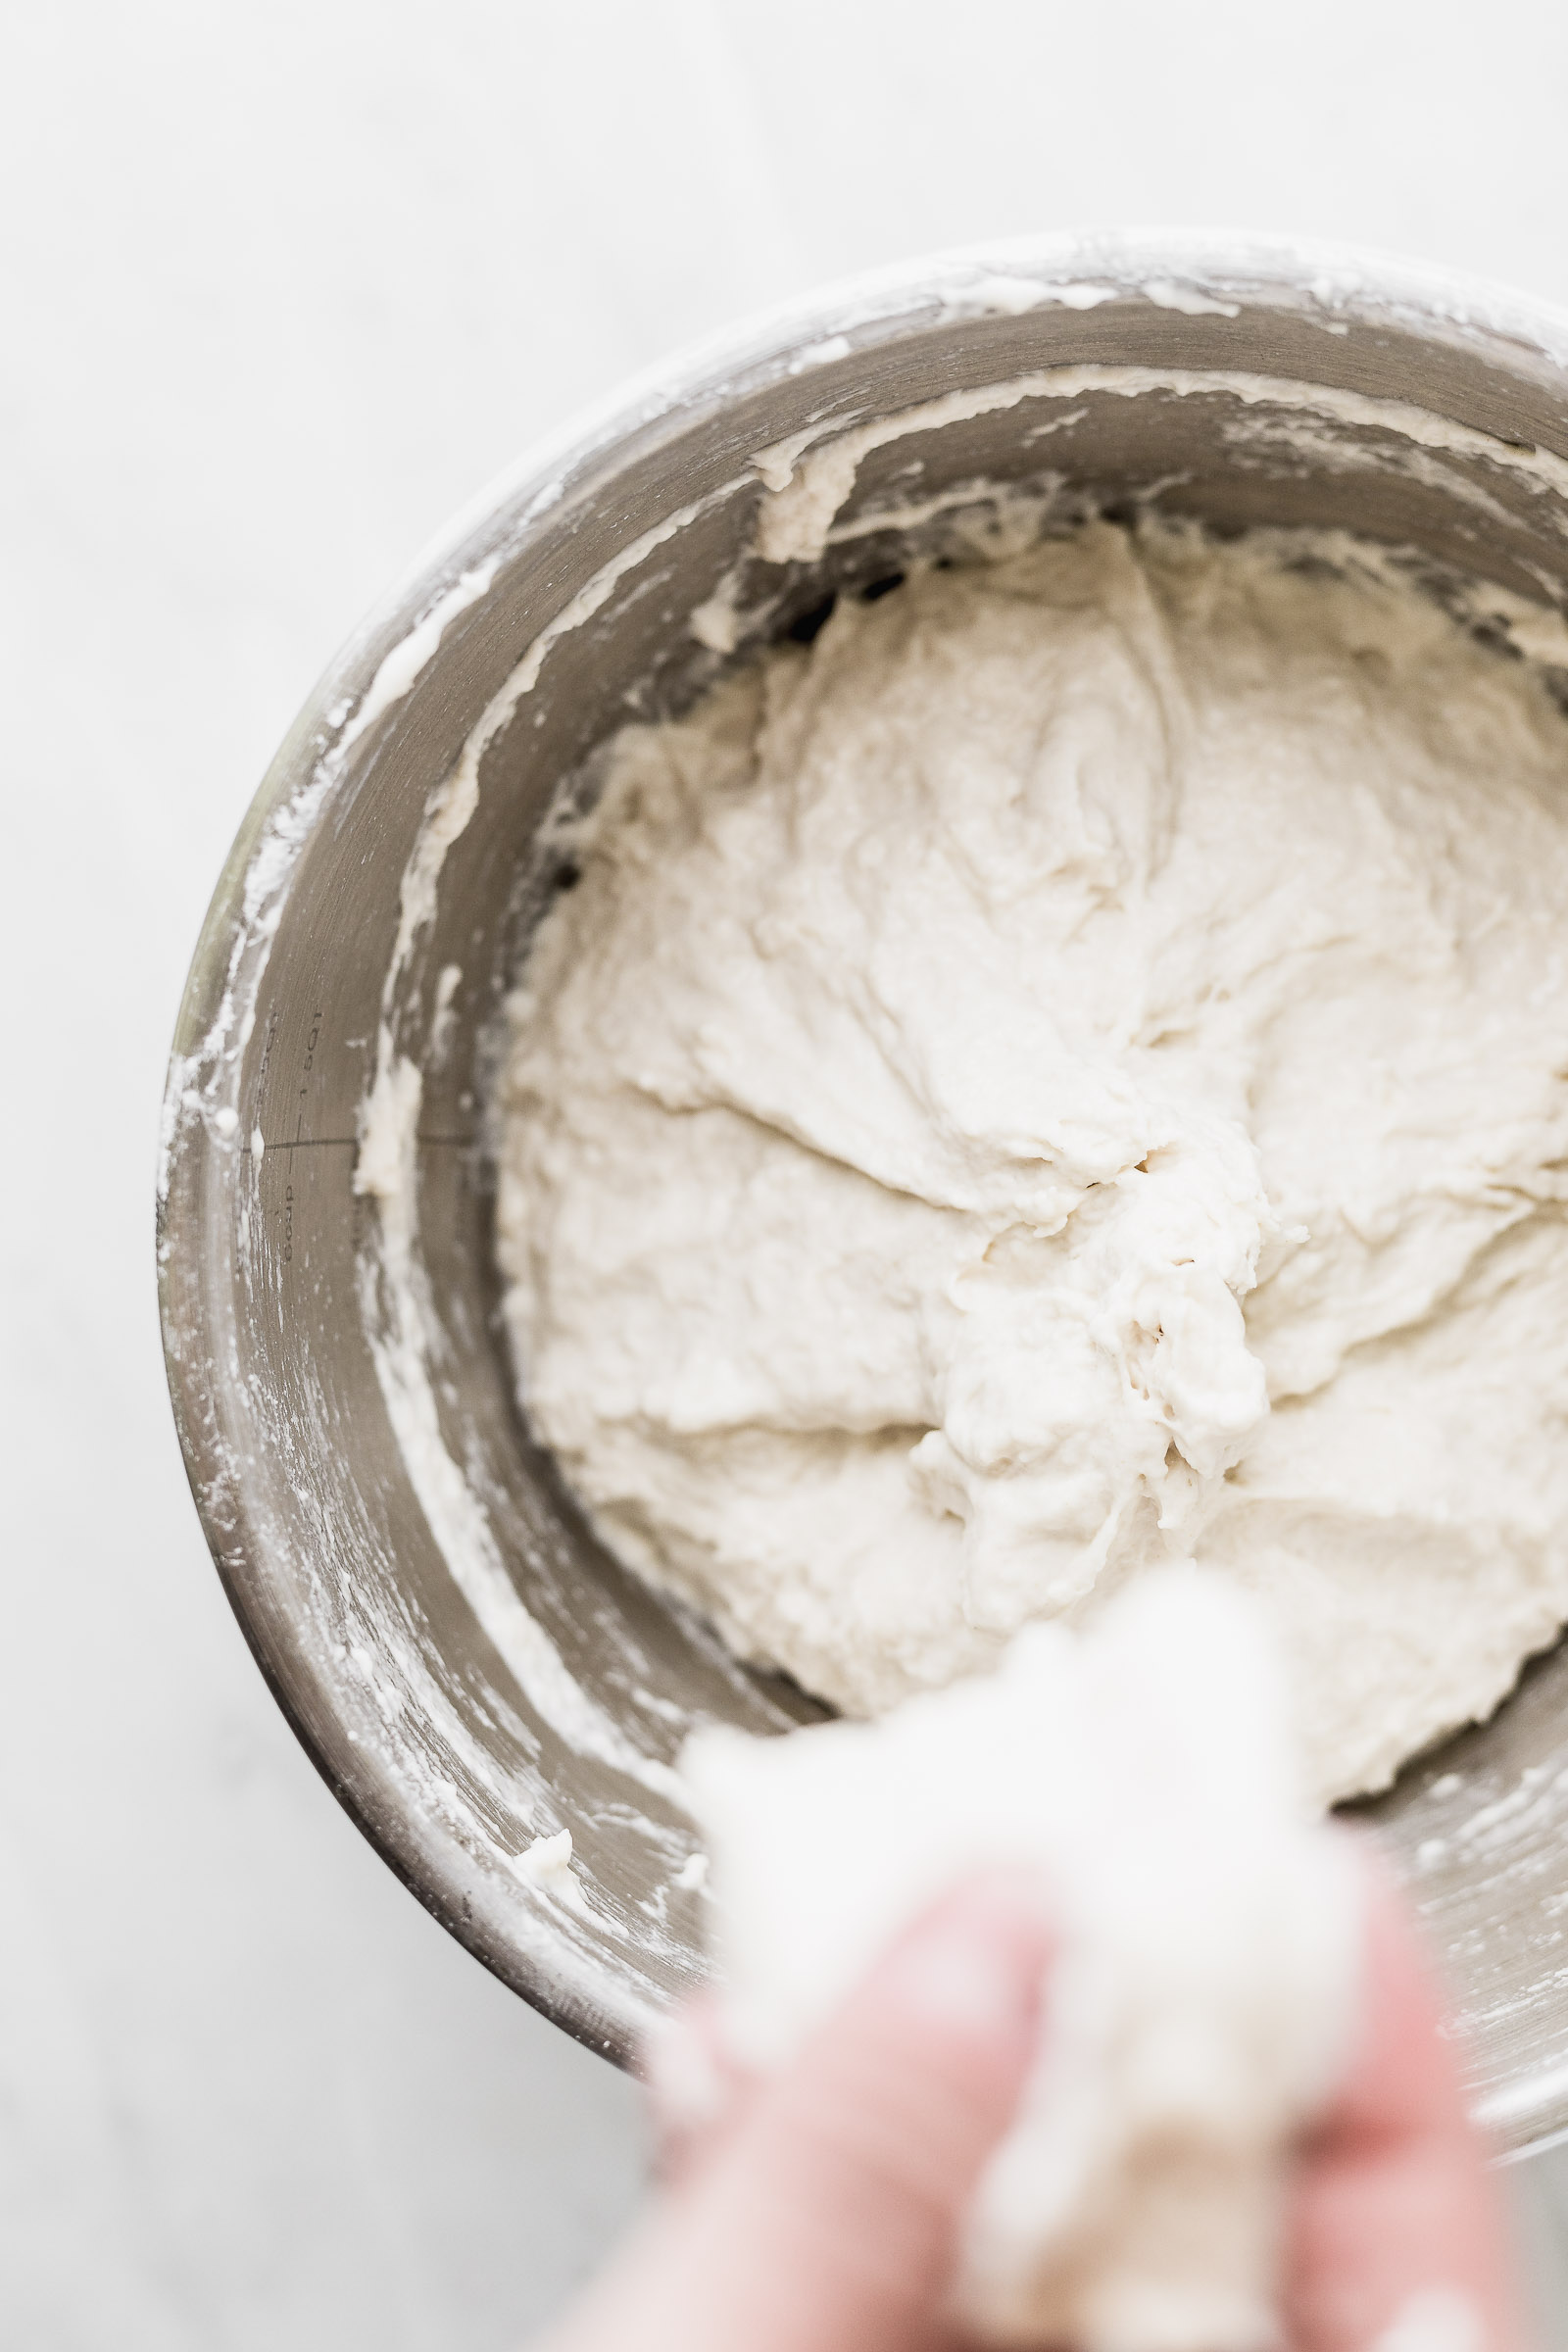
Autolyse is the process in which the flour will absorb the water in the dough. At the same time the gluten will start to develop and gain elasticity. Place 250g of strong flour / bread flour and 60g wholegrain flour in a bowl along with 210g lukewarm water and mix throughly. The best for this is to use your hands even if that means your hands end up being a goopy mess. Make sure that there are no pieces of flour without mixing. Once mixed it will autolyse for all the time that’s left for the levain to increase activity to its peak (3 to 4 hours). During this whole time the mix needs to be covered using plastic. I have a plastic bag I close with an elastic band that I use exclusively for this purpose and reuse it every time. Another good option is to use a shower cap and the last resort would be cling film. It’s important that the plastic does not touch the surface of the dough.
From the photos above, the one on the left was taken before autolyse, right after mixing the flour and water. I pulled on it and it broke immediately. After autolyze you can see on the photograph at the right that the mixx changed COMPLETELY. It’s much more elastic. Every time you want to touch the dough to make a test like this you want to wet it first.
2:30PM – STEP 3: MIX IN THE LEVAIN
If after 4 hours your levain is super active then you’re ready to mix it in. If not, you want to wait a bit longer. Add 60g of the levain to your dough. Again I recommend that you use your hands to do this. It’s easier if your hands are slightly wet. This will take 3-5min. Once mixed in cover the dough again.

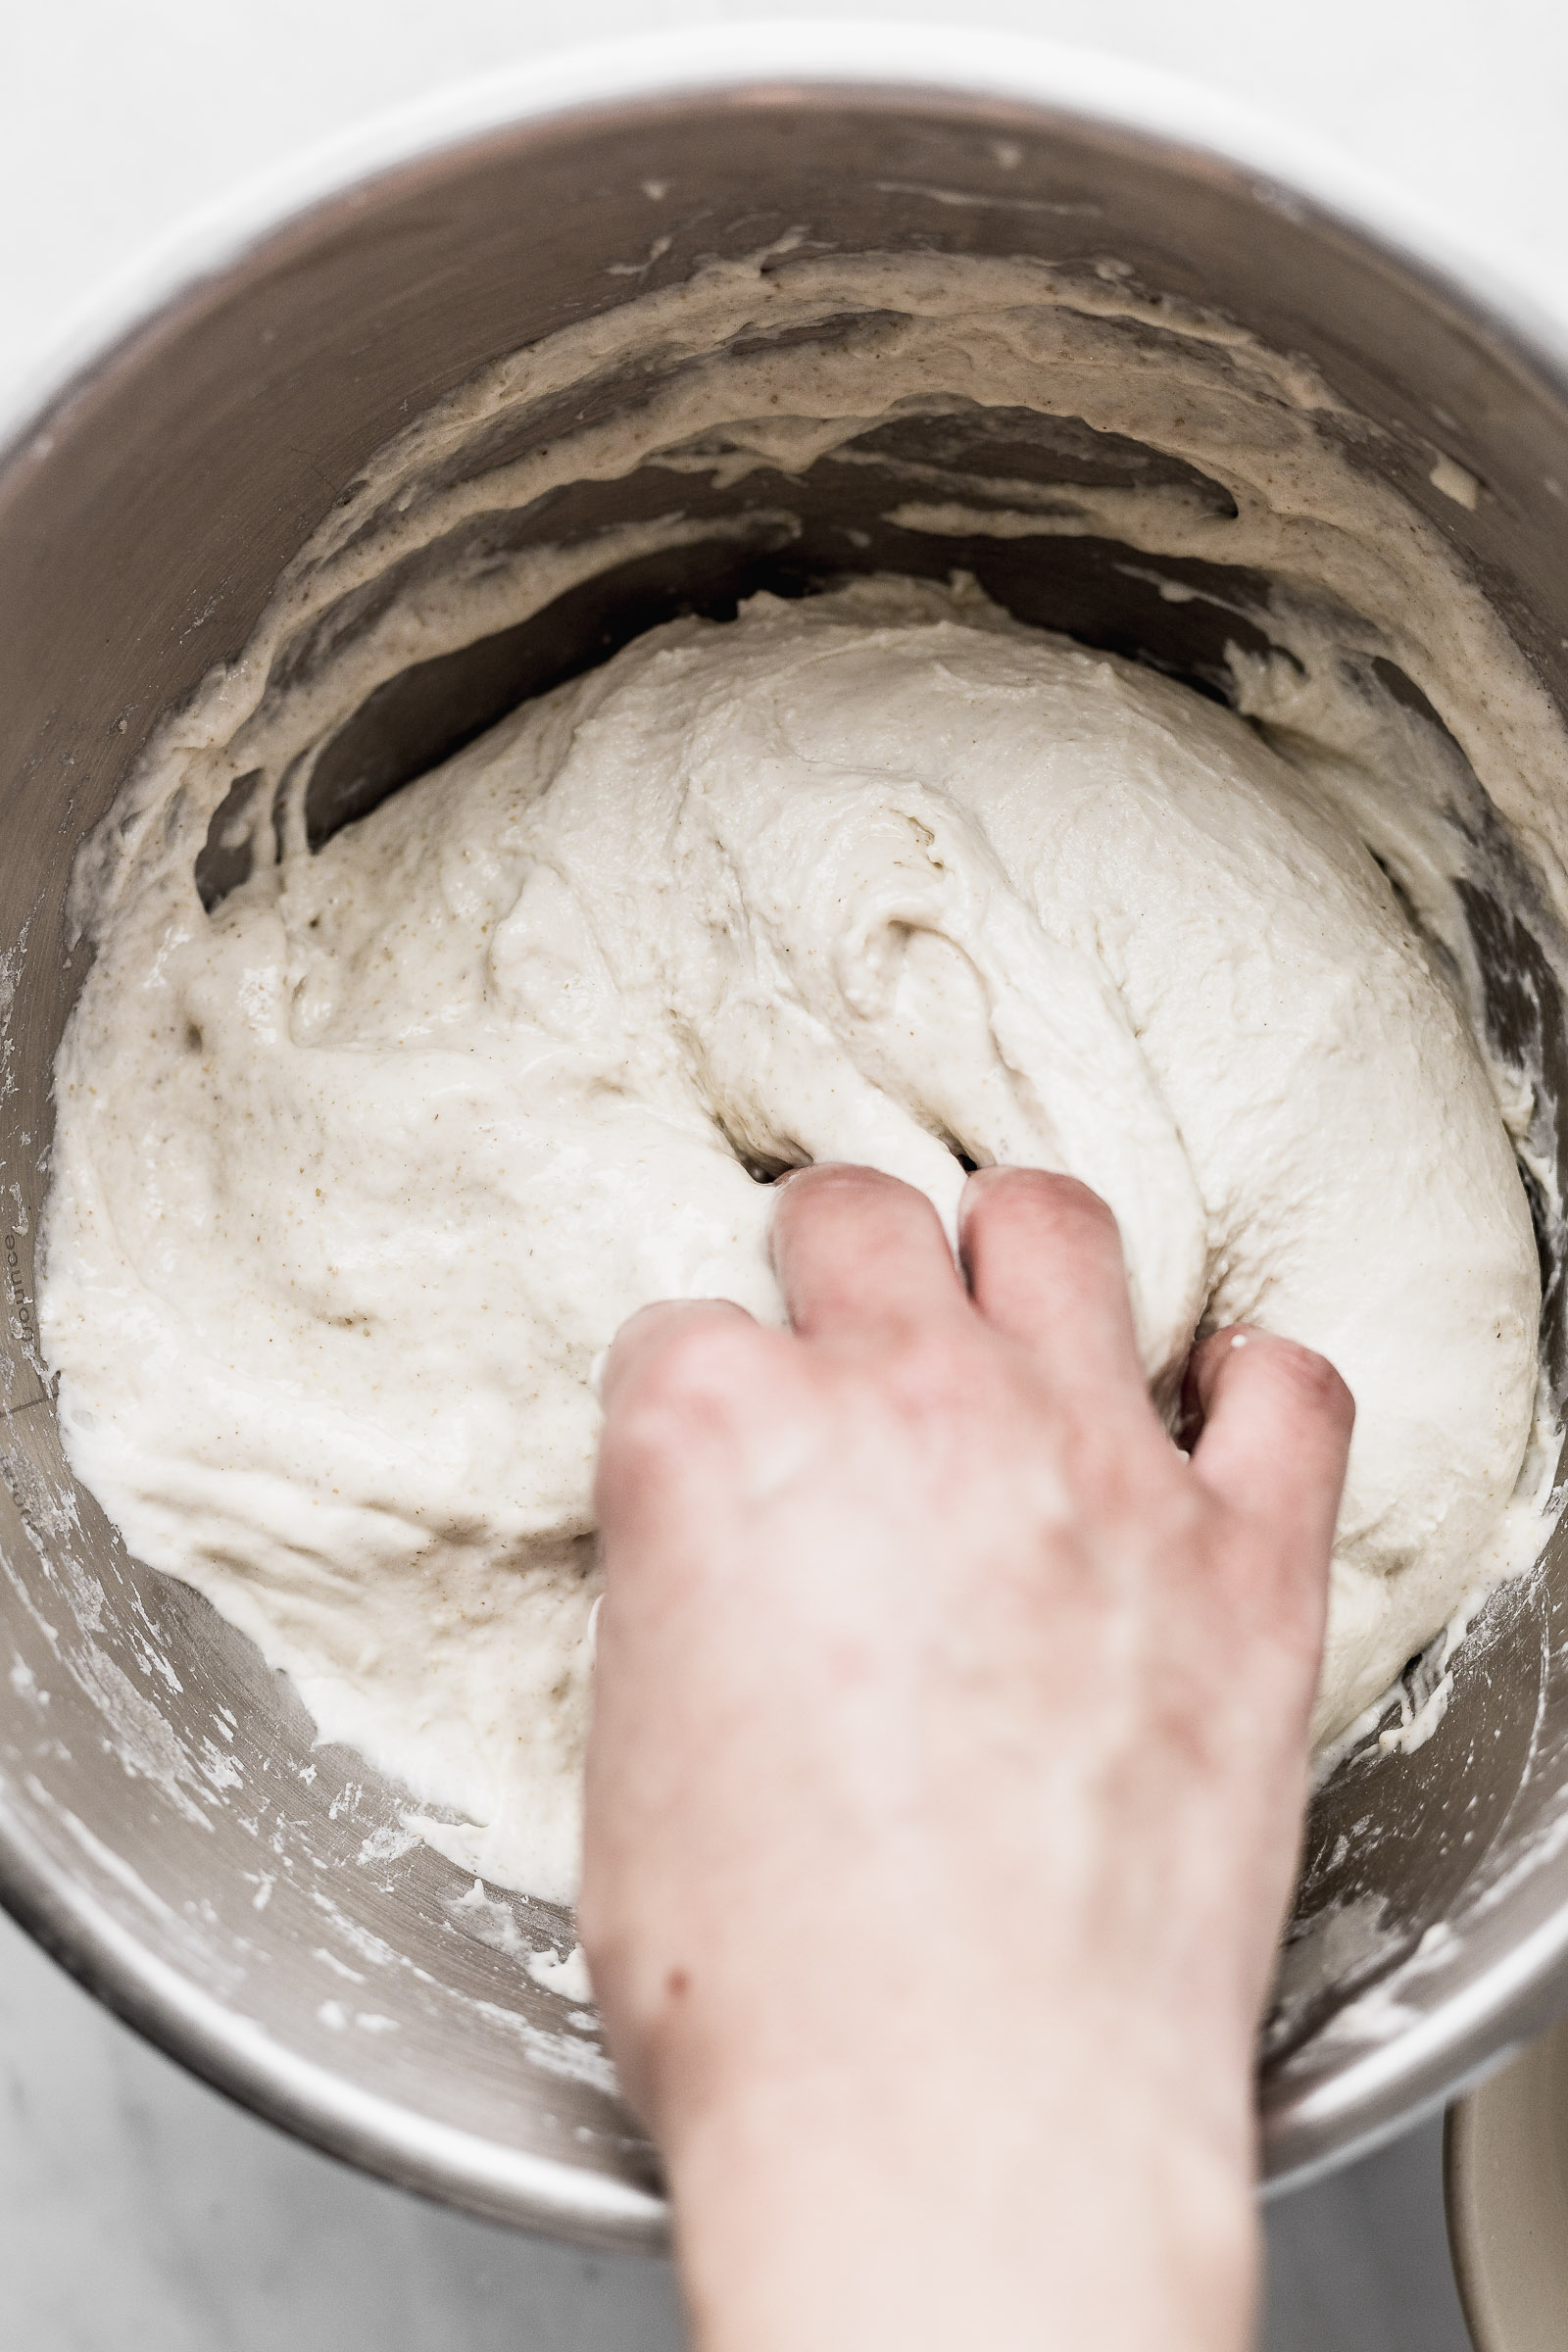
3PM – STEP 4: MIX THE SALT
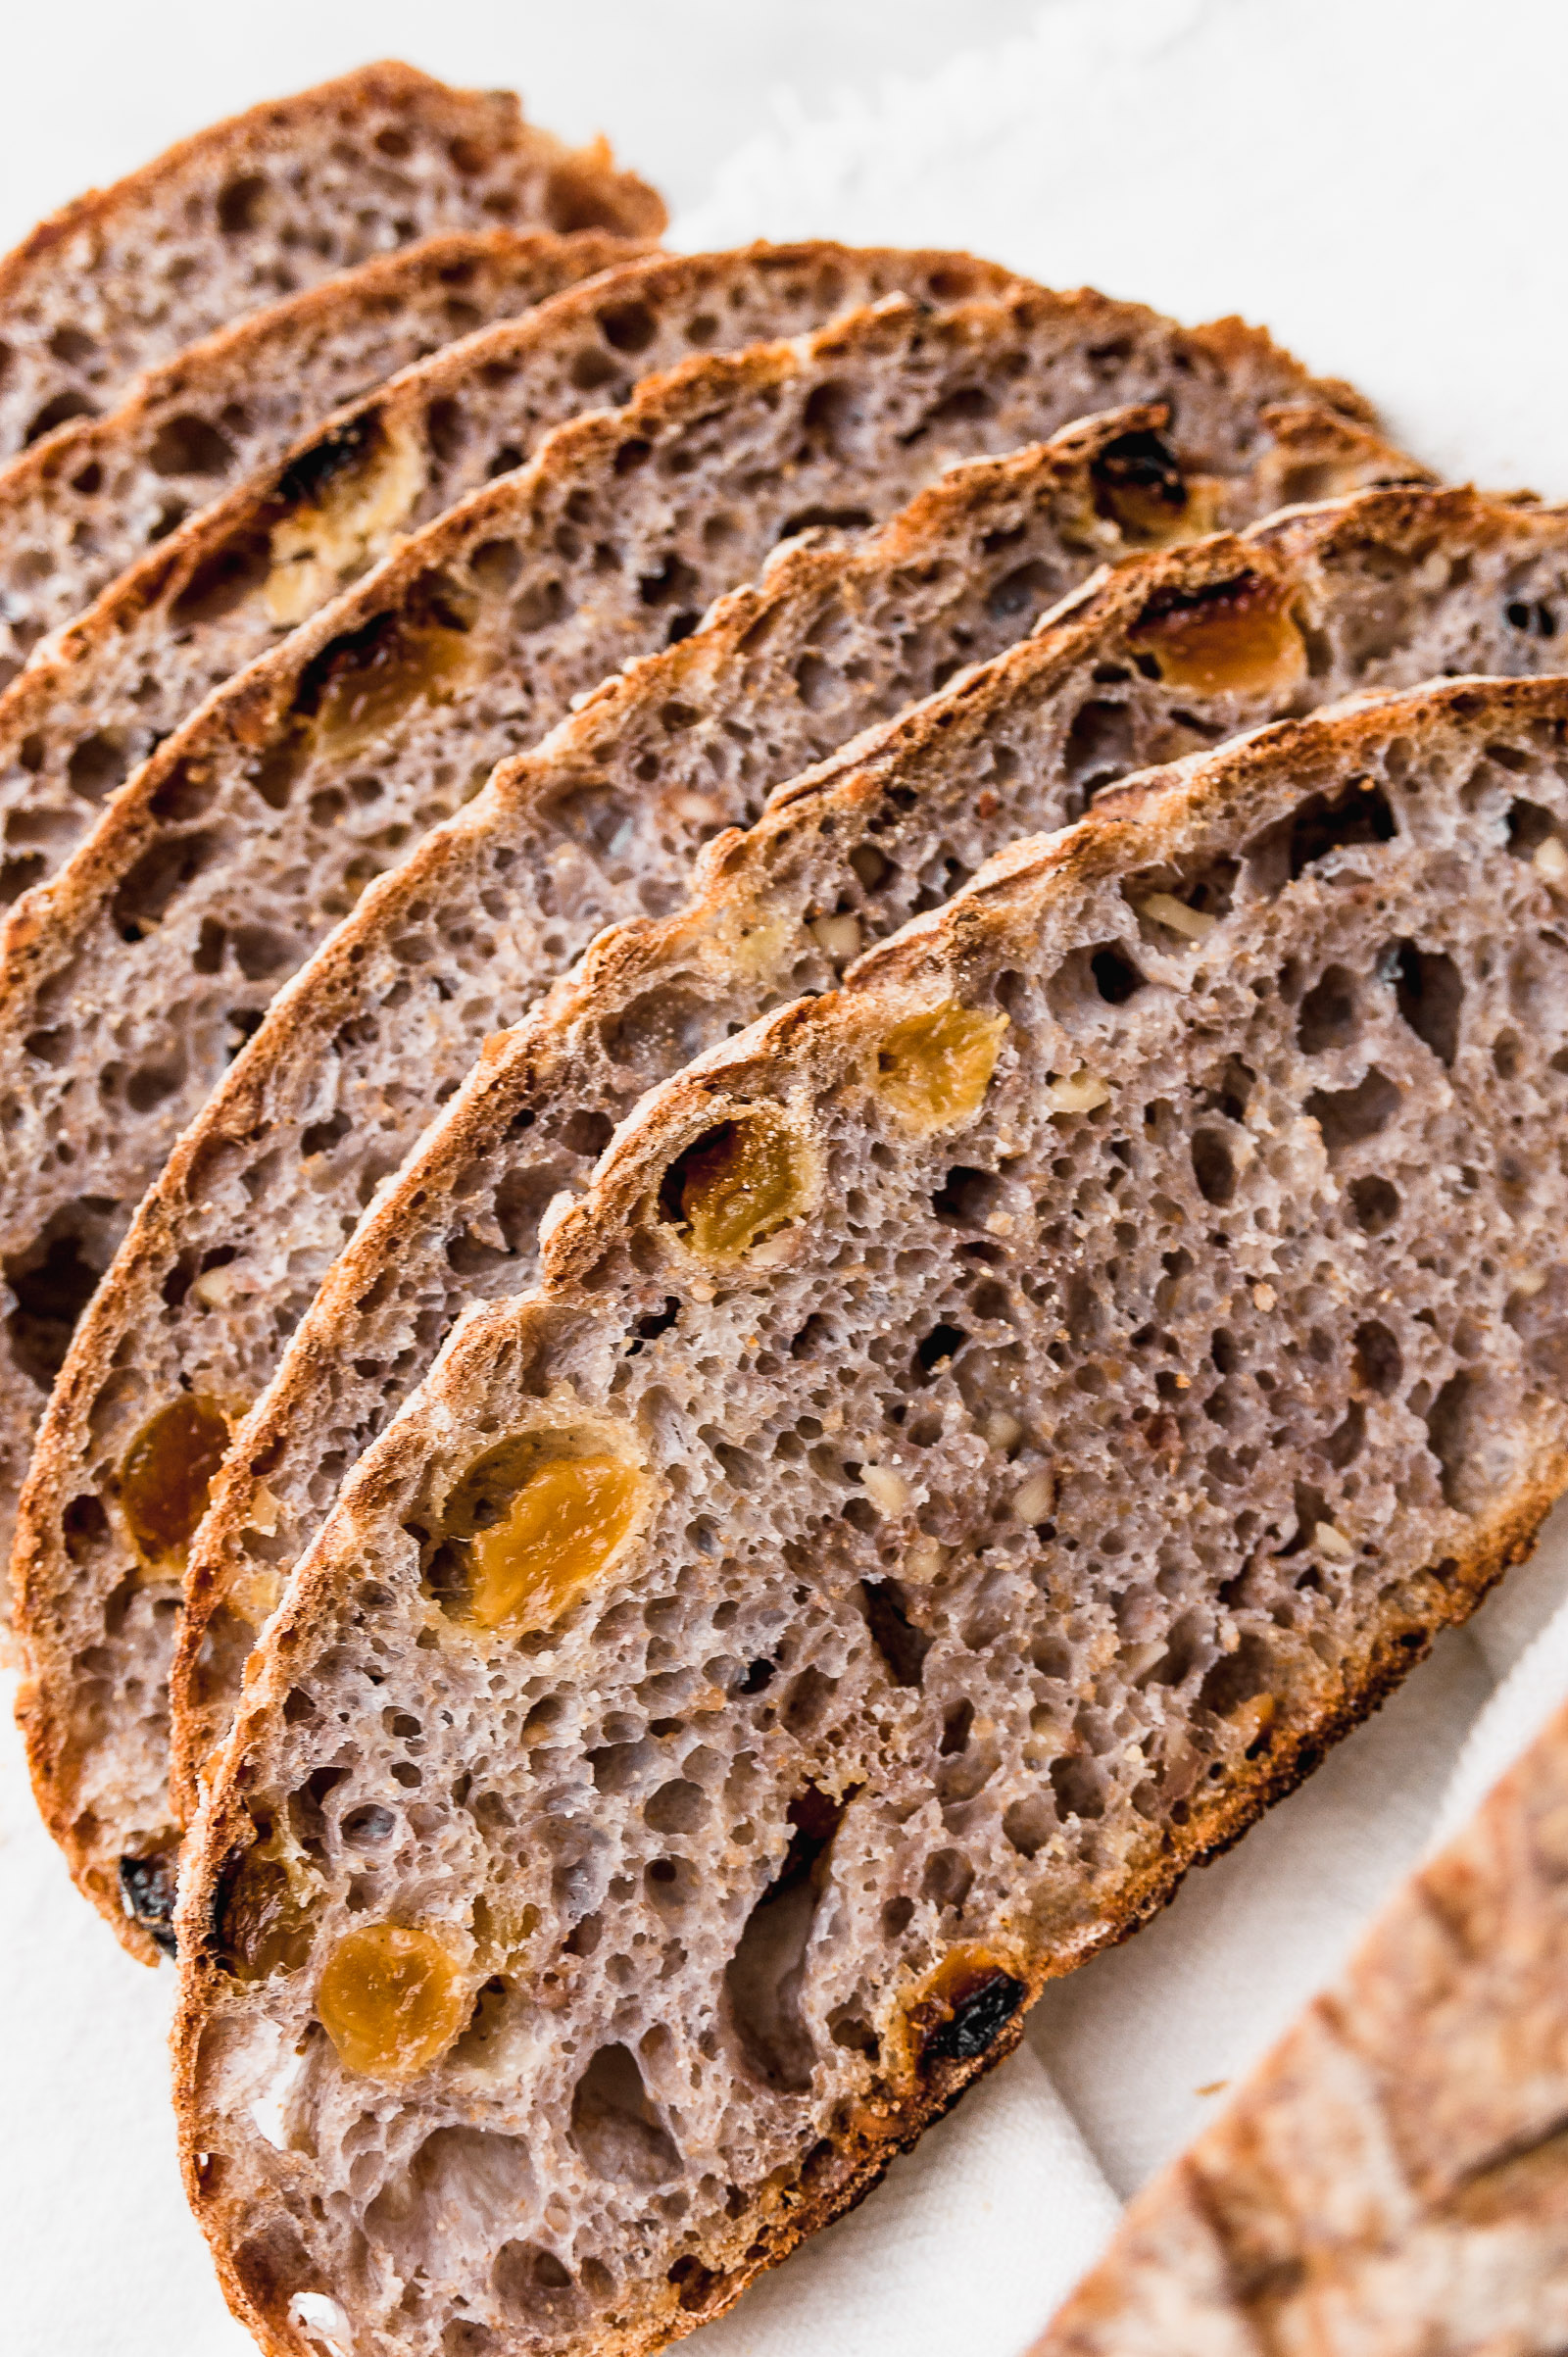
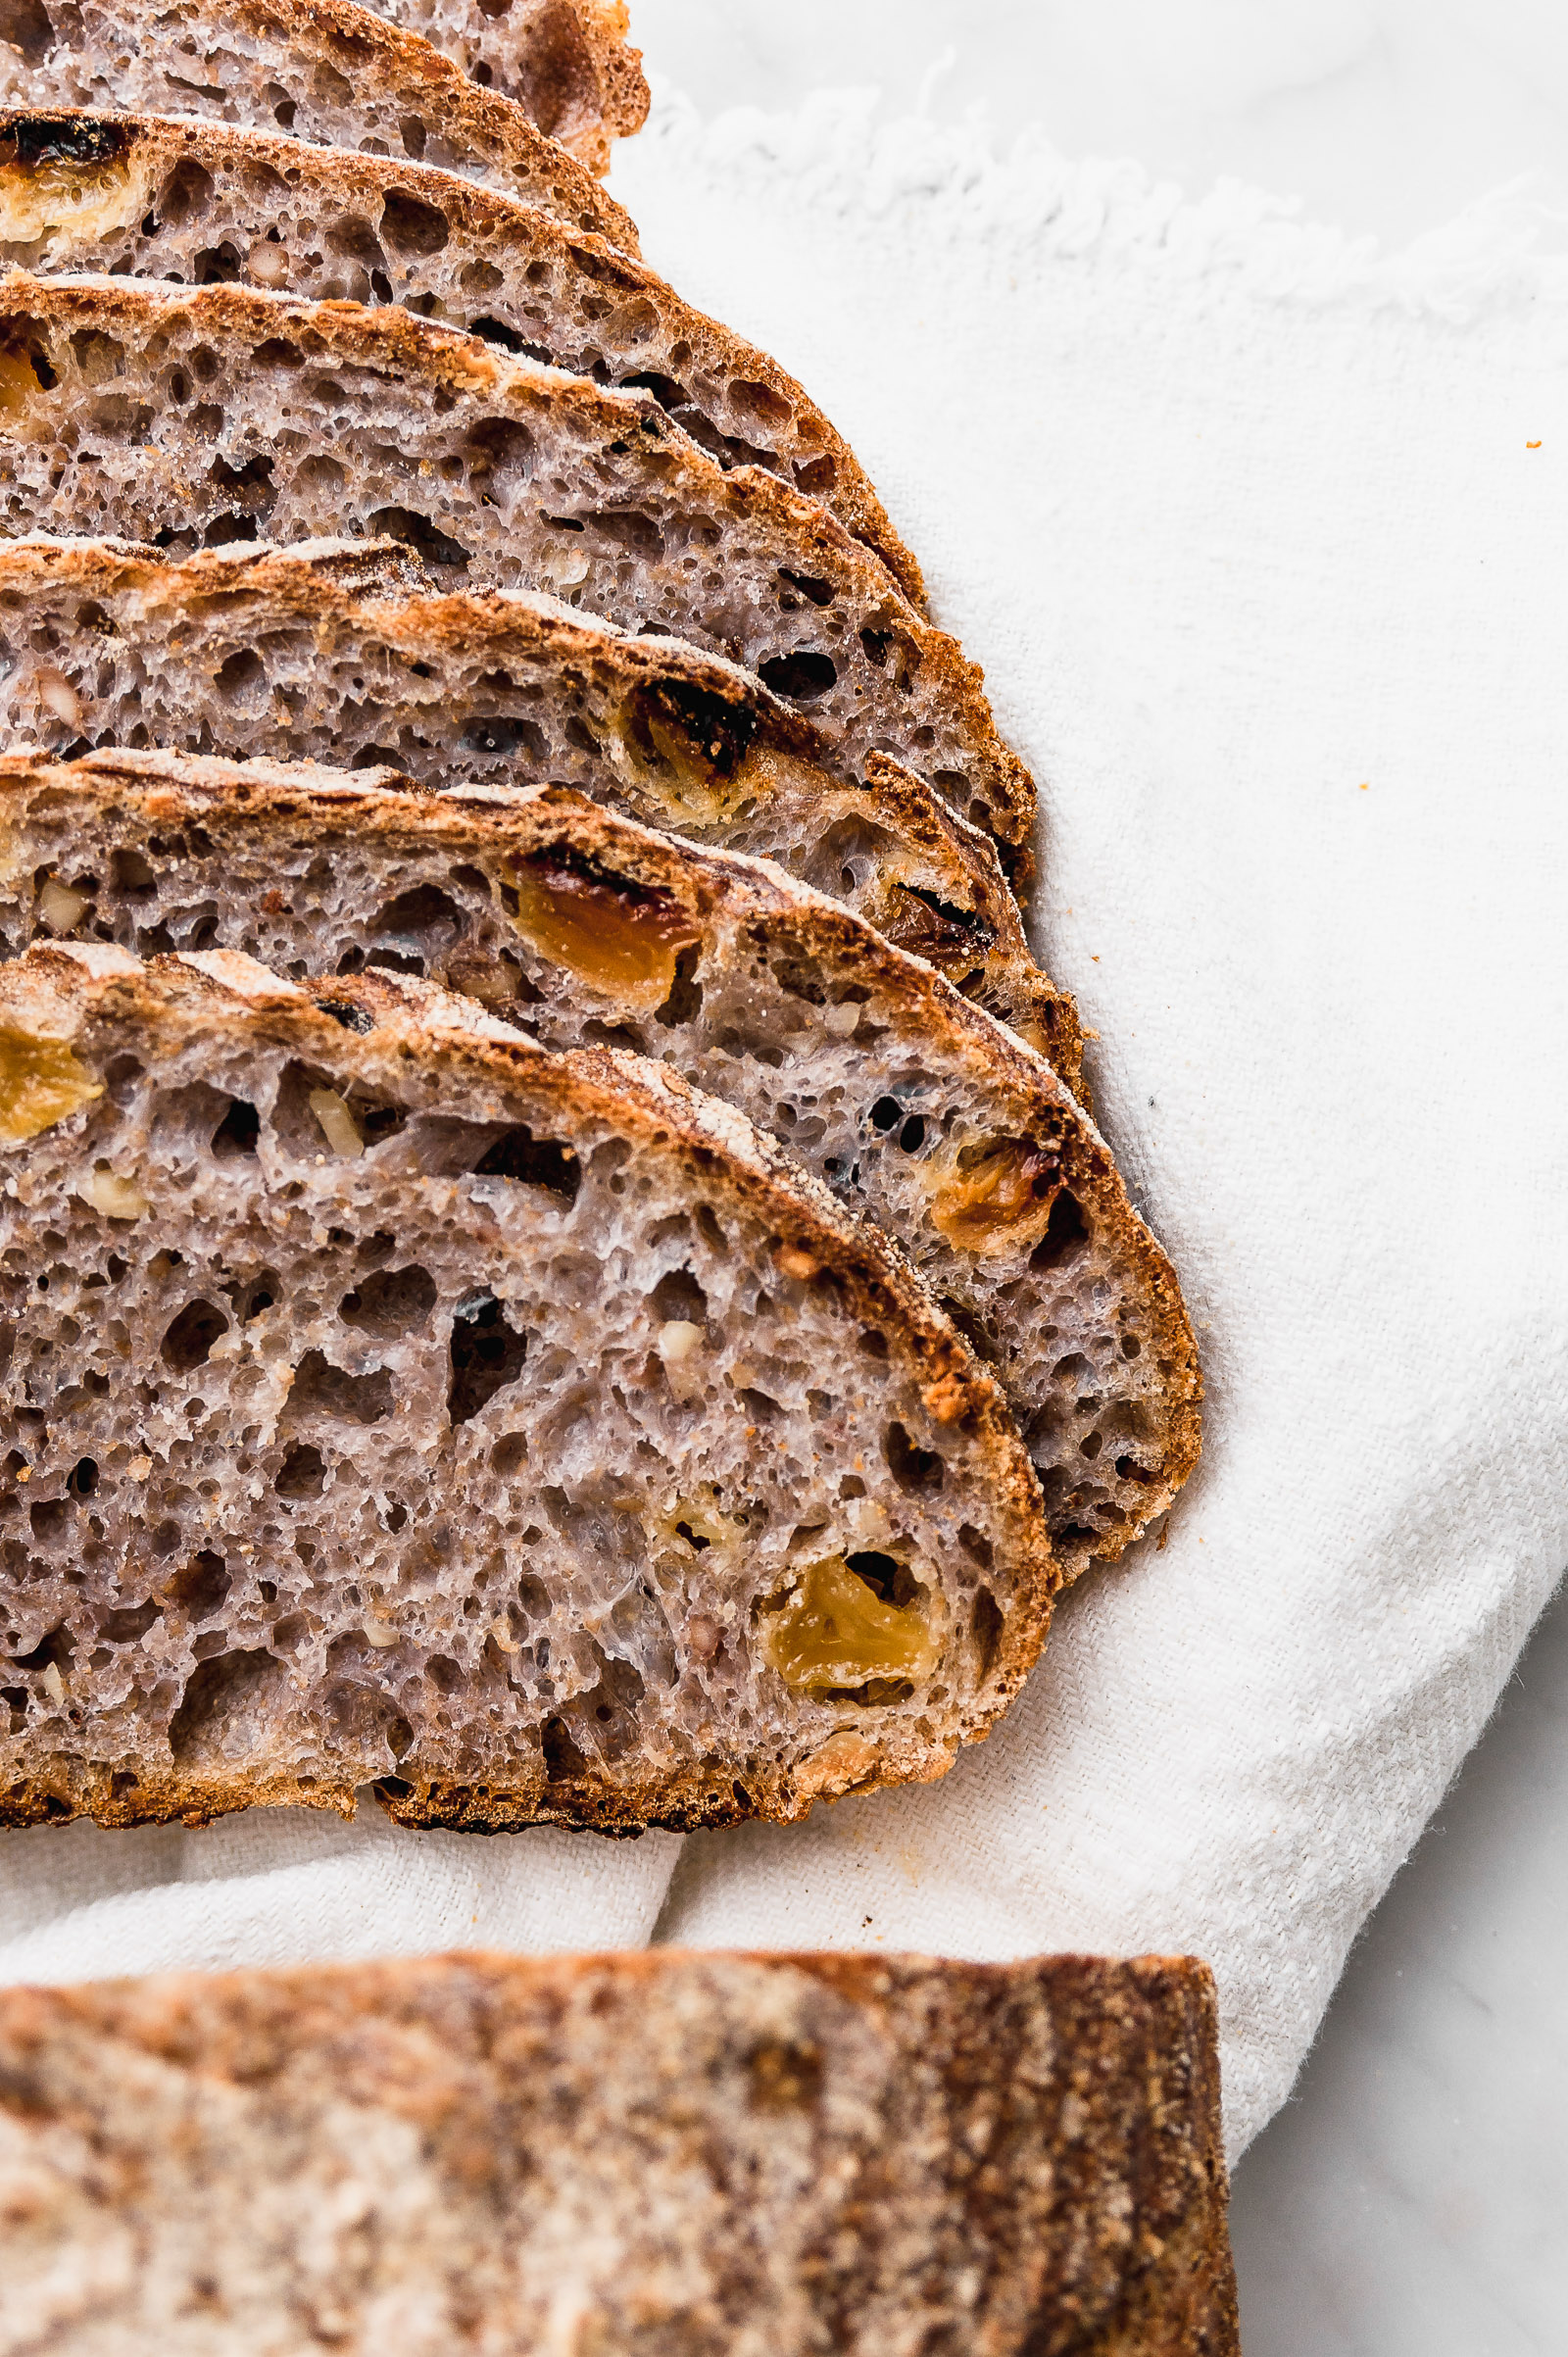
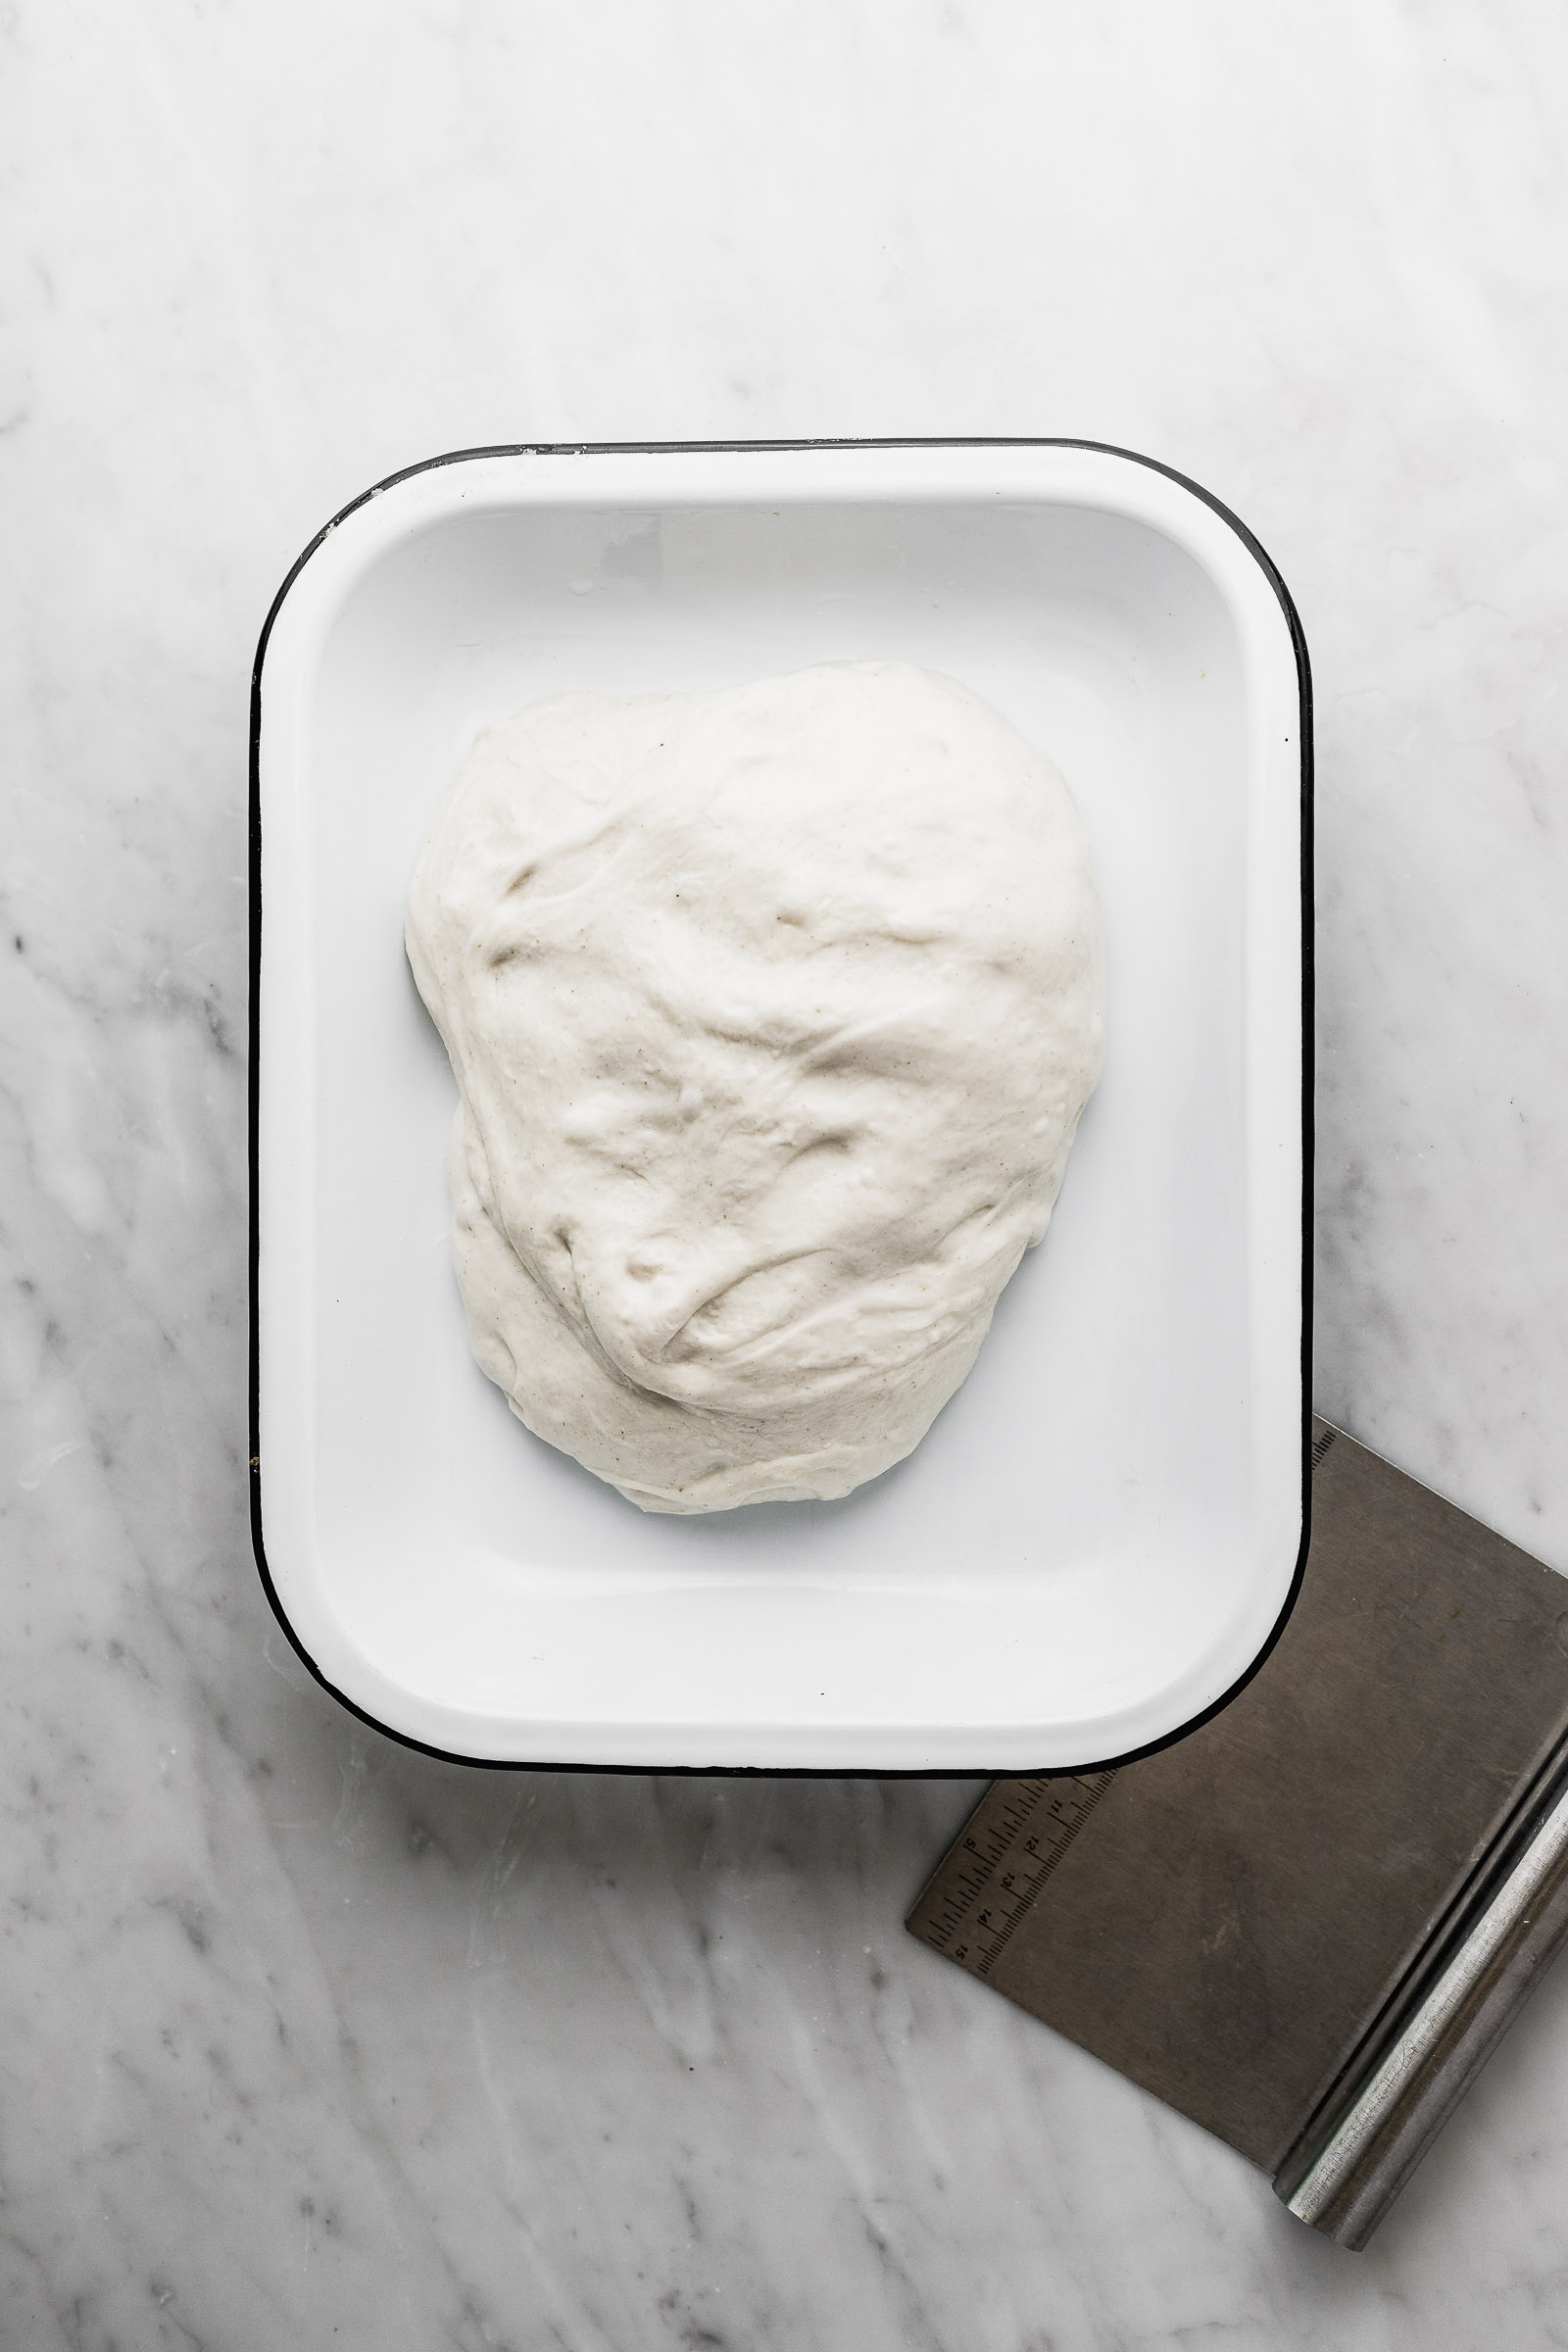
We don’t add the salt directly with the levain because they don’t get along very well. Dust 6g of salt on the dough and mix throughly with your wet hands. At this point you also want to add 50g of golden raisins (previously hydrated in boiling water if too hard) and 50g chopped walnuts. This will take 3-5min once again. You won’t see the raisins and walnuts in the next few process photos as they are from the beginner’s loaf. When it’s nicely mixed it goes into a pyrex type horizontal dish or fresh bowl that needs to be dampened previously so it doesn’t stick. Cover again and it needs to rest 30min in a warm place. I put it inside my turned off oven with the light on.
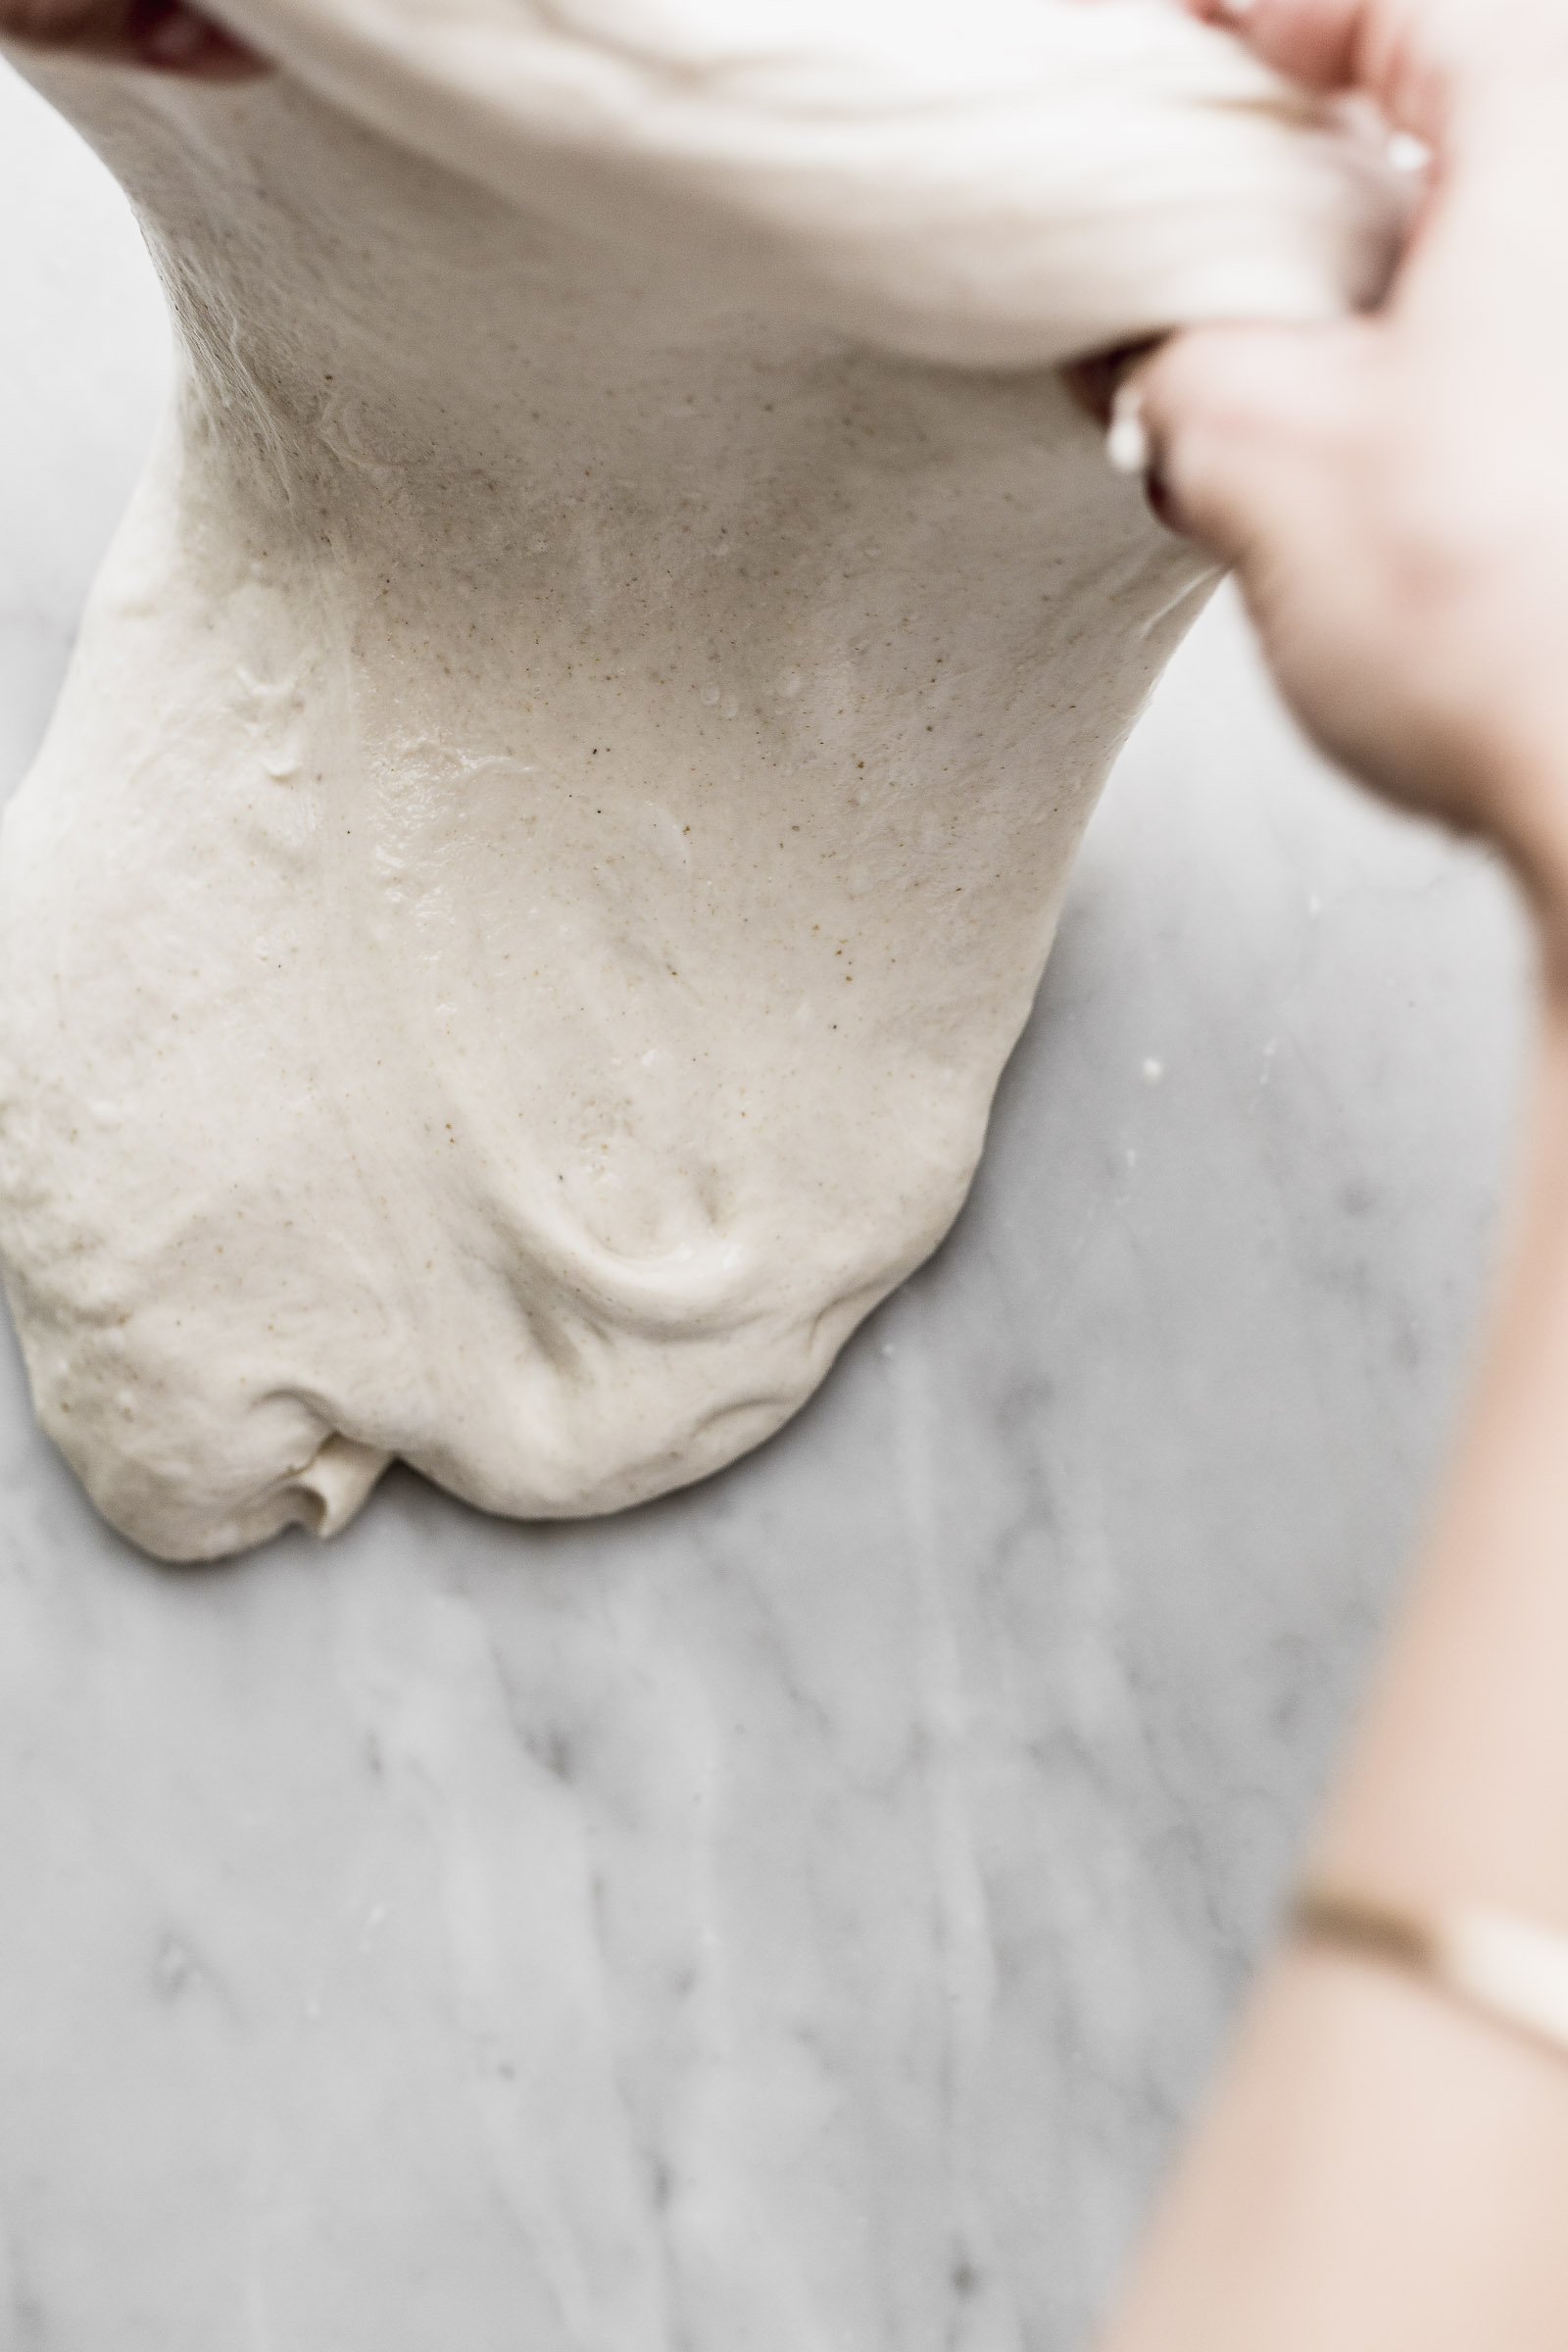
3:30PM – STEP 5: LAMINATION (this is the step that’s different from the beginner’s one)
Moisten your work surface as well as your hands. Place the dough on the surface and start to stretch is carefully until it’s nice a thin. It doesn’t matter if it breaks a little. Fold the dough in three vertically and then again horizontally. Now it goes back to its resting place covered.
4PM, 4:30PM, 5PM, 5:30PM – STEP 6: FOLDING
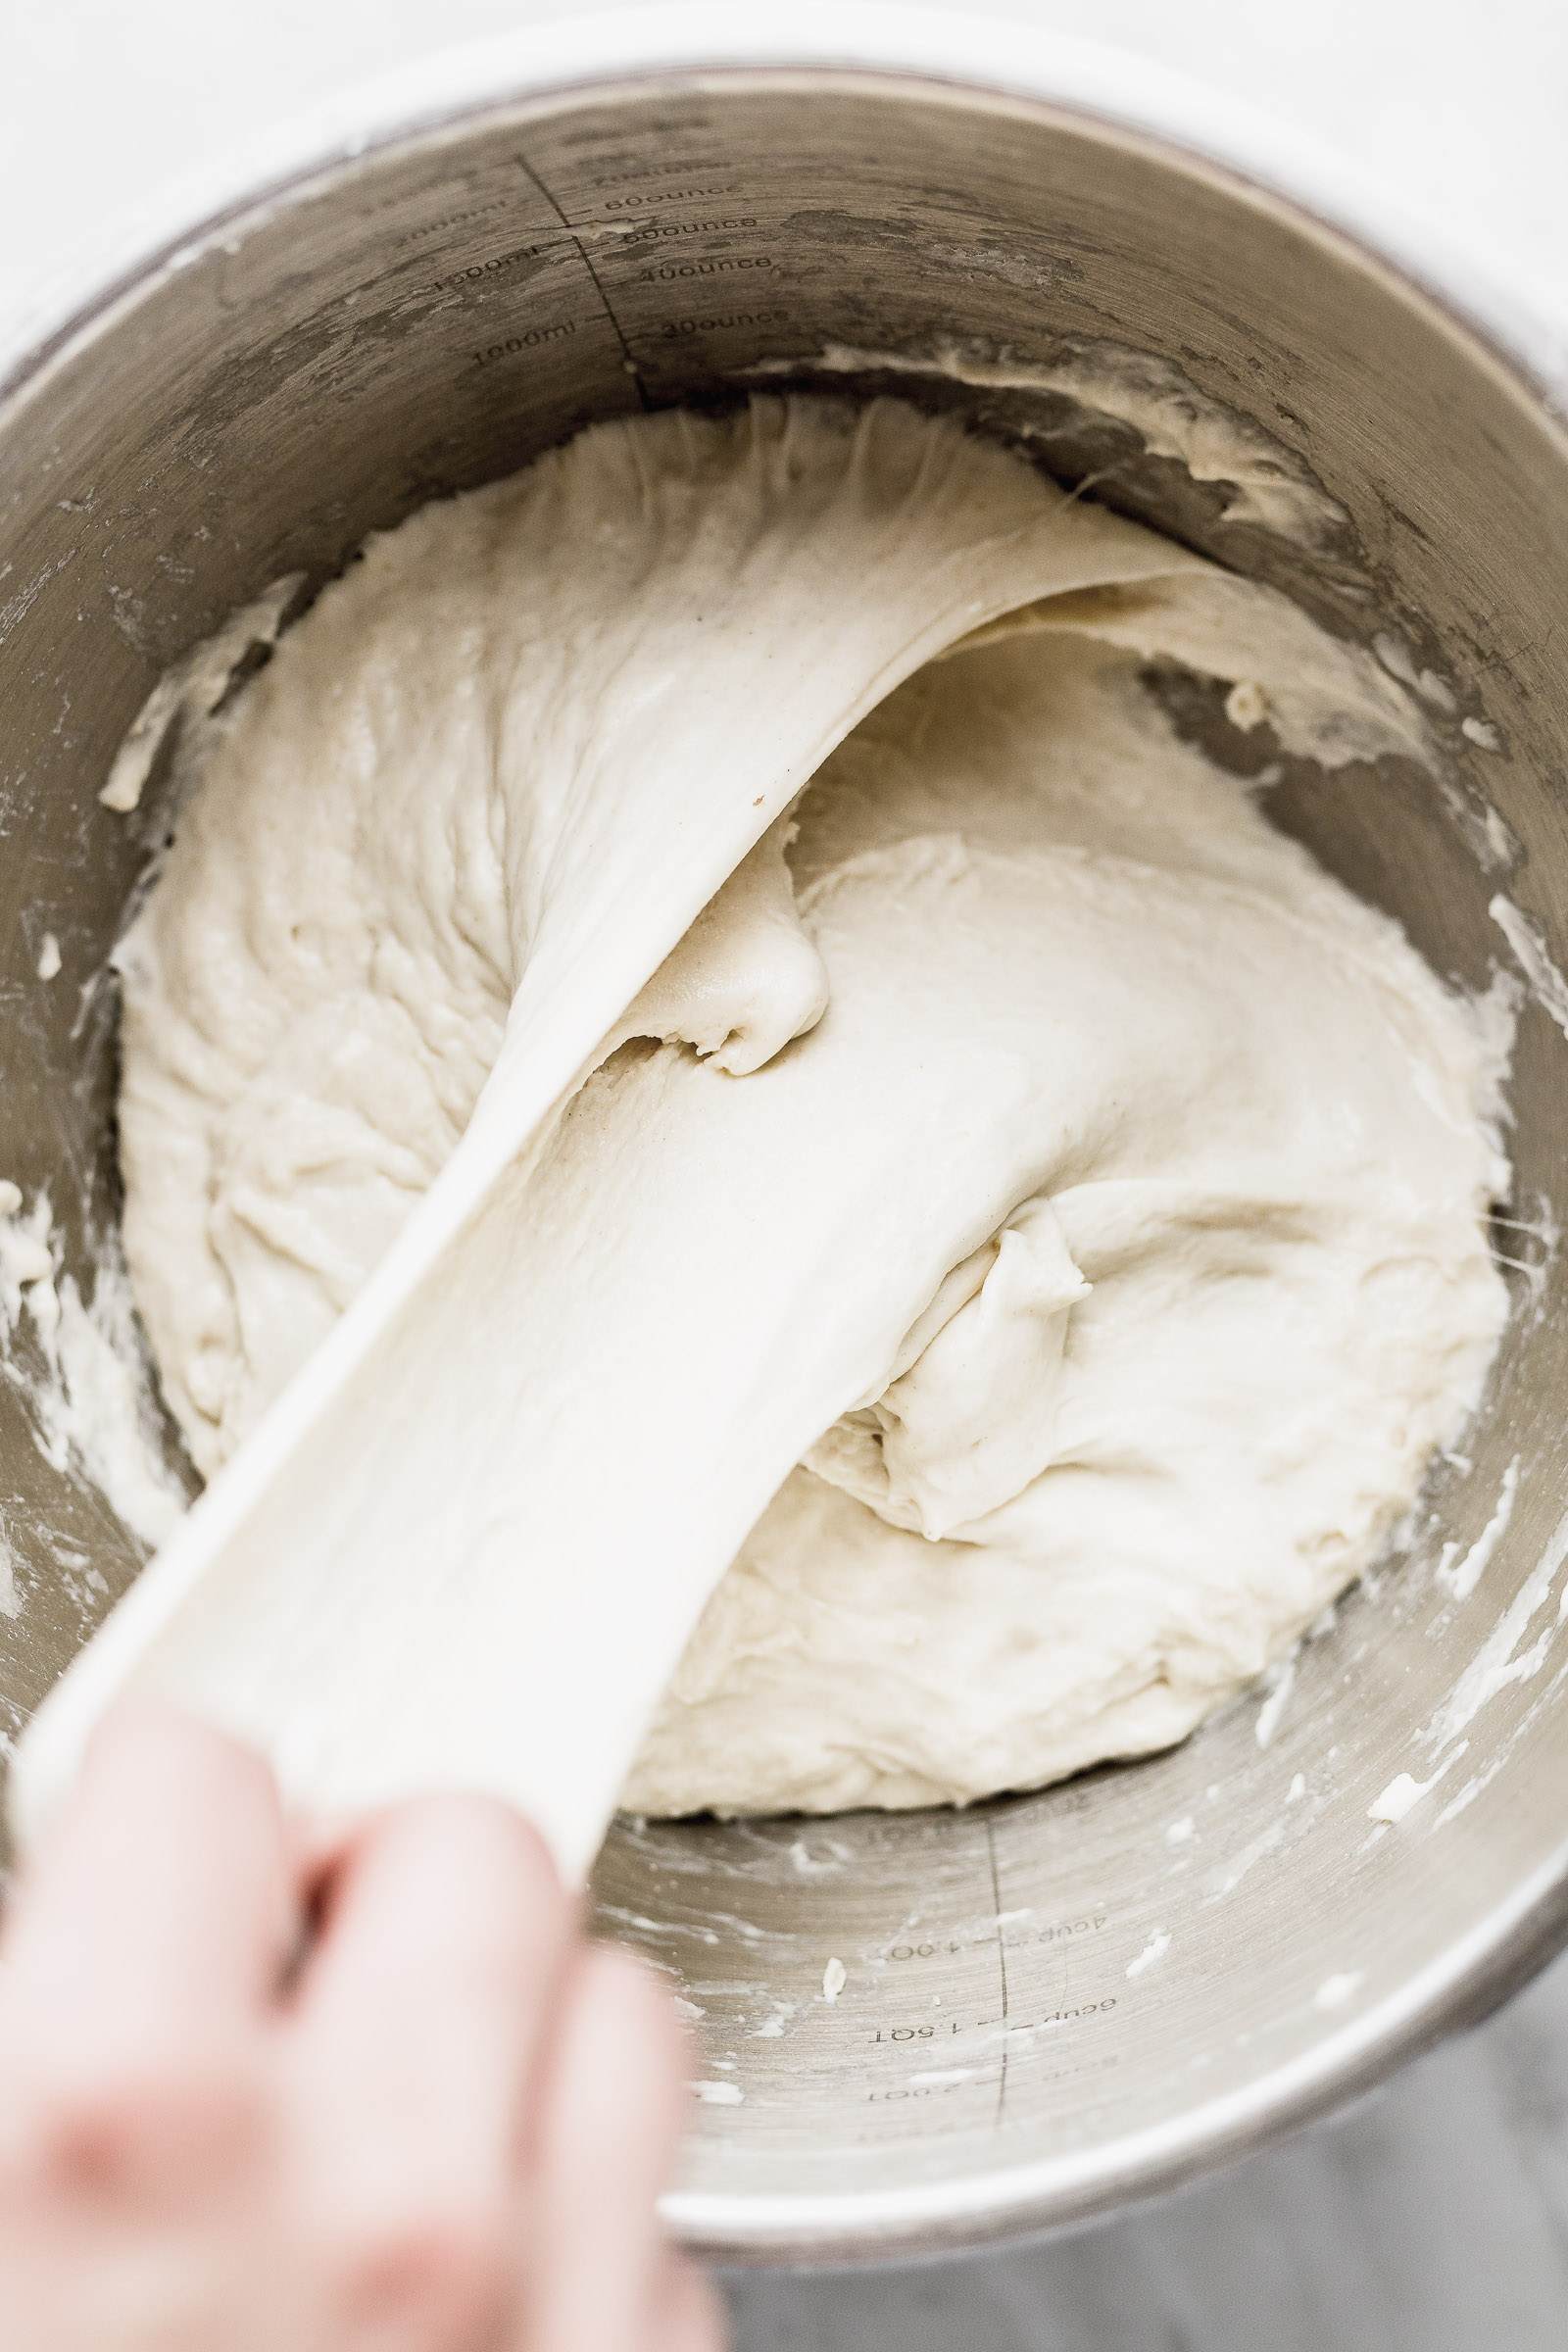
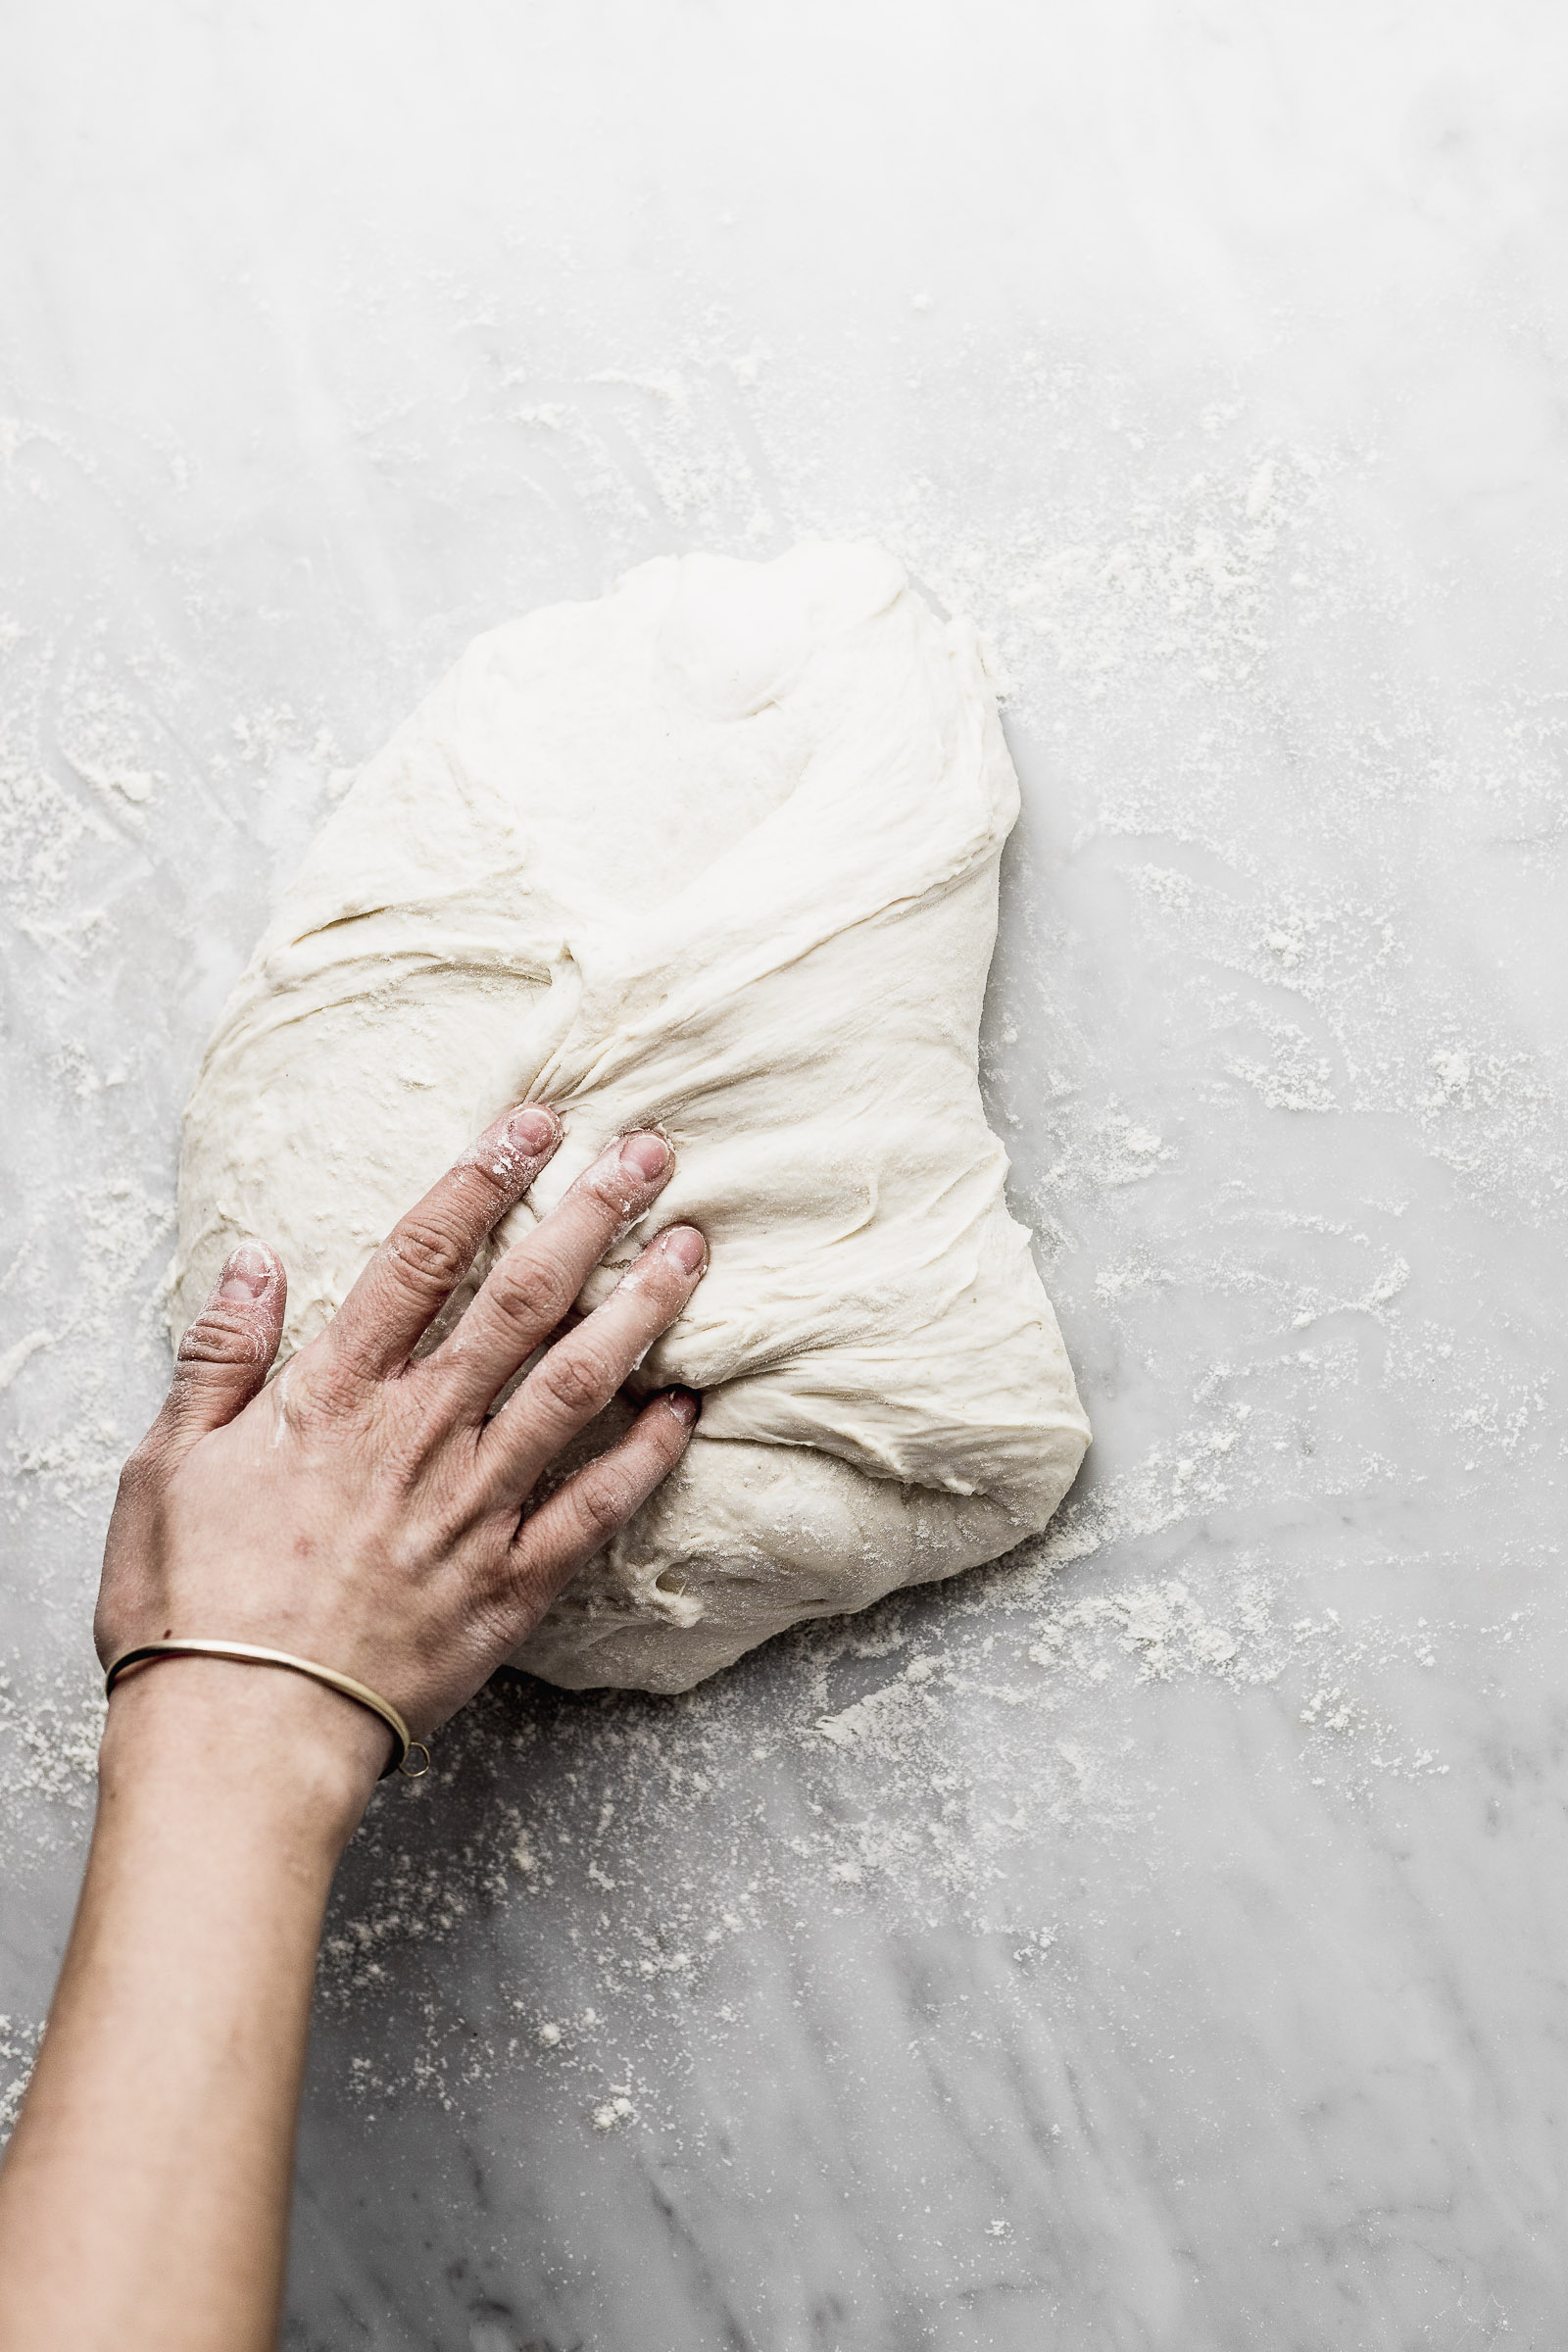
We need to stregthen our dough and that’s why we’re going to preform a series of foldings to develop more the gluten. Remove the dough from its resting place using your damp hands and place it on a surface with a bit of water. Pull on the dough with both your hands as much as you can and fold it in half. Repeat this process on all 4 sides as if it were a square. When you’re done the 4 folds return the dough to its container and cover it. Return it to its warm place once again. In this process you might start to find a few bubbles, make sure to pop the largest ones. You need to repeat this process 3 more times (4 in total) every 30 minutes.
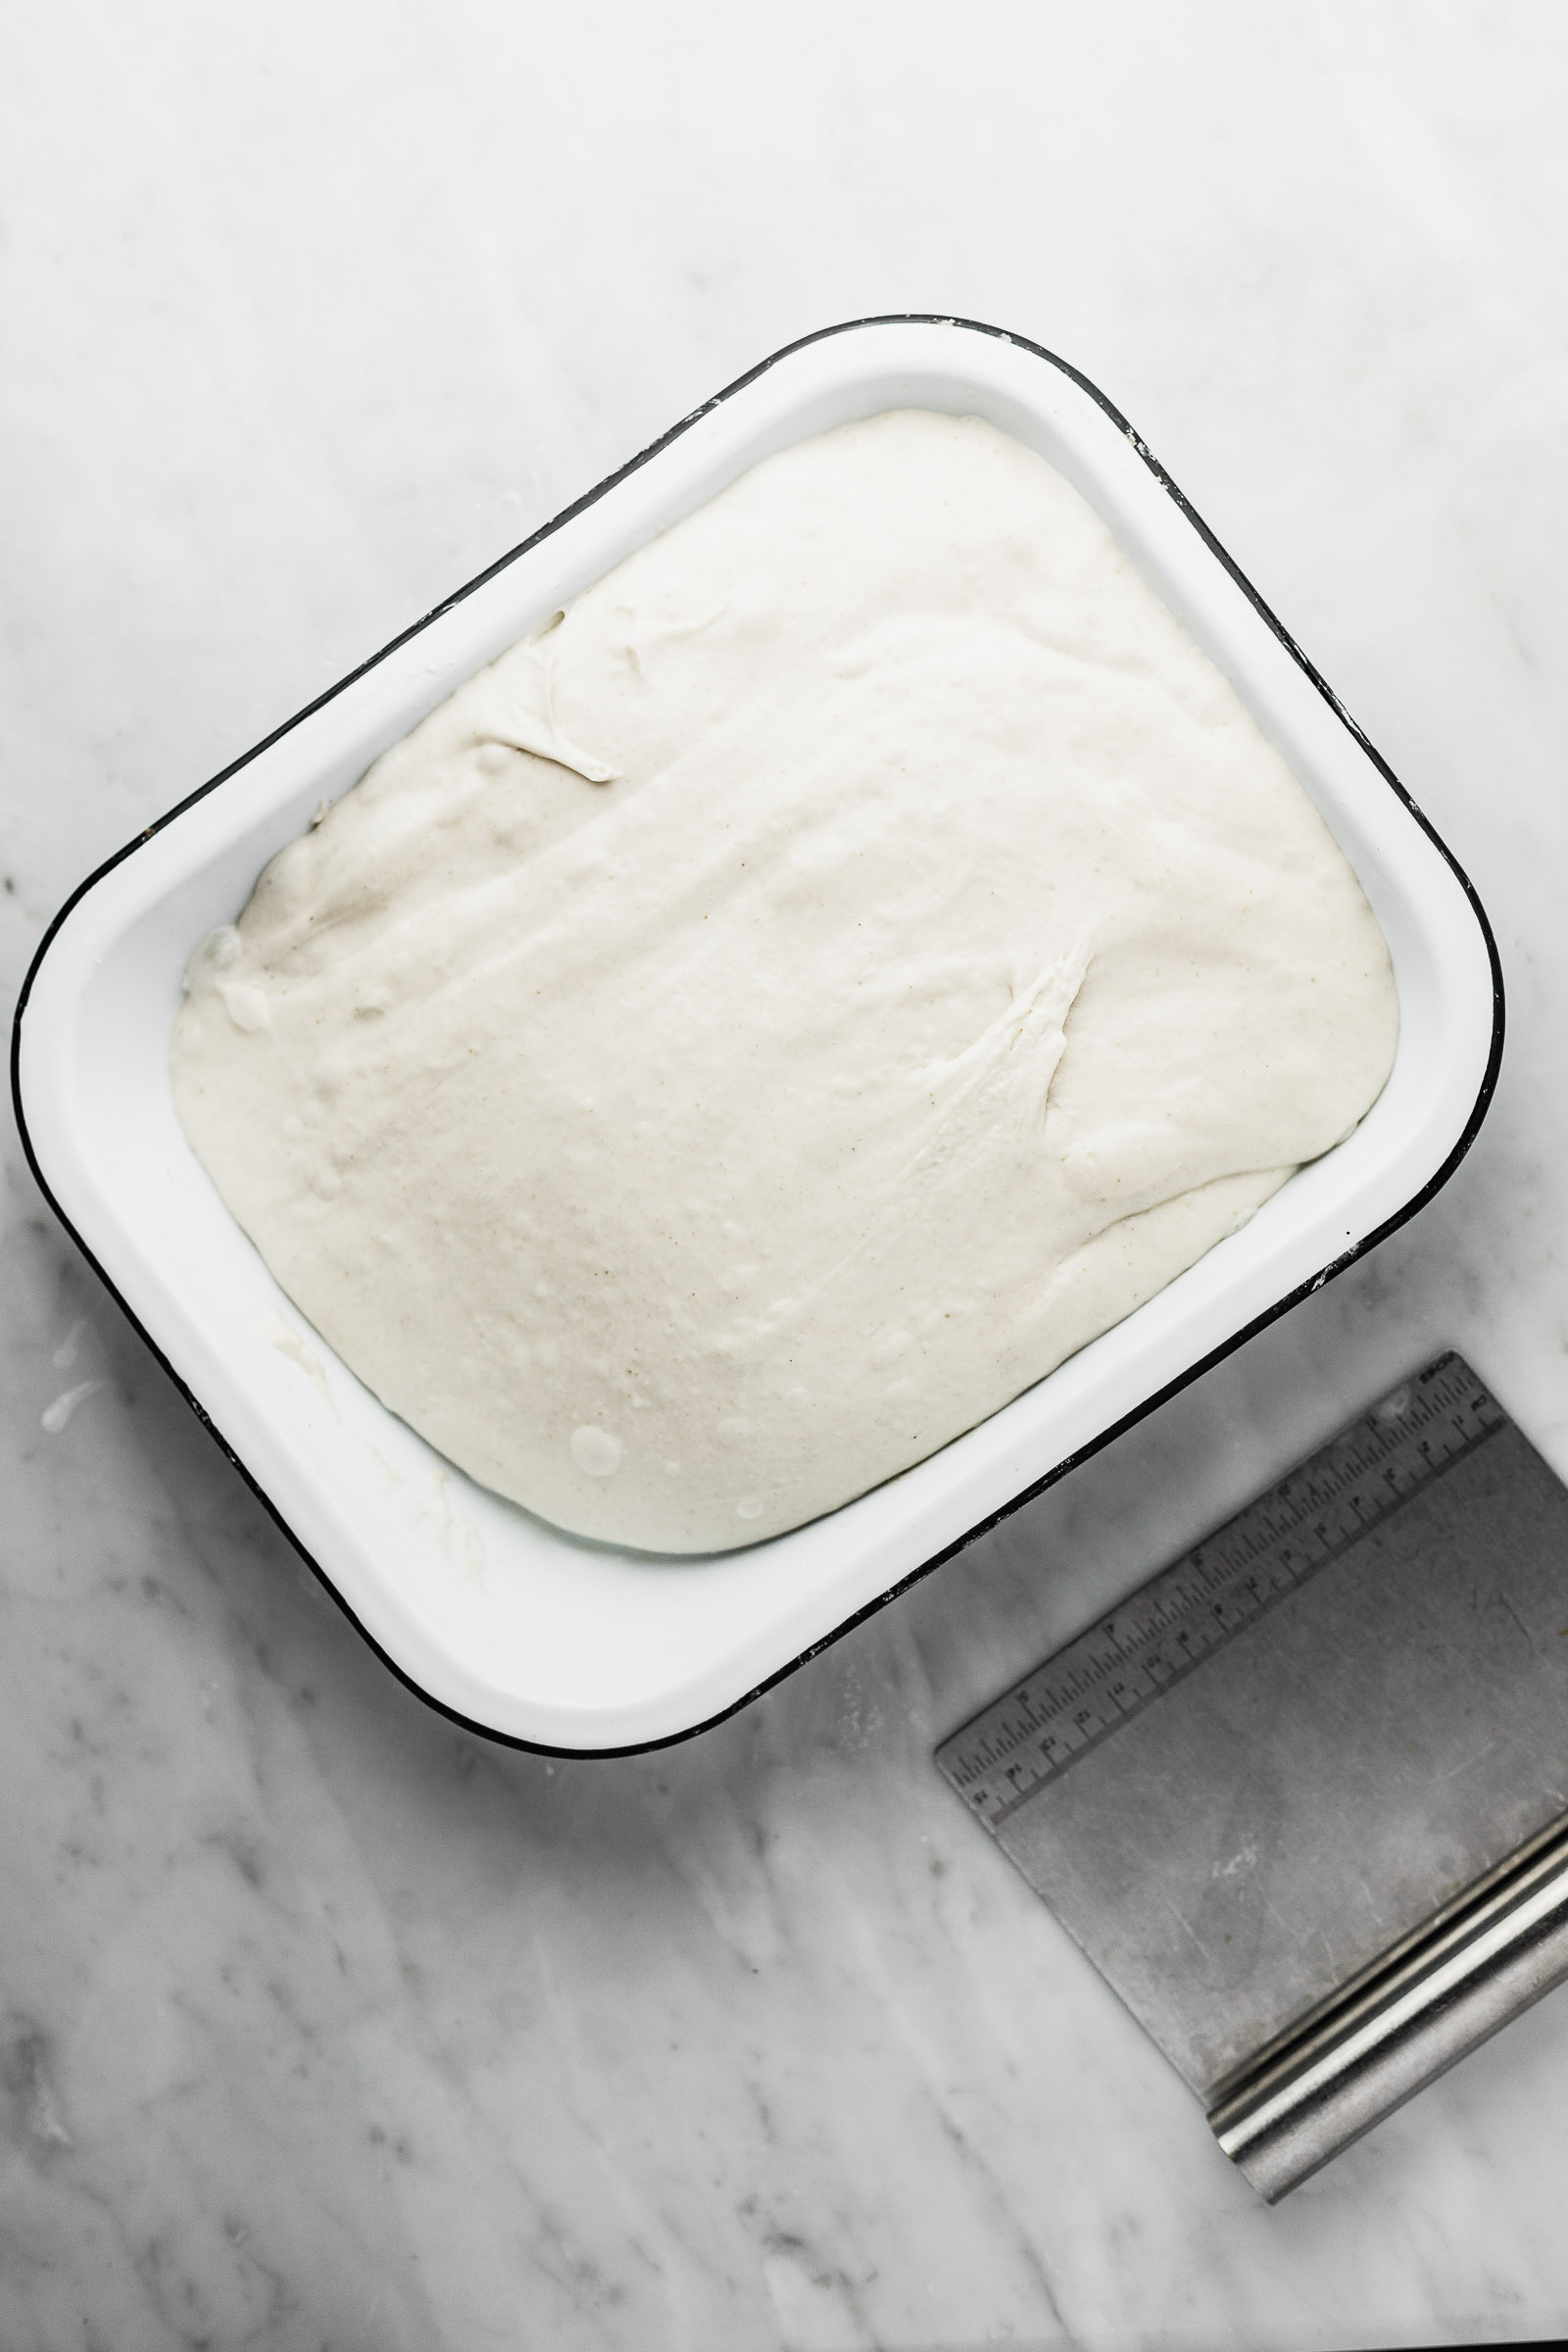

5:30PM – STEP 7 BULK FERMENTATION
Even if our dough has been fermenting since we added the levain now we’re going to let it do so without interrupting it. You’ll leave it to ferment 2 hours in its damp container covered with your plastic cover of choice and in a warm spot. Remember that the plastic should not tough the surface of the dough. After this time you should see the dough has a dome shape along the edges, sign that we have correctly developed the gluten. You should also see several air bubbles on the surface. The photo on the left shows how the dough looked before bulk fermentation and the next two are from after.


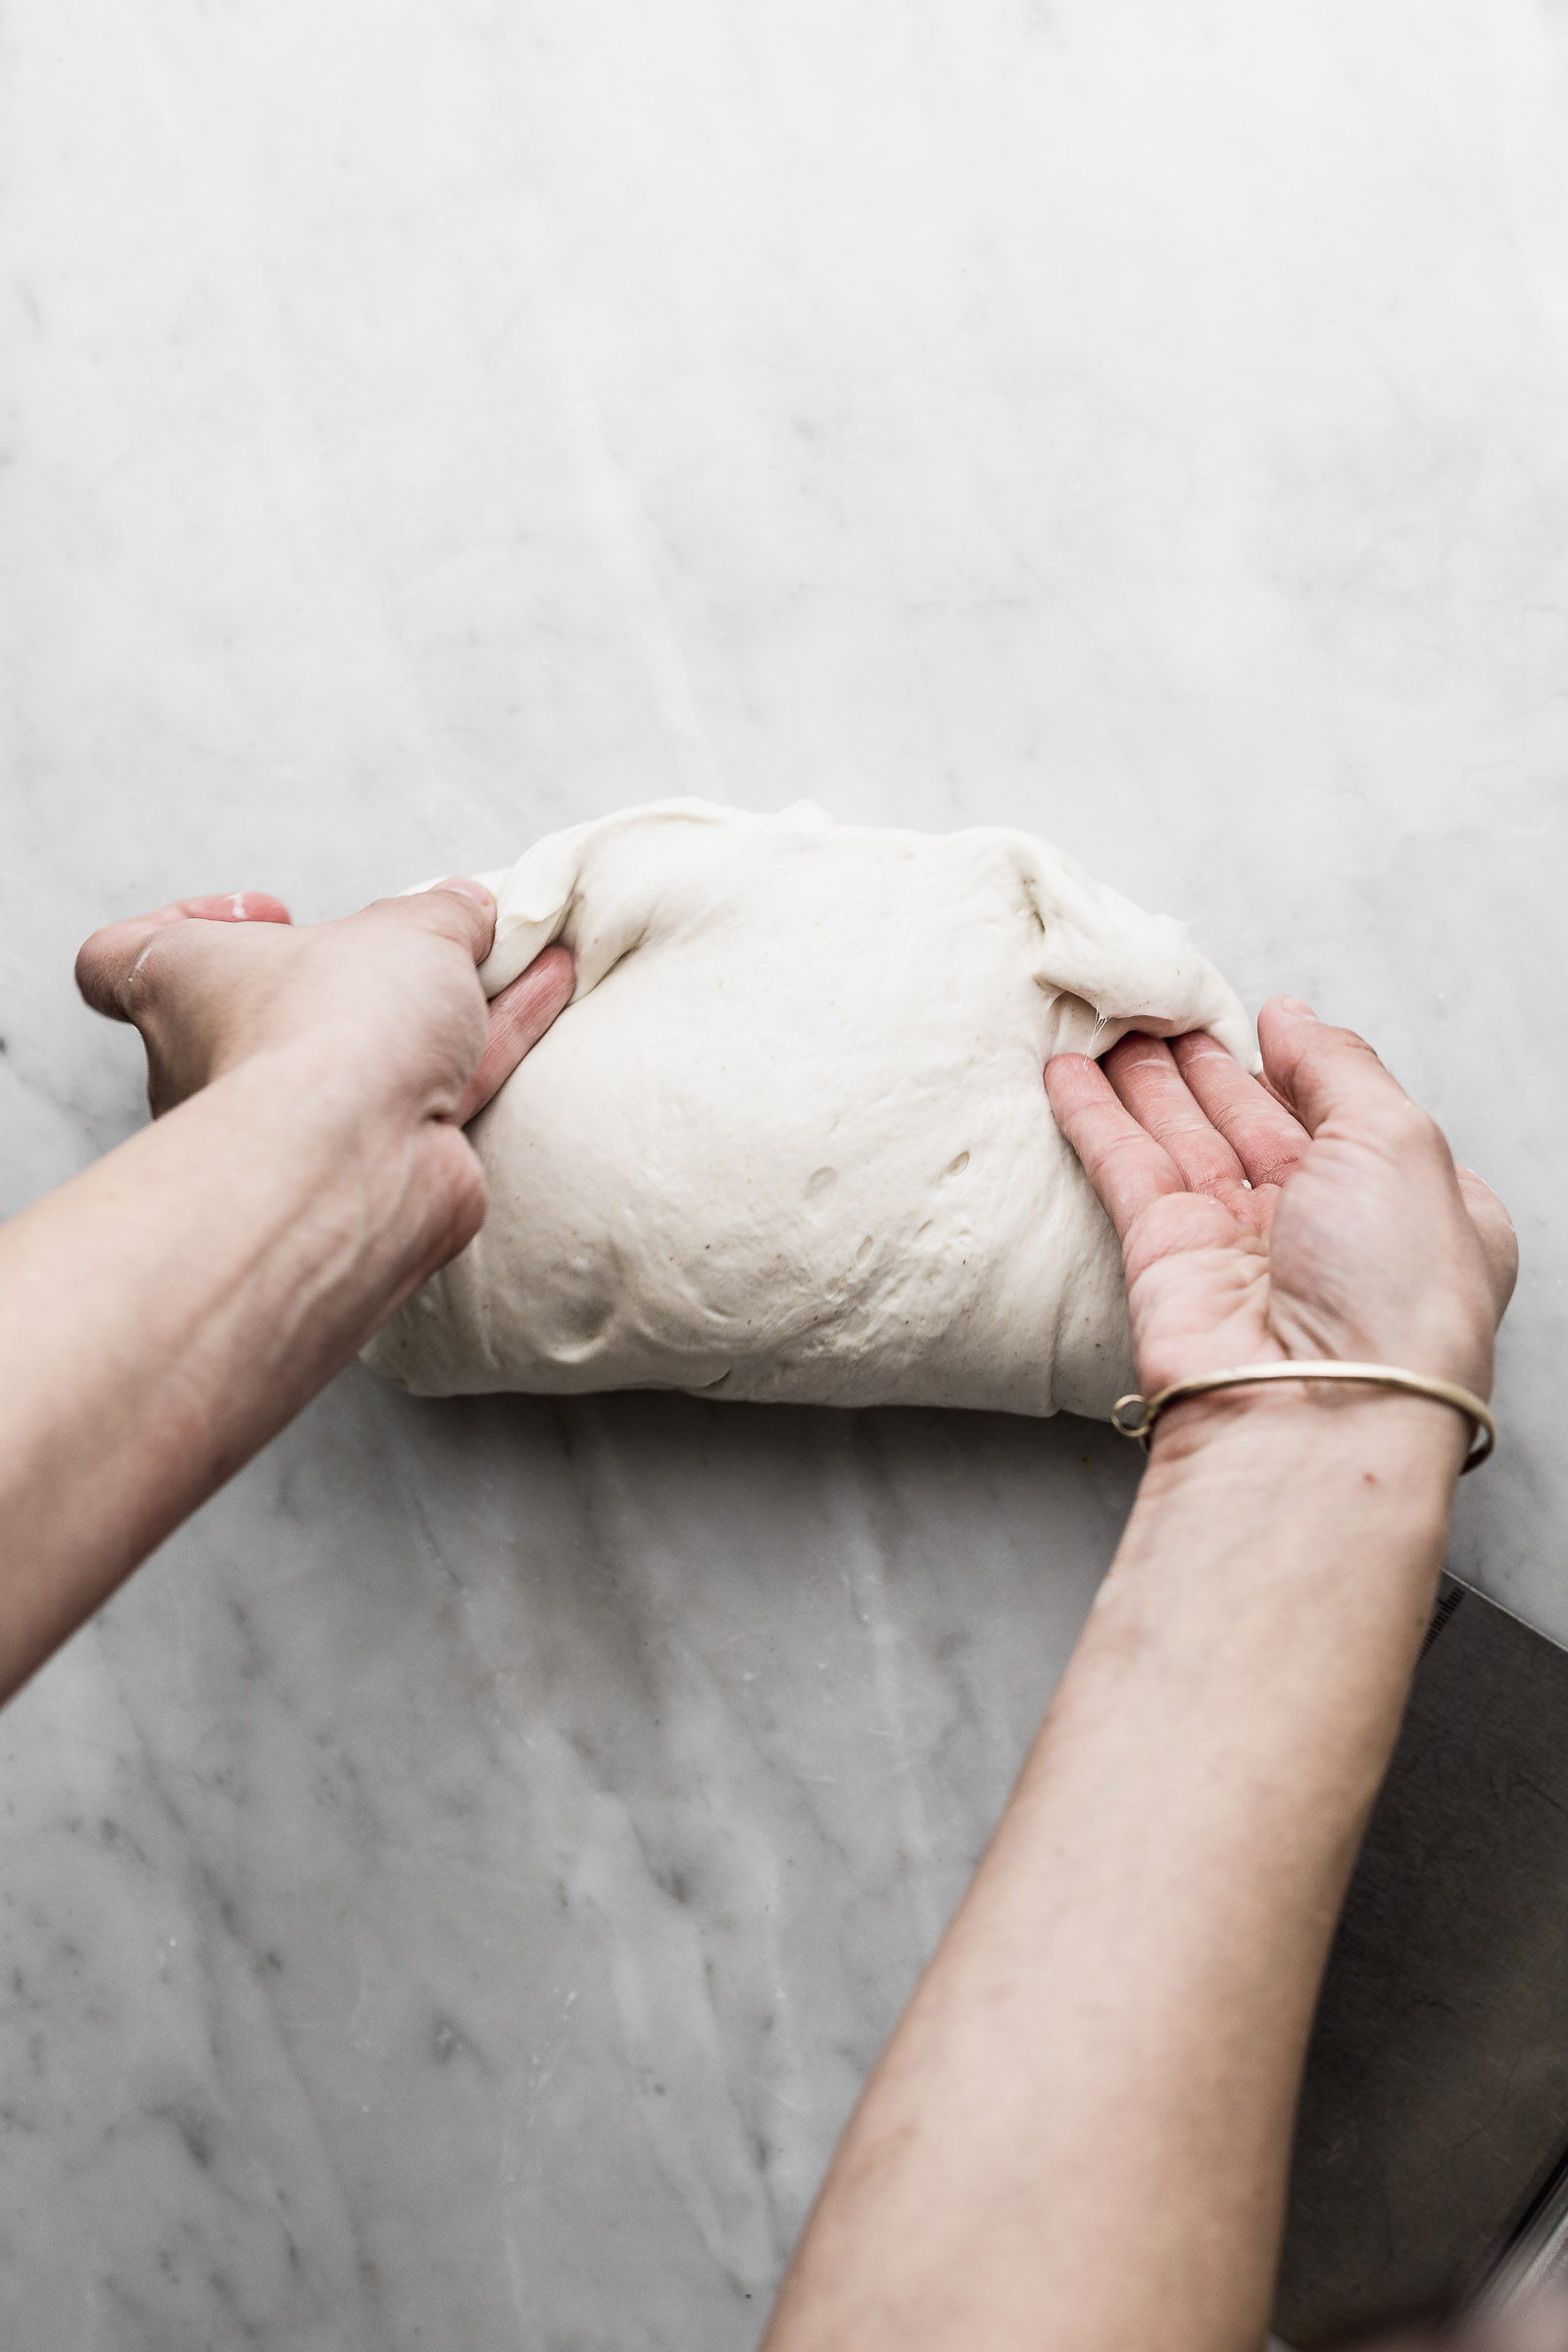
7:30PM – STEP 8: SHAPING
Once you’re done with bulk fermentation dust a bit of flour on a clean surface. You also want to flour your hands and use them to remove the dough gently from its container. Don’t use too much flour in this process. To shape our dough we’re going to make a parcel by pulling in from all four edges of the dough and joining them at the center. Then you’re going to turn the dough around so that the seam is now at the bottom. With your hands at 45 degrees relative to the surface take the dough and spin it to close the seam. For further reference see the third photo above or my video on basic white bread at minute 2:13. The seam is closed with the friction it gets from the surface so you want to remove as much flour as you can at this point.
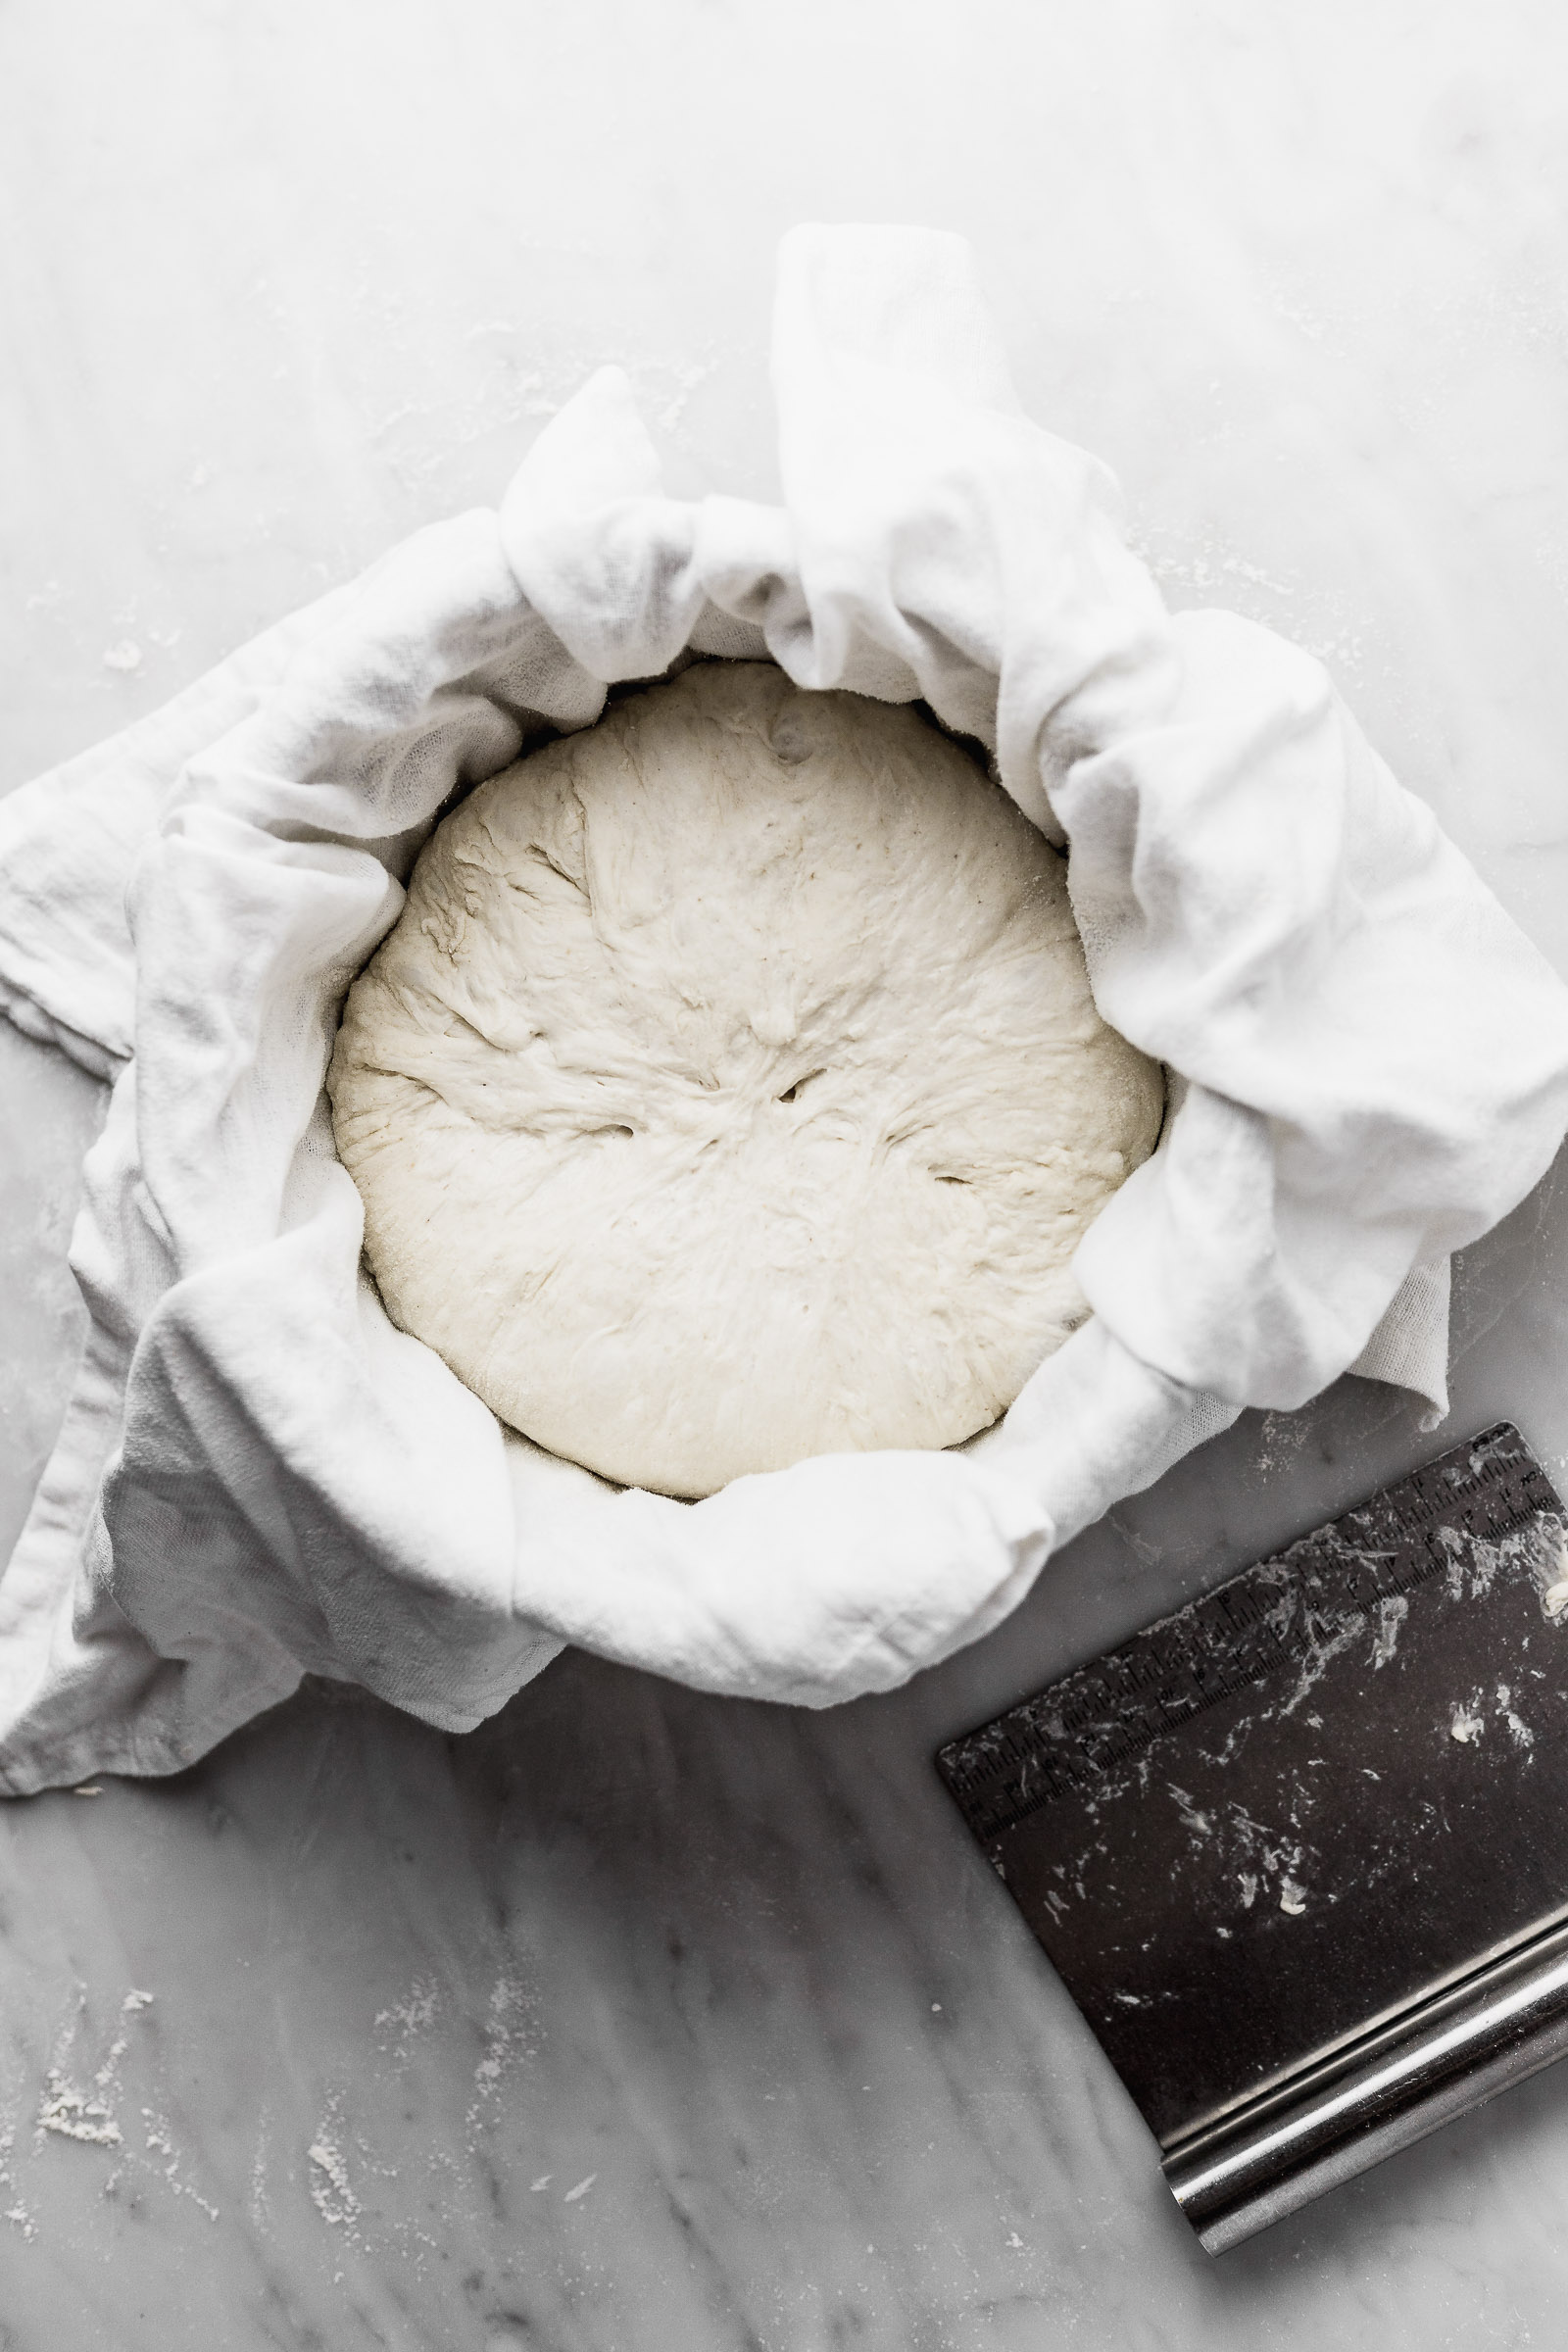
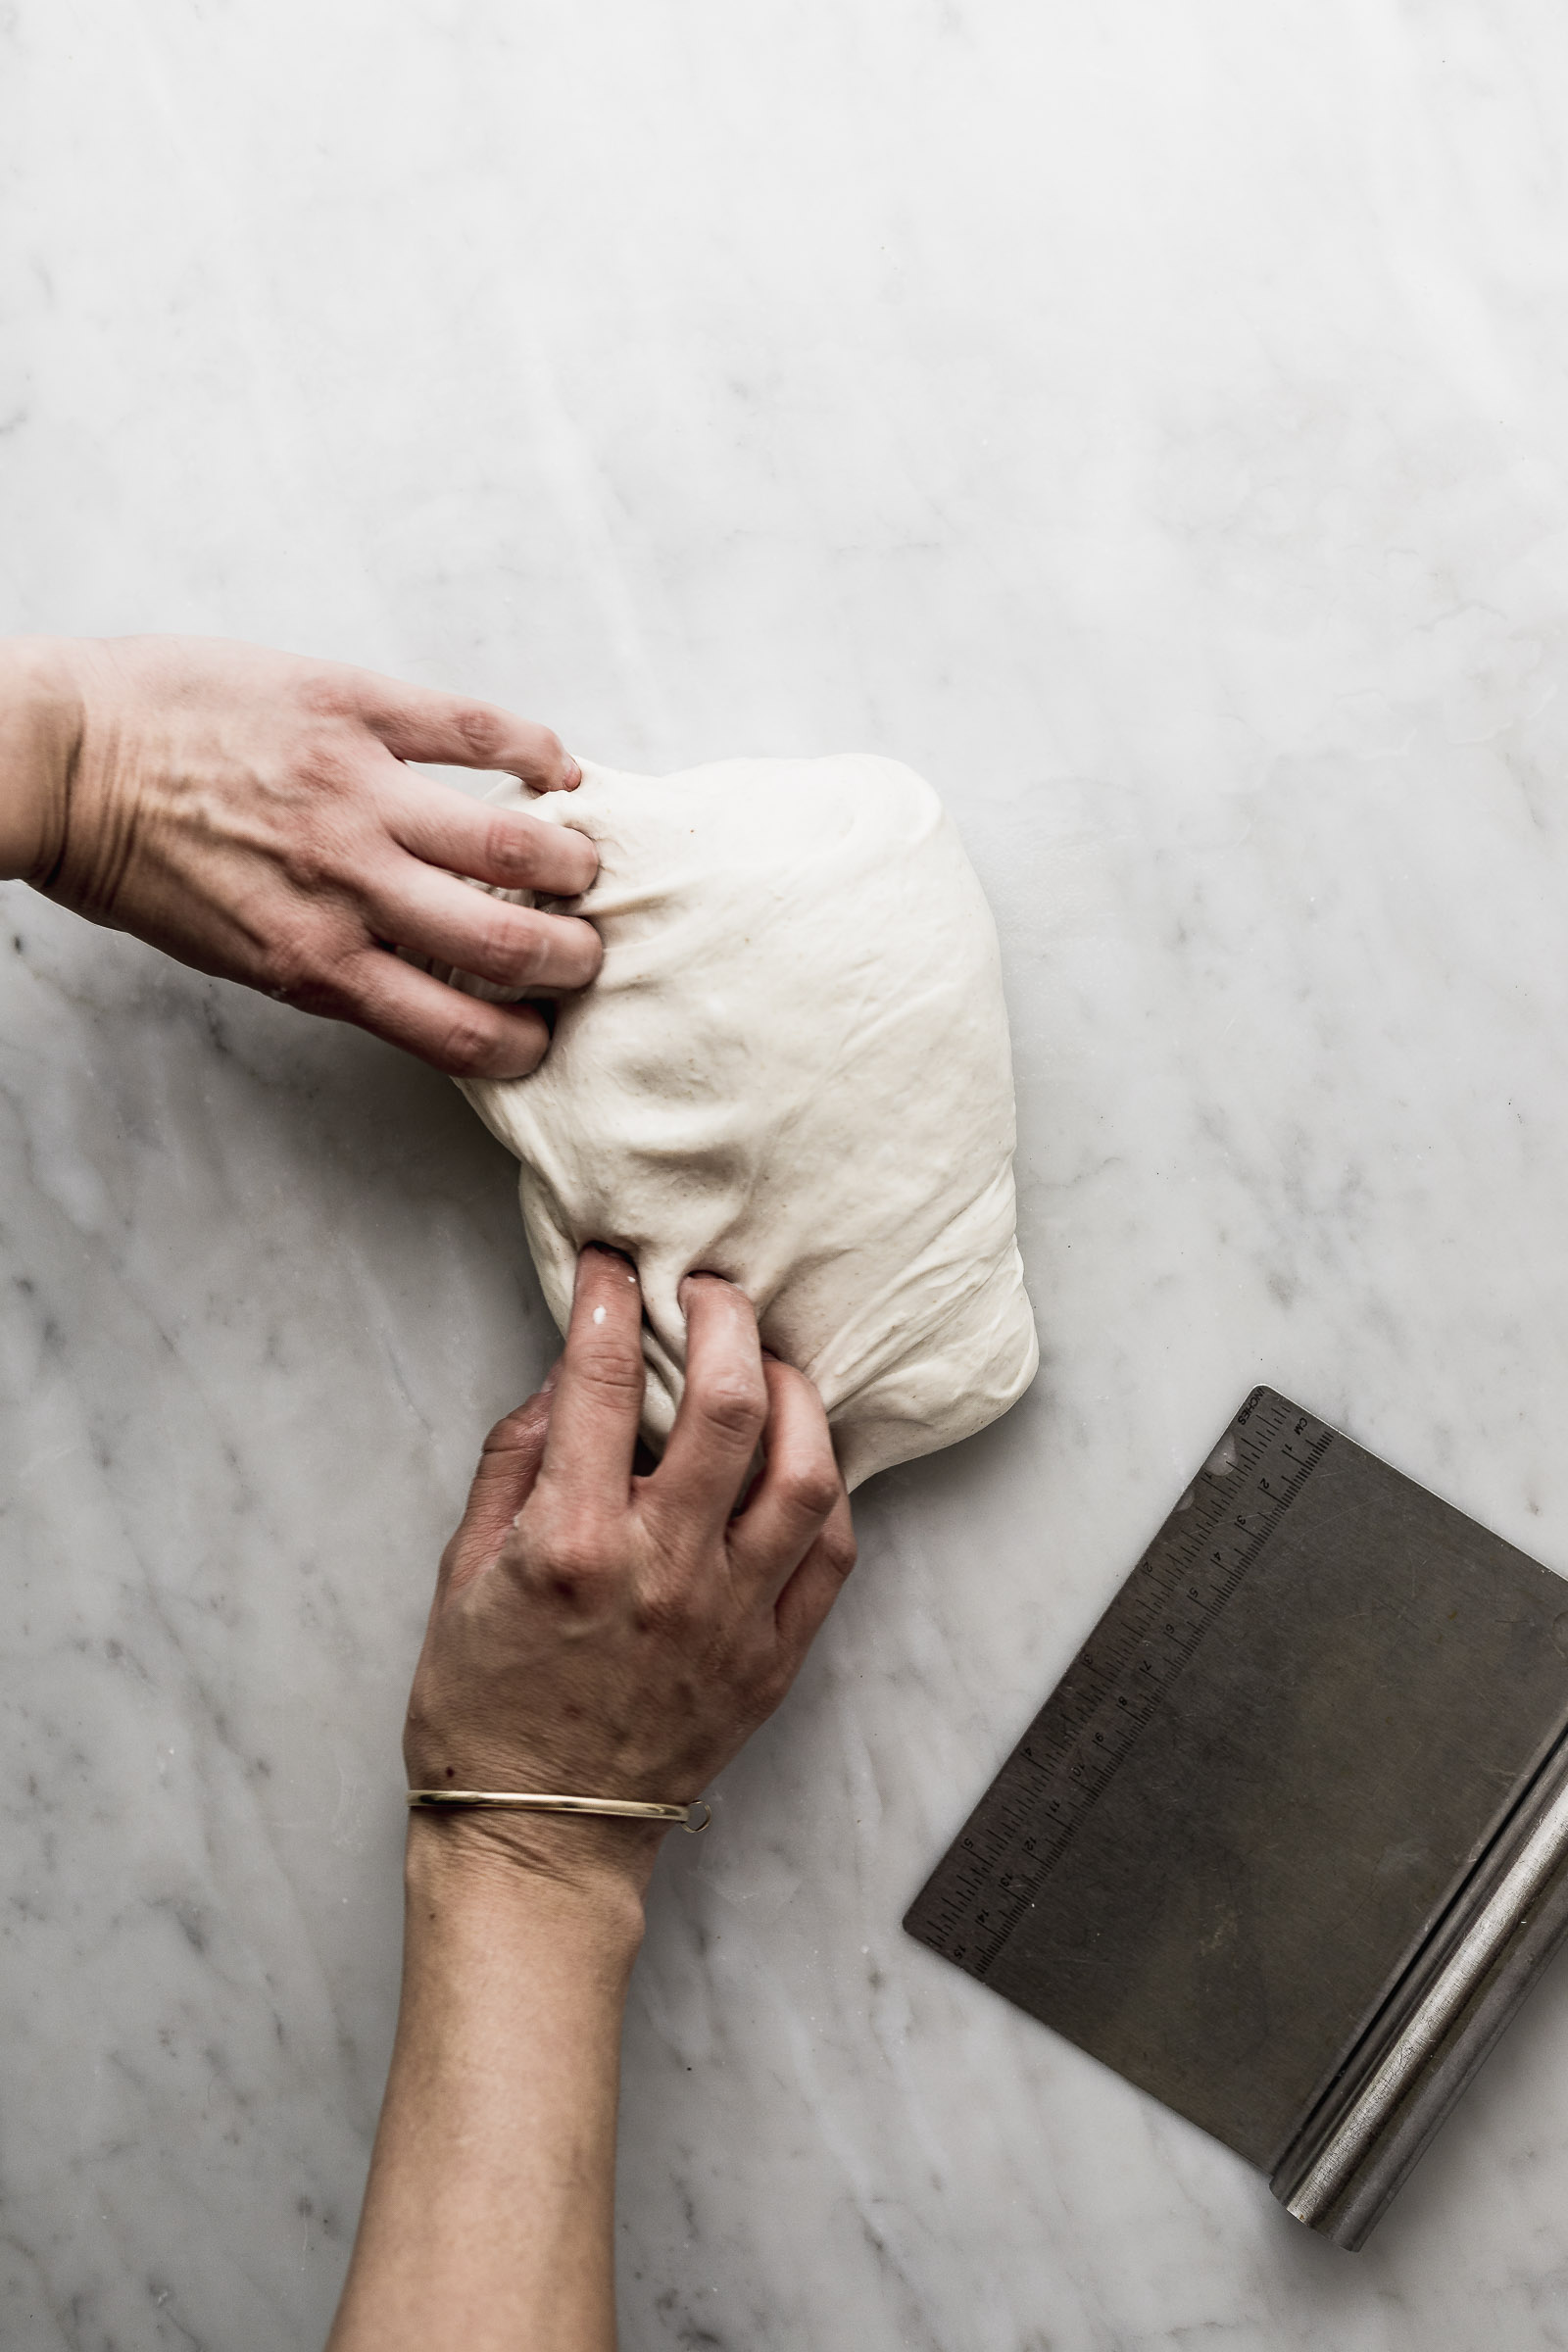
STEP 9: REST AND PROOF
Once you’ve shaped your dough we’re going to place it in its proofing place. For this you have two options:
- Use a bowl: make sure you’re using one that’s nice and round because it will give its shape to the bread. You first need to dust a clean kitchen cloth with a mix of half white and hal frice flour (it helps it stick more easily). The cloth goes into the bowl and on top of that goes the bread. The seam should face upward.
- Use a banneton: this is the typical basket that’s used in artisanal breads. The cute thing about bannetons is that they leave their circular pattern on the dough when you flip it for baking. You should also dust generously with the mix of white flour and rice flour. Also the seam should also be on the top.
One of the mistakes I made the first time I made sourdough bread was to not flour enough my containers. It’s the worst because as you’re pulling on them to try and unstick them you remove a lot of the air. Remember that this dough will grow 50-70% so be generous with the flour.
Once the dough is inside we cover it back up again and leave it in a warm spot for 30 minutes., After this time it will retard in the fridge for 12 hours (it’s still in the bowl or banneton). Retard = proofing in a cold temperature. It can proof up to 14 hours in the fridge.
9:30AM – BAKING
1 hour before preheat your oven to 250C. If your oven does not reach such a high temperature then program it as high as it gets. Along with the oven we’re going to preheat the surface upon which the bread is going to cook. In my case I use my 25cm cast iron pan. It could also be a dutch oven, a french oven or the most common which is a combo cooker. Lastly you could also use a pizza stone or an oven tray but I find that these last ones don’t give the bread as much of a heat punch which is what the bread needs to expand. If you’re using a dutch oven, french oven or combo cooker you want to also place the lid in the oven to preheat.
In the oven you’ll also be preheating an oven-safe container with water. This will give us the steam we need in the first stage of the cooking process. The steam prevents the crust from forming too early making the bread expand more. If you’re using a dutch oven, french oven or combo cooker you don’t need the container with water; enough vapour is created by the dough itself.
When the oven has been preheated remove the dough from the fridge and flip it gently on a chopping board with baking paper. Dust a bit of flour on top of the dough and spread it around using your hands. Use a razor to make one or several cuts on the bread. The easiest things are to cut along the center about 3mm deep and at a 45 degree angle, a cross at 90 degress or a box like I did. I also did a decorative bit at the center that in the end got dusted away because I didn’t go deep enough LOL. Remember that I’m only just starting at this adventure, too. These cuts tell the bread where to expand and if they weren’t there it would explode from the bottom. For more bread scoring inspiration check out the #breadscoring hashtag on Instagram. I have to warn you that those videos are addictive!
Once you’ve scored your bread transfer the bread along with the paper from the chopping board to the baking surface of your choice. BE REALLY CAREFUL because that surface is really hot! If you’re using anything with a lid also put it on. Is goes immediately back into the oven. If you’re not using a surface with a lid then you also want to add 100ml of water to the base of the oven to generate even more steam. Close the oven door fast after this so the steam doesn’t get you. As soon as it goes in decrease the temperature to 230C.
Here’s something that I learned from my oven, I don’t know if it applies to yours but you can do some trial and error. I preheat my oven to 250 with top and bottom heat. Afterwards when the bread goes in I only keep the bottom heat because if not it goes way too golden on top and that’s how I cook it until the end. Try how this works on yours and make whatever changes necessary.
After the first 20 minutes have passed remove the container with water or the lid and lower the temperature to 200C. At this temperature the bread will cook for an extra 25-30min. It should be nice and golden and if you remove it from the oven and knock on the bottom you should hear a hollow sound. Let it cool COMPLETELY before cutting it or you’ll crush those air gaps that are inside with the knife.